How to Migrate Emails from Network Solutions to Office 365?

Summary: Are you considering move Network Solutions email to Office 365 account? This article will show you the fastest and most reliable way to transfer your emails and attachments from Network Solutions to Office 365. By using the Xtraxtor Email Migration Tool, we’ll guide you through each step of the process, ensuring a hassle-free migration. If you’re looking for a way to make this transition, keep reading to discover the solution.
Network Solutions has built a reputation as a reliable provider for domain registration and web hosting, offering dependable customer support. While it’s an excellent choice for small businesses and teams, it may not always meet the needs of larger organizations. As a result, many businesses are now migrating Emails from Network Solutions to Office 365, which offers enhanced flexibility and a wider range of features.
Network Solutions provides domain name registration along with a variety of web-based email services. They also offer website design and hosting, e-commerce solutions, and online security products. However, with Microsoft 365’s advanced tools and collaboration features, more and more users are seeking a way to migrate emails from Network Solutions to Office 365. Let’s first explore why so many businesses are choosing to make this transition.
Advantages of Migrate from Network Solutions to Office 365
Migrate from Network Solutions to Office 365 can offer several benefits which can significantly improve productivity, collaboration, and overall efficiency in your organization. Here are some advantages of Office 365 over Network Solutions.
- Office 365 is a cloud-based service that allows you to access emails and applications from anywhere with an internet connection.
- Office 365 offers flexible plans that enable you to scale your services and features based on your organization’s needs and growth.
- Microsoft 365 provides real-time collaboration features like co-authoring in documents, SharePoint for team collaboration, and Microsoft Teams for chat, video conferencing, and file sharing.
- With Exchange Online, It provides a reliable email system with advanced features like shared calendars, contacts, and task management.
- Moving to Office 365 can reduce hardware and infrastructure costs, as you no longer need to maintain on-premises servers for email and collaboration tools.
- Office 365 offers automatic updates for all applications, ensuring your organization is using the latest features and security patches without manual intervention.
Read More: How to Backup Network Solutions Emails?
Ways to Migrate Emails from Network Solutions to Office 365
There are two techniques to transfer Network Solutions emails to Microsoft 365. One is a free manual solution that comes with some restrictions. In the manual method, MS Outlook email client is used for Network Solutions to Office 365 migration. The other one is a direct approach that completes the migration process in a few seconds.
Method 1. How to Transfer Network Solutions Emails to Office 365 Instantly?
Download and run Xtraxtor Email Migration Tool on your Windows PC to directly migrate emails from Network Solutions to Office 365. It is a powerful and user-friendly software designed to facilitate the seamless transfer of Network Solutions emails to Office 365. The software can export Network Solutions emails to Office 365 in bulk. It is able to maintain the folder hierarchy throughout the process.
In addition, the tool can also migrate Network Solutions to other email platforms. It is a completely safe and secure solution that preserves 100% data integrity during the process. You can download the free demo version to check its work efficiency and accuracy.


Steps to Export Network Solutions Emails to Office 365 with Attachments
Step 1. Launch Xtraxtor Network Solutions to Office 365 Migration Tool on your system.
Step 2. Now, Click on Open >> Email Accounts >> Add Account.
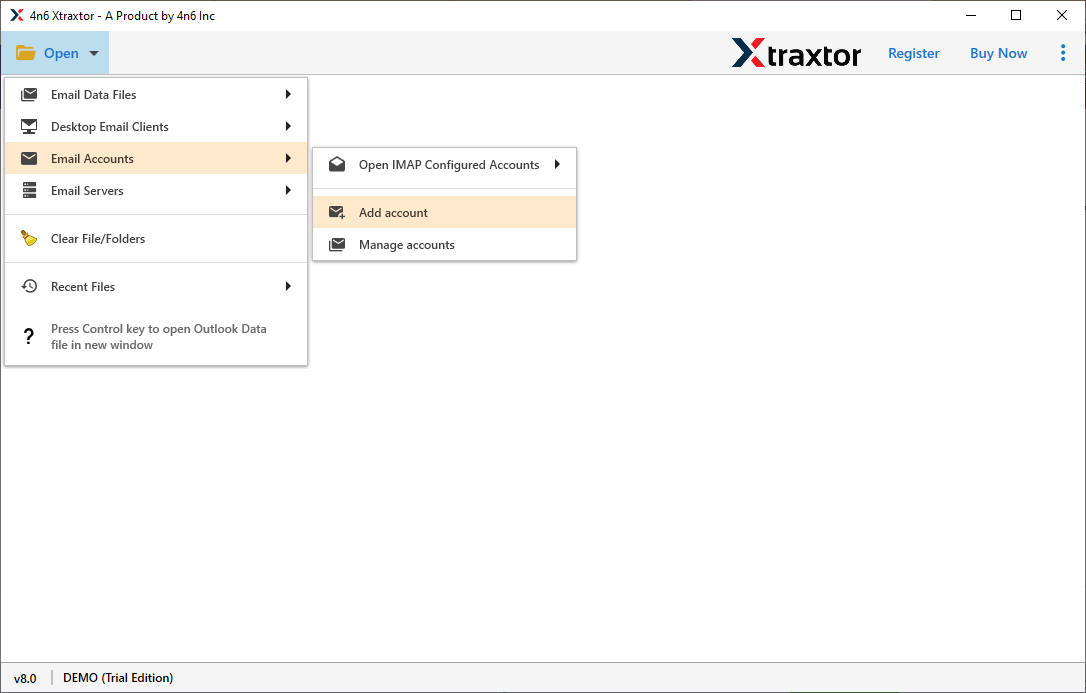
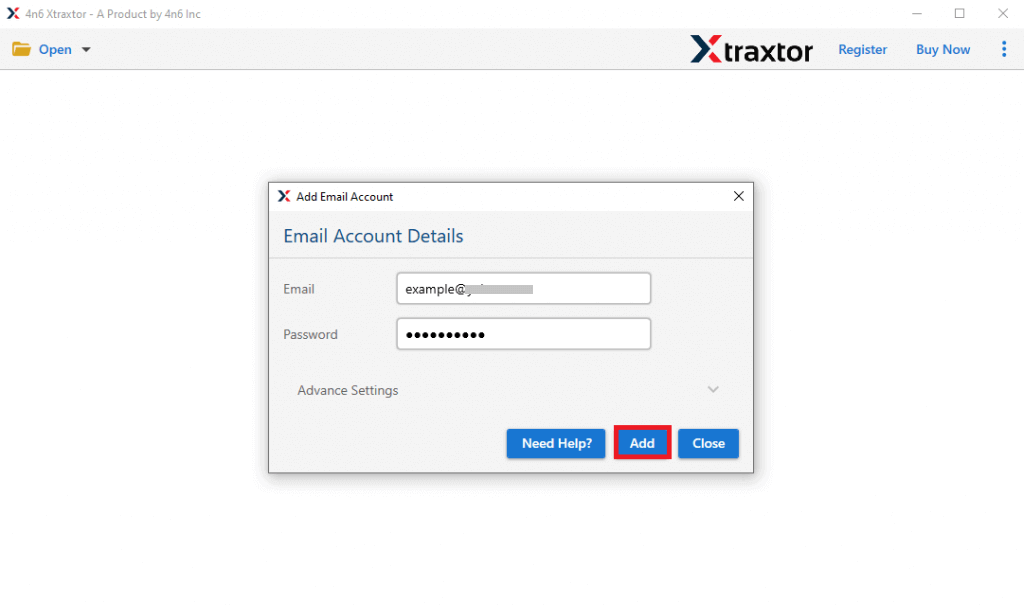
Step 3. Enter the login details of Network Solutions in the respective field and press the Add button.
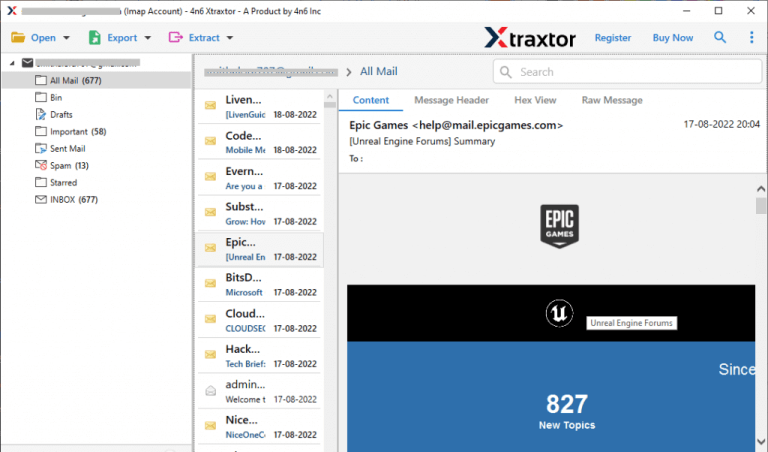
Step 4. Here, you can view Network Solutions emails before migrating them to Office 365.
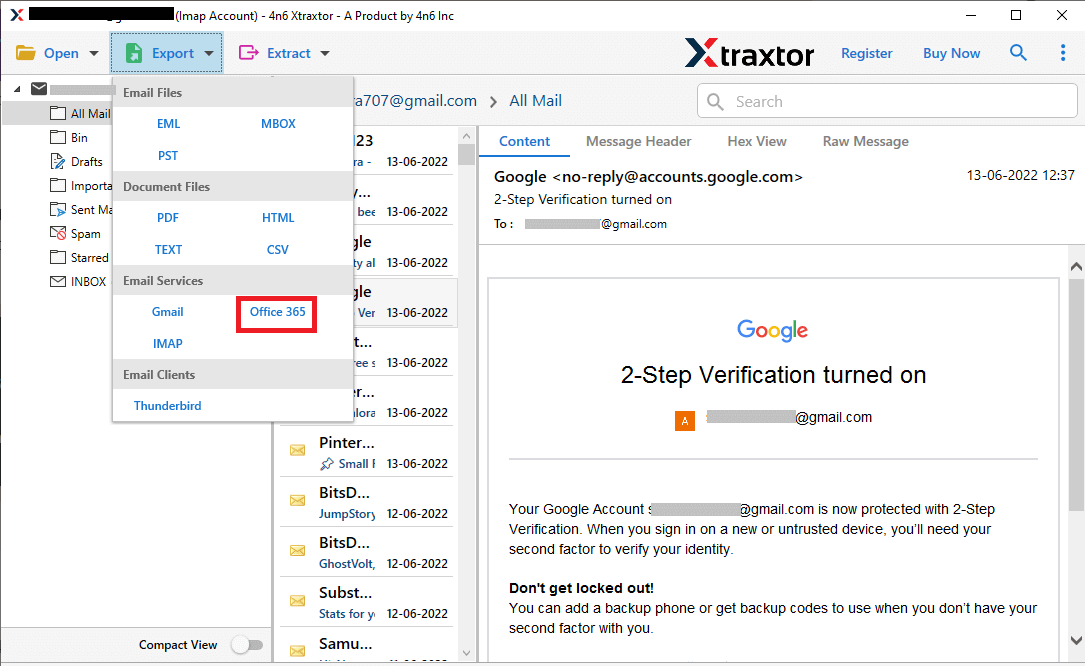
Step 5. After that, Go to Export and select Office 365 from the given options.
Step 6. Choose Network Solutions email folders that you want to migrate to Office 365.
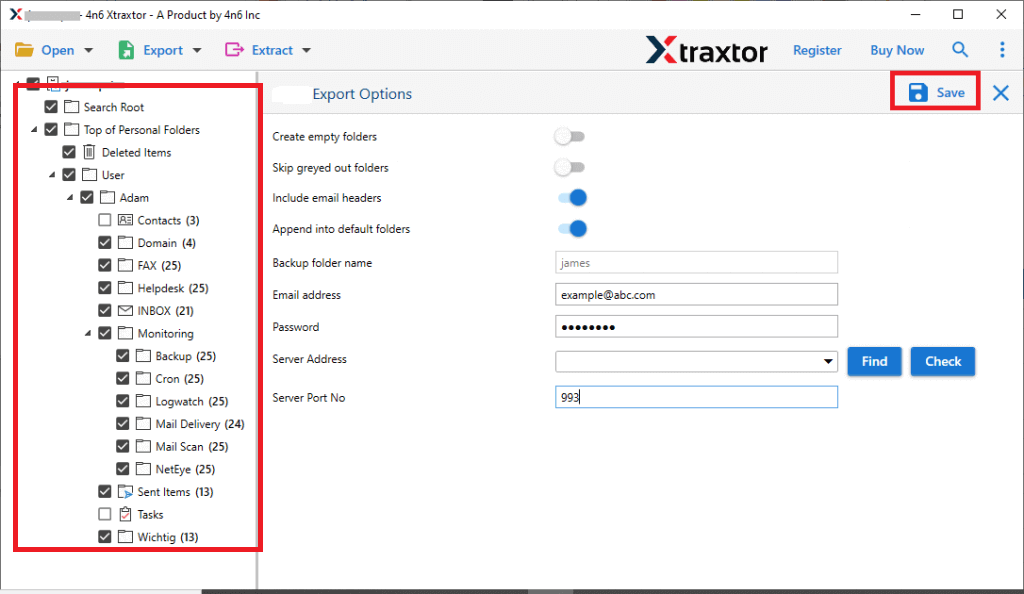
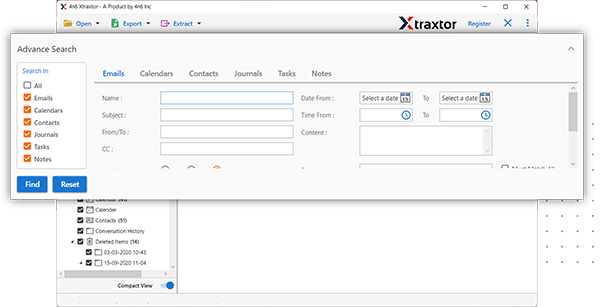
Step 7. Apply the filters to move selected emails.
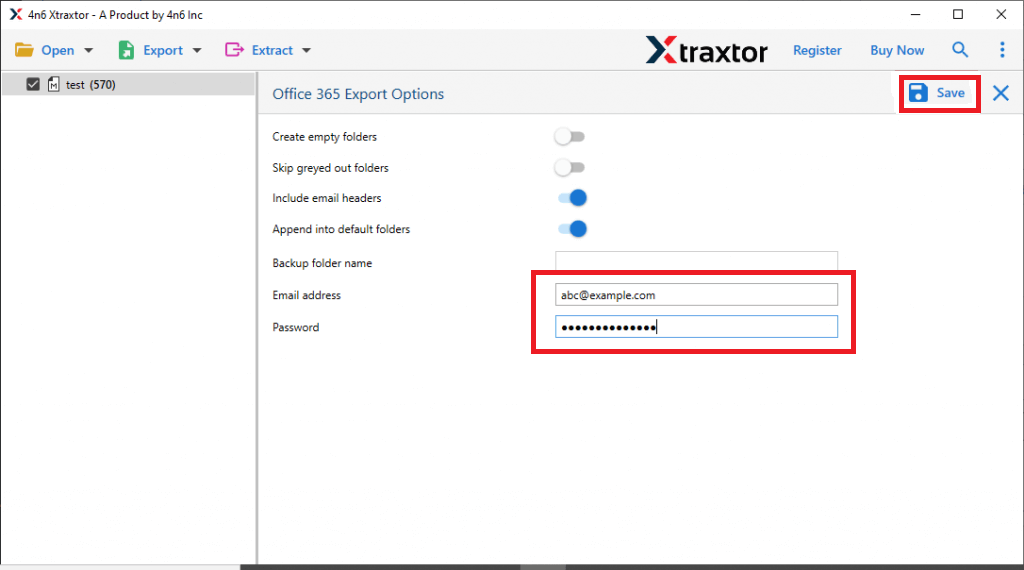
Step 8. Enter Office 365 credentials and click Save to start migration.
The process is complete! Hence, you can easily migrate emails from Network Solutions to Office 365 in a few simple clicks.
Incredible Features of Network Solutions to Office 365 Migration Tool
This migration tool offers a range of features to ensure a safe, efficient, and error-free emails migration process.
- Direct Migration from Network Solutions to Office 365: The tool enables a direct and straightforward migration from Network Solutions emails accounts to Office 365, eliminating the need for manual data transfer.
- Batch Mode to Import Multiple Emails at Once: The software supports batch migration, allowing users to transfer multiple emails, folders, and attachments simultaneously, saving time and effort.
- Export Network Solutions Emails to Various File Formats: It offers the option to export Network Solutions emails to various file formats, including PST, EML, MBOX, PDF, TXT, HTML, etc.
- Preserves Email Metadata: During Network Solutions to Office 365 migration, the software preserves email metadata, such as sender, recipient, date, and attachments, maintaining the original email properties in Office 365.
- Selective Email Migration: If you do not want to transfer a complete mailbox then you can choose specific emails or folders to migrate them based on Date Range, Sender, Recipient, Subject, etc.
- Safe and Error-Free Solution: This migration tool ensures data integrity and security during the transfer process, minimizing the risk of data loss.
- Easy to Use: The software comes with a user-friendly interface and step-by-step instructions. It is easy for both technical and non-technical users to migrate email from Network Solutions to Office 365 effortlessly.
- Vast Compatibility: The tool is compatible with all latest and old versions of Windows Operating Systems. It supports Win 11, 10, 8.1, 8, and all the below versions.
Method 2. Manual Process to Transfer Network Solutions Emails to Microsoft 365
Using MS Outlook, you can manually migrate from Network Solutions to Office 365. Add both email in Outlook and export Network Solutions emails to PST file and then import this exported file into Office 365. Follow the below-given instructions for Network Solutions to Office 365 migration.
Phase 1. Configure Network Solutions with Outlook
Step 1. Launch MS Outlook application on your system.
Step 2. Now, Click on File >> Info >> Add Account.
Step 3. Enter Network Solutions Email address. Click on Let me set up my account manually and press Connect button.
Step 4. After that, select IMAP as account type.
Step 5. Enter the following details in the respective field.
Incoming Mail: mail.yourdomain.com, Port: 993, Encryption Method: SSL
Outgoing Mail: mail.yourdomain.com, Port: 587, Encryption Method: SSL
After filling all the details click on Next button.
Step 6. Enter the Password of Network Solutions account and hit on the Connect button.
Now, your Network Solutions account is added in Outlook.
Phase 2. Export Network Solutions Emails to PST File
Step 1. After configuration, navigate to File >> Open & Export >> Import/Export.
Step 2. Select Export to a File and click on Next.
Step 3. Choose Outlook Data File (.pst) and press Next.
Step 4. After that, select Network Solutions email folders to export into PST.
Step 5. Browse the location to save the exported file and then Press Finish button.
Phase 3. Configure Office 365 with Outlook
Step 1. In Outlook, again navigate to File >> Add Account.
Step 2. Enter Office 365 account details such as your name, email address, password, again re-type password, and then click on Next.
Step 3. Wait for Outlook to find your server, it takes some time.
Step 4. Once the configuration is complete then click on the Finish button.
Phase 4. Import Network Solutions Emails to Microsoft 365
Step 1. After completing the configuration process, restart the Outlook and click on File tab.
Step 2. Now, Click on Open & Export and select Import/Export option.
Step 3. Choose Import from another program or file in the Import/Export wizard and press Next.
Step 4. Select Outlook Data File (.pst) and click on Next button.
Step 5. After that, Browse the location of PST file that is exported in Phase 2, select it and press Next button.
Step 6. Choose the Import items into the same folder in option and select the Office 365 mailbox. Finally, click on the Finish button to complete the Network Solutions to Office 365 migration process.
Hence, you can manually migrate Network Solutions emails to Office 365.
Why Manual Solution is Not Recommended?
There are some limitations of this method which are given below-
- This approach takes a lot of time to complete the migration process.
- There is no email filter facility to transfer selected emails.
- Outlook must be installed on your system
- If import export option greyed out in Outlook then this method does not work.
Final Words
In this post, we have discussed how to migrate emails from Network Solutions to Office 365. Here, we have explained both manual as well as automated solutions. You can use anyone that is best suitable for you. However, experts recommend using the professional method to complete the Network Solutions to Office 365 migration process in a simple manner. The above-suggested tool is able to move Network Solutions emails to Office 365 in bulk without losing any single bit of data.
