How to Export Rackspace Email to PST File in Seconds?

“Hello! I am working in an organization. There are 200 Rackspace accounts. My senior asked to create a backup of all emails of Rackspace accounts in PST format. I need an effective solution to convert Rackspace email to PST file. Can anyone suggest to me how to export Rackspace email to PST file? It’s very helpful for me. Thanks in advance.”
It’s not just the above user, there are a lot of users who want to know a proper solution. If you are also one of the users who want to convert Rackspace emails to PST format then you are at the right place. Here, you will get the step-by-step explained techniques to complete this task.
Rackspace is a company that provides a large number of multi cloud services including email hosting service. Rackspace technology is a well known email hosting service for business that requires domain specific email accounts and stores emails on the cloud. It is a cost effective and business class webmail service that can be accessed from anywhere at any time.
Why Do You Need to Export Rackspace Email to PST File?
We all know that Email is the most important part of any organization to make the business operation smooth. Rackspace stores emails on the cloud. Nothing is safe on the internet. Your important data may be lost due to any reasons like natural disaster, cyber attack, hardware/software failure etc.
From the security point of view, it’s important to have a mirror copy of your important data. PST is one of the best file formats for security purposes. It provides password protection features to protect crucial data. If you export Rackspace email to PST then you can easily import them to the new platform.
Rackspace provides 25 GB Storage space for their users. If you have exceeded the limit, you will not be able to send and receive new emails. In that case, you can export old emails from Rackspace to Outlook PST format and easily send/receive new emails.
How to Convert Rackspace Email to PST Format?
In this section we are going to discuss some of the easiest ways to export Rackspace emails to PST file format.
- Manual Solution
- Automated Solution
Method 1: Manual Way to Export Rackspace Email to PST File Using MS Outlook
With the Outlook application you can convert Rackspace emails to PST format. In this method, first you need to configure Rackspace with Outlook and then export emails from Rackspace to PST file. Hence, this solution works in two phases.
Phase 1. Add Rackspace Account in Outlook
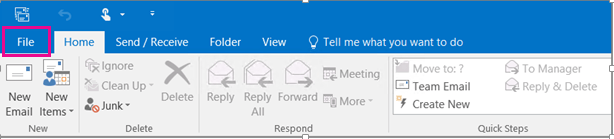
Step 1. Launch MS Outlook application on your system and click on File.
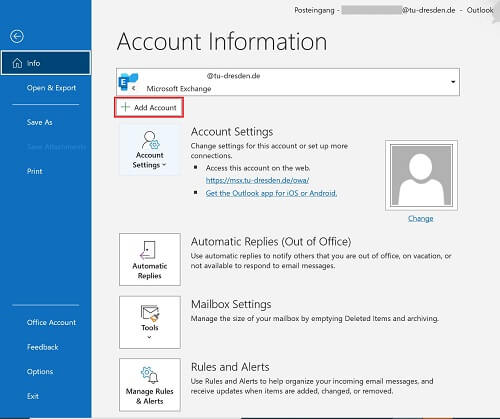
Step 2. Now Click on Info >> Add Account.
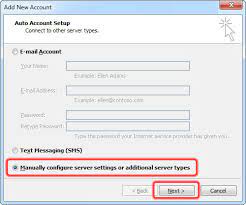
Step 3. Select the Manual Setup or Additional Server types option and click on Next.
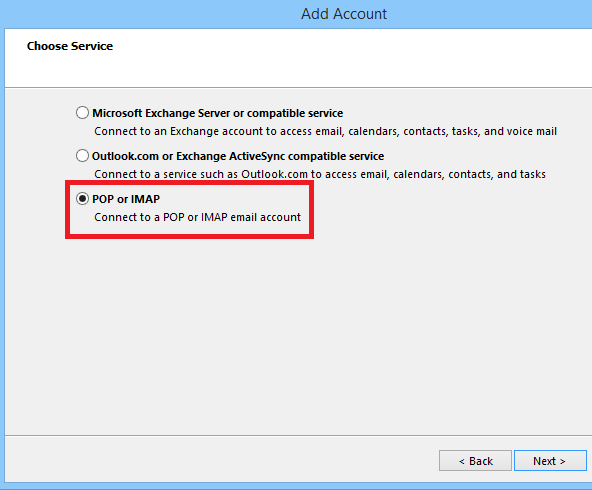
Step 4. Choose POP or IMAP and click on Next.
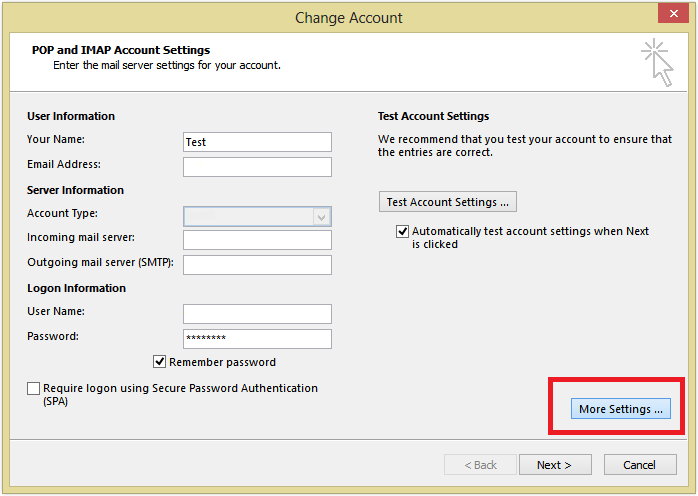
Step 5. Fill the following information
Your Name: Your full name,
Email Address: Your Rackspace email address,
Account Type: POP3 or IMAP,
Incoming mail server: mail.yourdomain.com,
Outgoing mail server: mail.yourdomain.com,
User Name: Your email address,
Password: Your password
and click on the “More Settings” button.
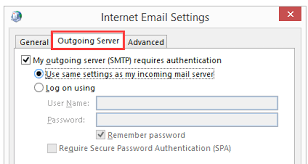
Step 6. Now, Go to the Outgoing Server tab and check the box that says My outgoing server (SMTP) requires authentication.
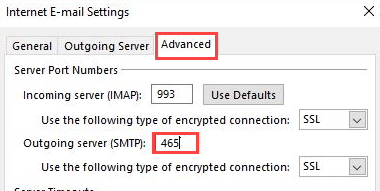
Step 7. Go to the Advanced tab and set the following settings:
Incoming server (POP3 or IMAP): 995 or 993
Outgoing server (SMTP): 465 or 587
Use the following type of encrypted connection: SSL/TLS
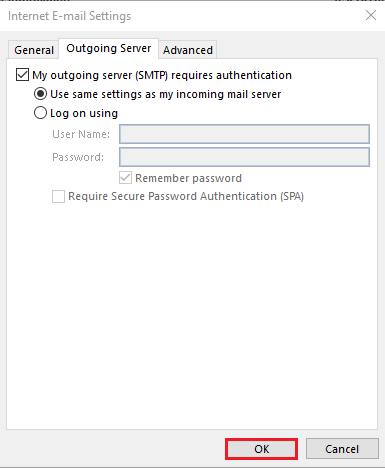
Step 8. Click on OK to close the Internet E-mail Settings window.
Step 9. Hit on Test Account Settings to verify that everything is working correctly.
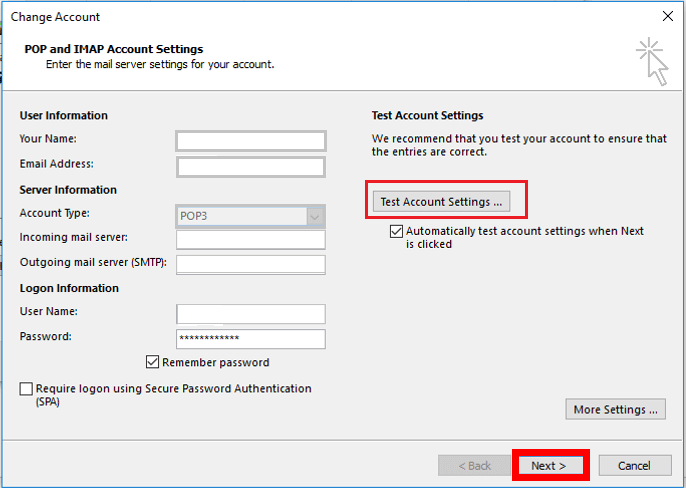
If everything is ok then click on Next and then Finish to complete the setup process.
Now, proceed with further steps to export Rackspace email to PST file format using Outlook import export feature.
Phase 2: Convert Rackspace Emails to Outlook PST Format
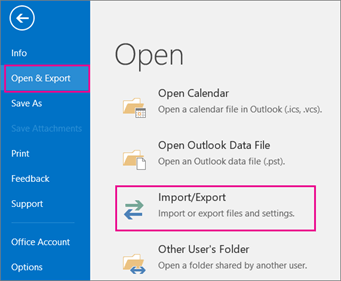
Step 1. Click on Open & Export and Select Import/Export option.
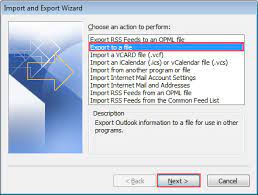
Step 2. Now, Choose Export to a File option and press Next.
Step 3. Select Outlook Data File (.pst) and click on Next button.

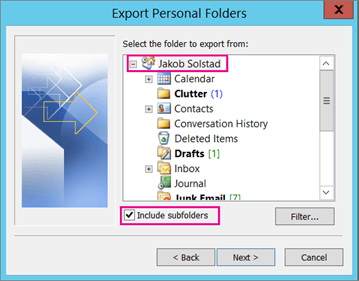
Step 4. After that, select the folders and subfolders of Rackspace emails that you want to convert into PST format and hit on Next.
Step 5. Click on Browse to choose location to save the resultant file and press Finish button.
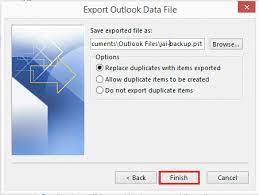
Hence, you can manually export Rackspace email to PST file format.
Drawbacks of Manual Solution
- In this method, MS Outlook must be installed on your system. Sometimes, Outlook import export option greyed out then you can not convert Rackspace emails to PST with this approach.
- It is such a lengthy process. With this solution you require a lot of time and effort to complete the process.
- There are some complicated steps. Users must have in-depth technical knowledge to configure Rackspace with Outlook.
Method 2: How to Export Rackspace Email to PST File in Seconds?
To overcome all the limitations of the above suggested method, try Xtraxtor on your Windows System. The software can convert Rackspace emails to PST format in a few seconds. It is designed with an advanced algorithm and simplified interface that helps beginners to perform the process without facing any issues.
In addition, with this tool you can export only selected emails from Rackspace to PST using filter options. It does not modify the original structure of emails during the exporting process. Moreover, the tool can export emails from any Webmail to PST , EML, MBOX, MSG etc. You can download the free demo version to check its work efficiency.

Process to Convert Rackspace Email to PST File Format
Step 1. Launch Xtraxtor Email Backup Tool on your Windows PC.
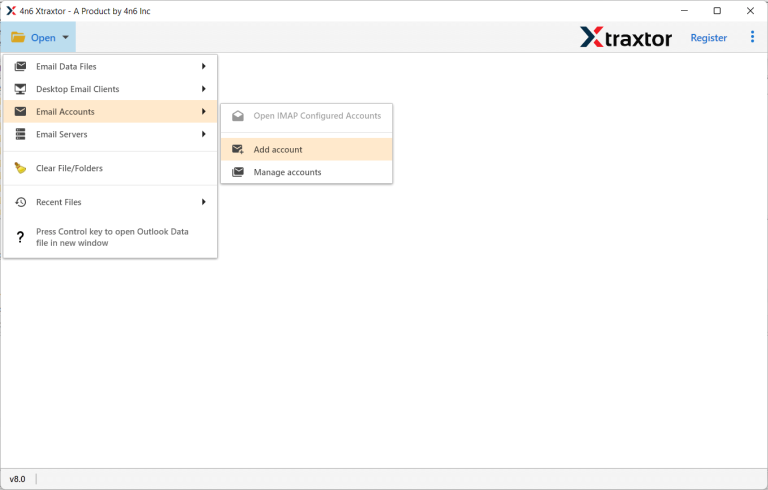
Step 2. Now, Navigate to Open >> Email Accounts >> Add Account.
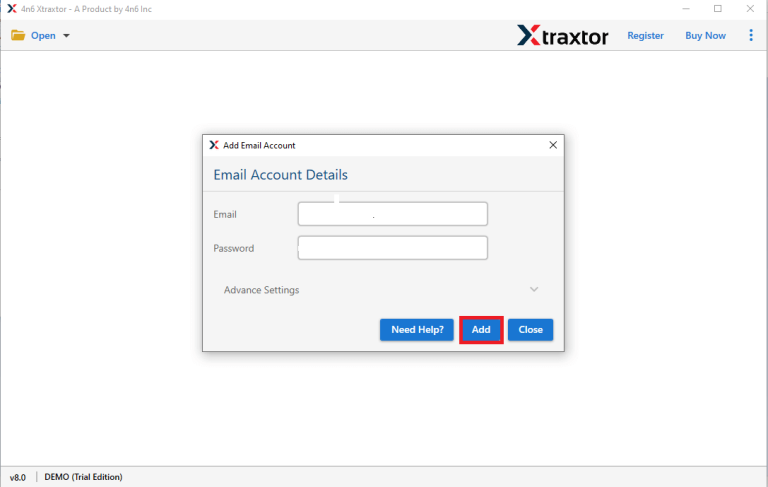
Step 3. Enter your Rackspace Account credentials and press Add Button.
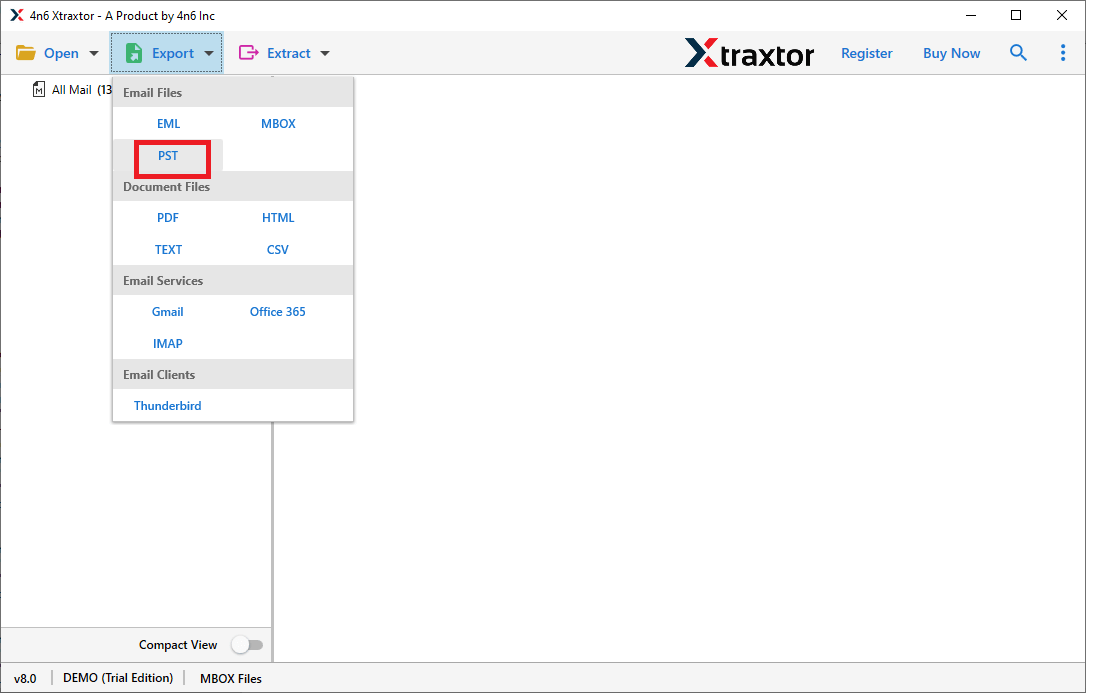
Step 4. After that, click on Export and select PST from the given options.
Step 5. Click on Browse to set the Destination location and then click on Save button.
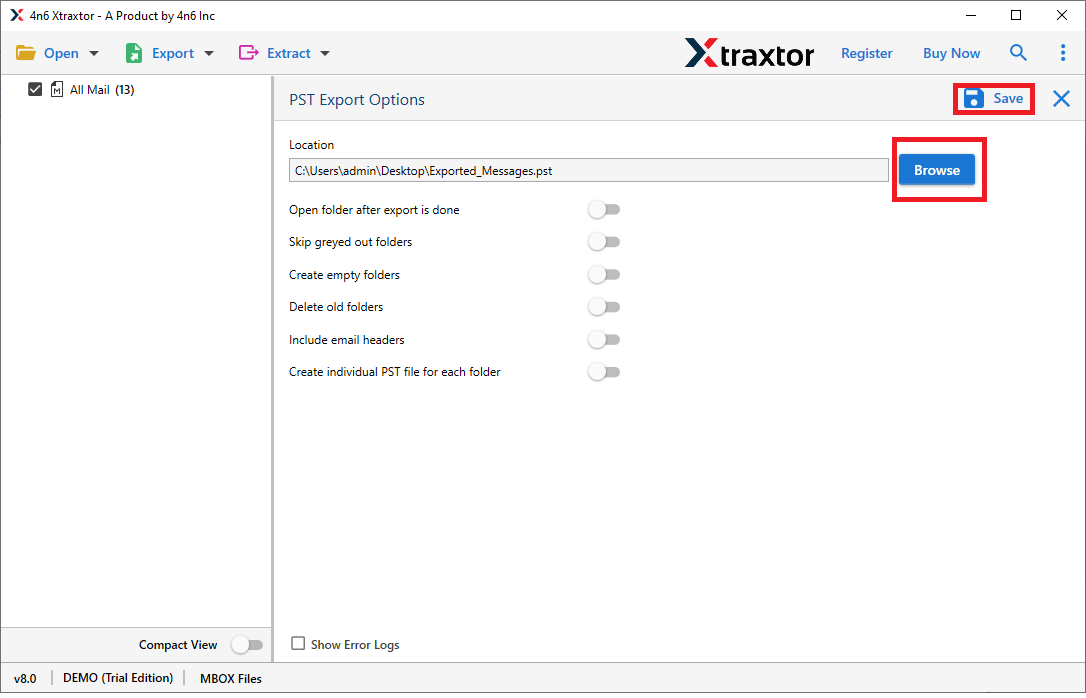
Finished!. Hence, you can easily export Rackspace email to PST file in seconds.
Why Xtraxtor Software Better than Manual Way- Know
The software has many benefits than the manual solution which are described below-
- Directly export emails from Rackspace to PST file without installing any other applications.
- Tool can save Rackspace emails to PST, MBOX, EML, MSG and 20+ file formats.
- Advanced filter options such as to, from, date, time etc. to export only required emails.
- Preview and search option to view and select emails before the conversion process.
- maintains the original hierarchy of email before and after the exporting process.
- Preserves 100% data integrity and provides accurate results.
- using this tool, you can directly migrate Rackspace to Gmail, Office 365 and other webmail accounts.
- Supports all latest and old versions of Windows Operating Systems.
- Freedom to save resultant files at your desired location.
- Dedicated support team is available 24*7 to answer user’s questions.
Final Words
In this post, we have discussed how to export Rackspace email to PST File in seconds. Both, manual and professional methods are explained here. You manually converts Rackspace emails to PST but there are some limitations of this method. However, experts recommend using the professional solution to complete this task without any hassle. The software can export emails from Rackspace to PST file format in a few simple clicks. It converts Rackspace emails with attachments. There are no chance of data loss with this application. Download the free version and check how it works so easily.
