How to Import PST to DreamHost Account?

Summary: If you want to import PST to DreamHost email account, this guide will help you understand the complete process in simple steps. Many users store their emails in Outlook PST files and later move to DreamHost email hosting. The main challenge is that DreamHost does not support PST files directly.
PST files are created by Microsoft Outlook to store emails, attachments, contacts, and other mailbox data locally on a computer. However, DreamHost email accounts work on standard protocols like IMAP and POP3, which means PST files cannot be uploaded directly.
In this guide, you will learn practical methods to transfer Outlook PST emails to DreamHost mailbox safely, including manual options and a more efficient automated solution.
How to Import PST to DreamHost Account for Free?
This is the manual and free method to import emails from PST file to DreamHost Mail. Follow the steps mentioned below:
- Open Microsoft Outlook on your computer.
- Click File >> Account Settings >> Account Settings.
- Click on the New option to add a new email account.
- Enter your DreamHost email address and click Connect.
- Outlook will automatically configure the account using IMAP settings.
- If required, you can enter DreamHost mail server settings manually.
- After successful login, click Finish to complete the account setup.
- Now your DreamHost mailbox will appear in Outlook.
- After that, load the PST file into Outlook.
- Restart Microsoft Outlook on your system.
- Click File >> Open & Export >> Import/Export.
- Select Import from another program or file and click Next.
- Choose Outlook Data File (.pst) and press Next.
- Browse and select the PST file from your computer.
- Select the DreamHost mailbox folder where you want to import the emails.
- Click Finish to start the import process.
Once the import is completed, Outlook will synchronize the emails with DreamHost server. After that, your PST emails will appear in your DreamHost mailbox.
How to Transfer PST File into DreamHost Email Account Directly?
With the help of the Xtraxtor, you can easily import PST emails to your DreamHost email account in just a few simple steps. The software allows users to transfer emails from large, damaged, or corrupted PST files without any data loss. Its clean and user-friendly interface makes the migration process simple for both technical and non-technical users. Additionally, the tool provides advanced filters that allow you to import only selected emails or folders into your DreamHost mailbox.
You can also download and try the free demo version of the tool to understand how this software works.

Steps to Import PST to DreamHost Automatically
Follow these steps to upload PST emails to DreamHost.
Step 1. Install and run the software on your Windows system.
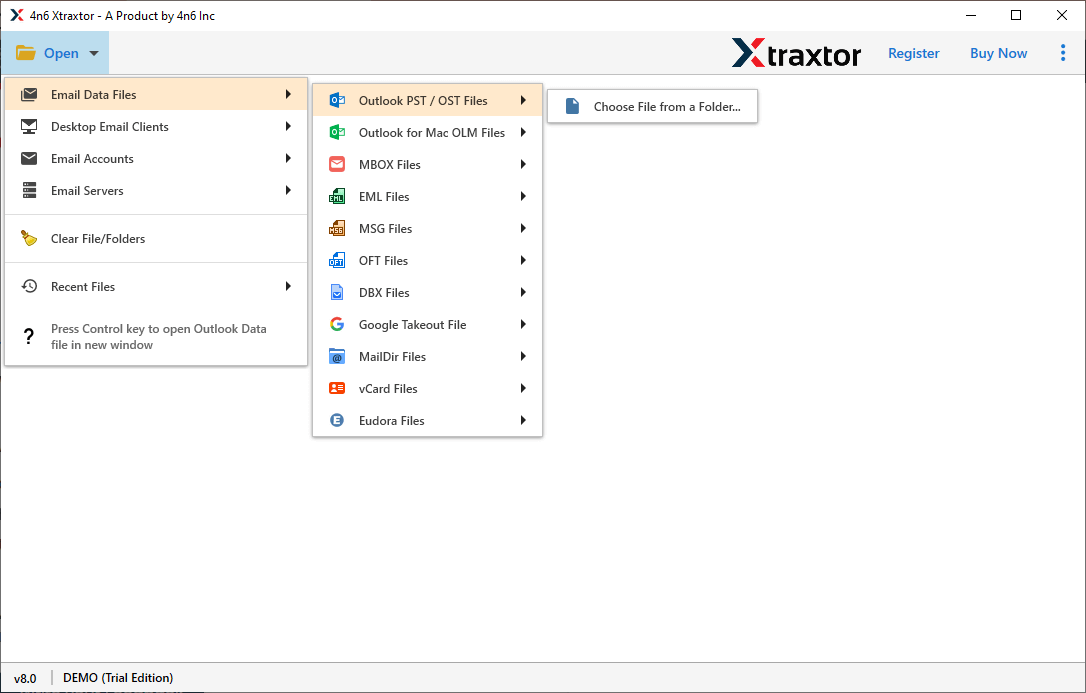
Step 2. Click Open >> Email Data File >> PST File.
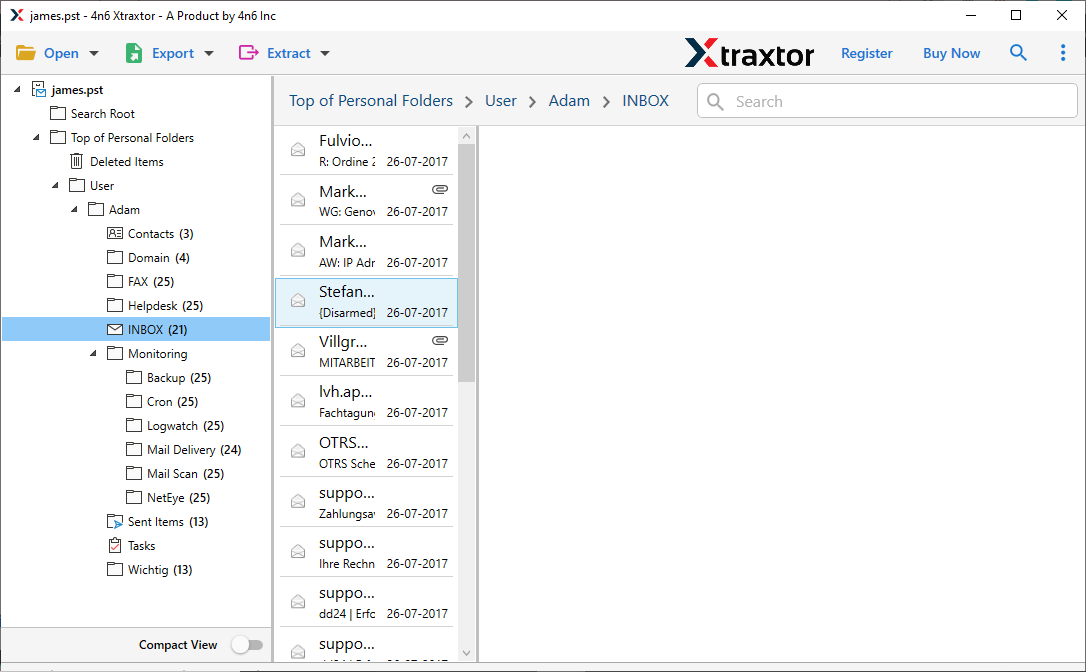
Step 3. Preview mailbox folders and choose the emails you want to migrate.
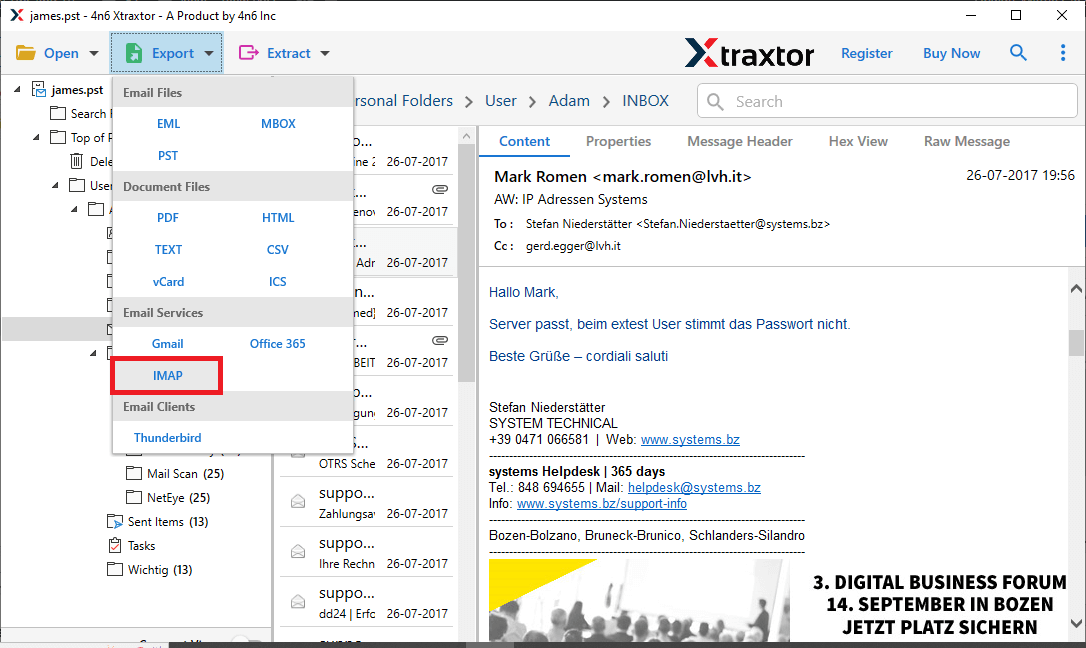
Step 4. Click Export and choose the IMAP option.
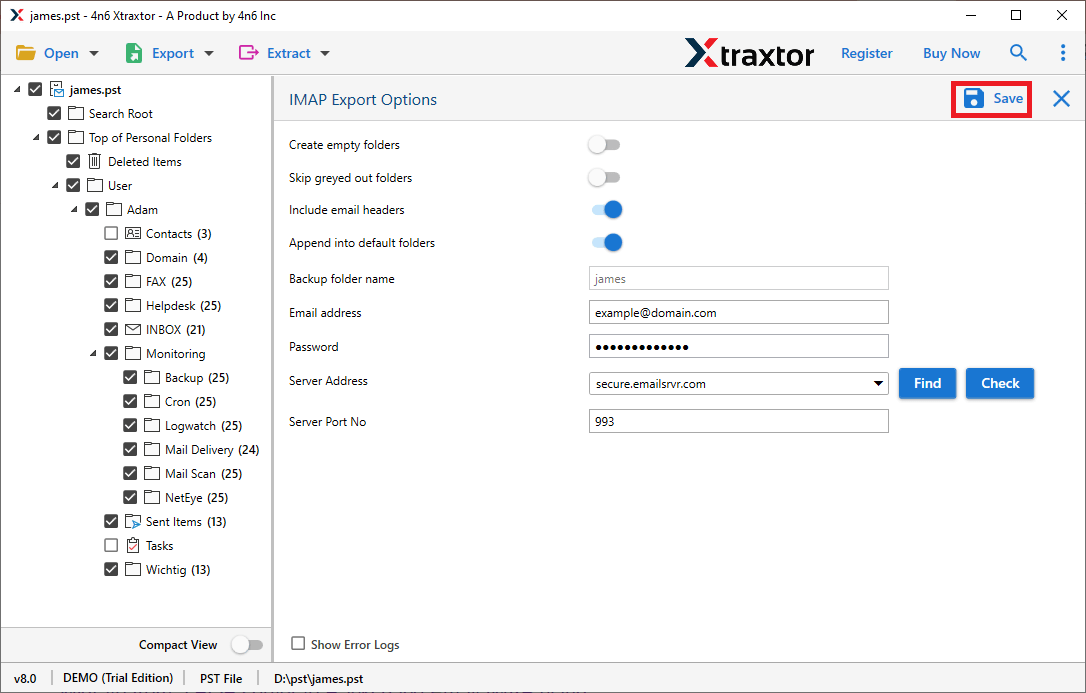
Step 5. Select the required email folders of your choice.

Step 6. Enter your DreamHost email login credentials & click Save to begin.
After the process finishes, log in to your DreamHost email account, and all PST emails will appear there.
Why Choose Automated Software instead of Manual Methods?
With this tool, there are various useful features. Some of them are;
- Import PST to Multiple Email Services: You can transfer emails from PST files to DreamHost as well as other email services like PST to Gmail, Office 365, Yahoo Mail, Zoho Mail, and other IMAP accounts.
- Folder Selection: The tool allows you to select only the required folders from the PST file. This helps avoid importing unwanted emails.
- Convert PST to Multiple Formats: You can also convert PST to MBOX, PDF, EML, MSG, CSV, HTML, and many more.
- Maintain Email Properties: While importing PST emails to DreamHost, the tool keeps email details like To, From, CC, BCC, Subject, Date, Time, and attachments intact.
- Email Preview Option: The preview feature lets you view all emails and folders before starting the migration process.
- Advanced Email Filters: You can apply filters to migrate only selected emails based on sender, recipient, subject, date range, or attachments.
- Extract Data from PST: The software can extract attachments, email addresses, phone numbers, and other details from PST files easily.
- Supports All Windows Versions: The tool works smoothly on Windows 11, 10, 8, 7, Vista, and other older versions.
Final Words
As per our research and knowledge, we have covered two easy ways to import PST to DreamHost email account using both manual and automated methods. The manual method works through Outlook configuration, but it may take more time and has several limitations.
For a faster and more reliable migration process, using an automated tool is recommended. It allows users to move PST emails to DreamHost securely with complete mailbox items.
You can try the free demo version to check how smoothly the migration works before upgrading to the full version.
