If you have EML files saved on your computer and want to access them inside your Office 365 mailbox, this guide is for you. Many users feel stuck because Microsoft 365 does not offer a direct option to upload EML files. But don’t worry, there are simple ways to do it.
In this blog, you’ll learn:
- Why users import EML to Office 365
- A free manual method for small data
- A bulk and faster automated solution
- Which method is best based on your needs
Let’s start by understanding why Office 365 is the preferred destination.
Why Do Users Move EML Files to Office 365?
People switch their EML emails to Microsoft 365 for several reasons:
- Access anywhere: You can open emails on mobile, laptop, or browser.
- Better safety: Microsoft’s cloud security protects your data.
- Easy search: Office 365 searches emails faster and more accurately.
- Handles big data: It easily manages thousands of emails.
Can You Import EML to Office 365 for Free?
Yes, but with limitations.
Office 365 does not allow direct EML upload. However, you can use the Outlook desktop application as a bridge to move EML files into your Office 365 mailbox.
Note: This method is suitable if you have a small number of EML files.
- Open Outlook on your system.
- Go to File >> Add Account.
- Add your Office 365 email and sign in.
- Create a new folder under your Office 365 mailbox.
- Open the folder where your EML files are stored.
- Simply drag and drop the EML files into the new folder.
- Outlook syncs the folder >> Emails appear in Office 365.
That’s the complete free process.
Limitations of the Manual Method
While the manual method works, it has some restrictions:
- Very slow if you have hundreds or thousands of EML files
- Requires the Outlook desktop app
- Needs basic technical knowledge
- Does not help if EML files are corrupt
- No option for selective migration (date, sender, etc.)
Because of these issues, users with bulk data often look for an automated method.
How to Open EML Files in Office 365 Automatically?
If you have a large number of EML files, want to protect attachments, or need filters (date, sender, subject), then a migration tool becomes helpful.
A professional tool like Xtraxtor EML Converter can:
- Import EML files in bulk
- Upload directly to Office 365
- Keep attachments and formatting unchanged
- Maintain folder structure
- Allow selective import using filters
- Handle damaged or inconsistent EML files
This method is usually chosen by users who want a fast, error-free, or bulk import experience.
So, what are you waiting for? Click the download button below and import 10 emails to your Office 365 mailbox for FREE.


Steps to Import EML to Office 365 Account
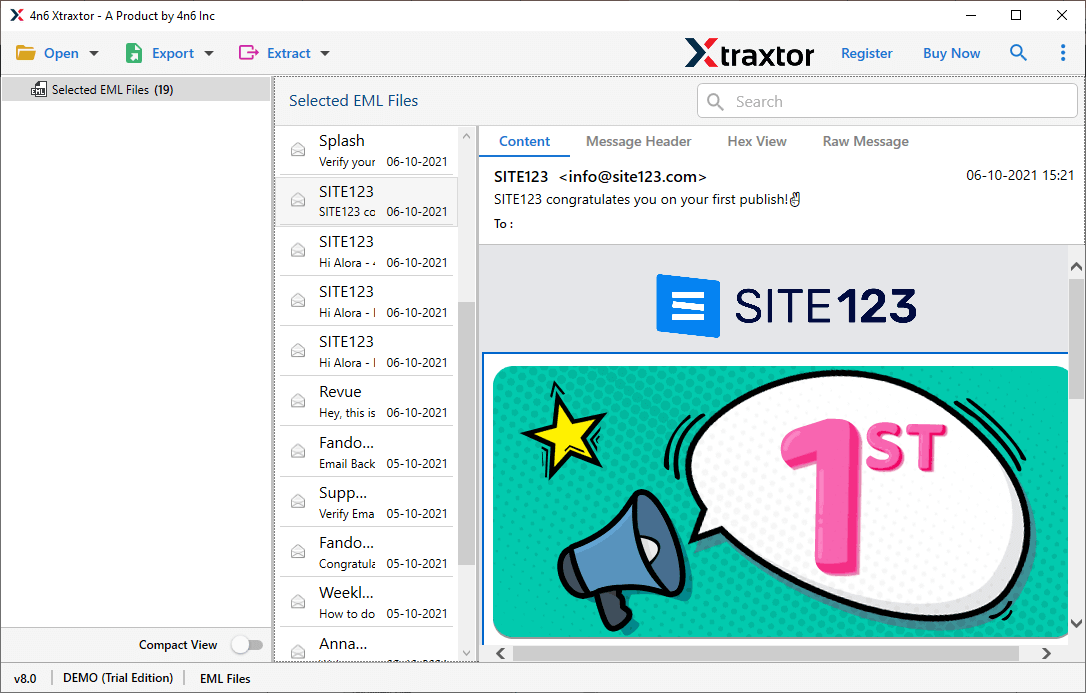
- Install and launch the Xtraxtor tool on your system.
- Here select Open >> Email Data file >> EML Files >> Select Files or Folder.

- Now you can view your emails with the help of the preview option of this tool.
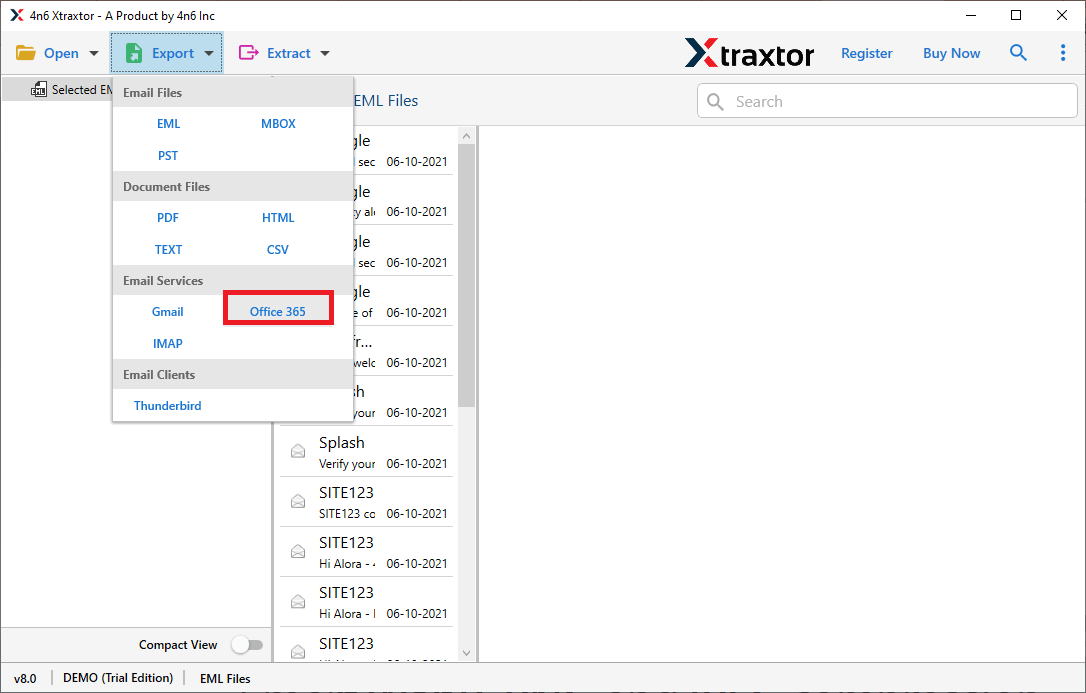
- After that click on Export and choose Office 365 option.
- Enter your Office 365 account login details and at last hit on the Save button.
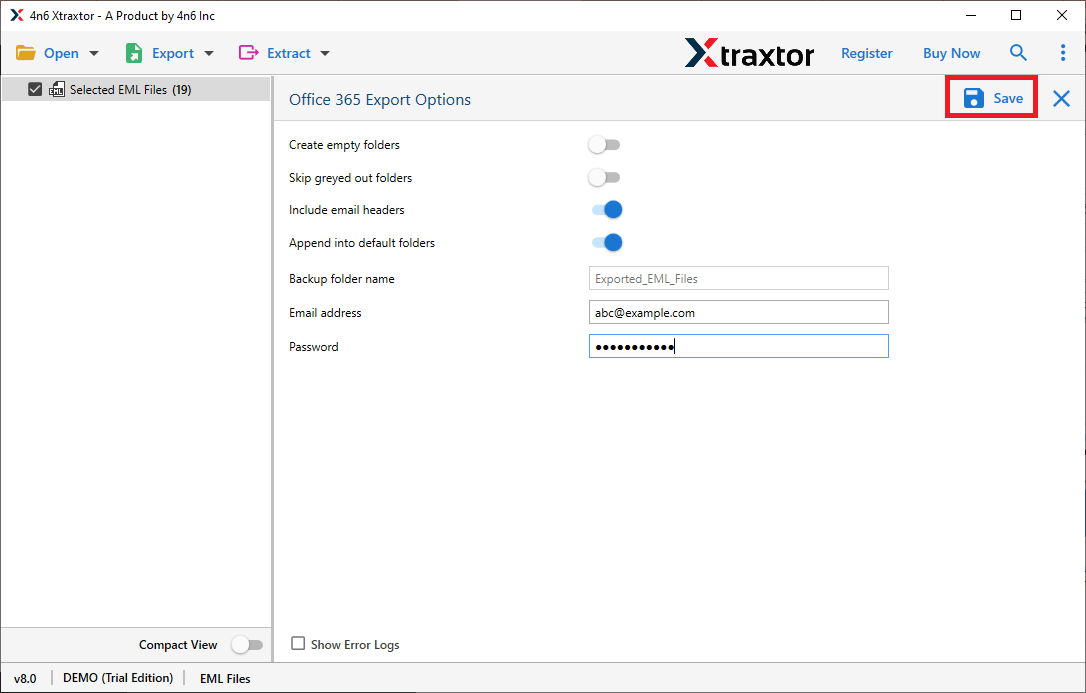
Done! Here you import EML to Office 365 mailbox accounts without facing any glitches. Try the demo version of this utility to experience the migration process.
Highlights of the EML to Office 365 Migration Tool?
There are lots of benefits of using the automated tool to import .eml files into Outlook 365 email account. Some of them mention here –
- Preserve Email Integrity: While using this tool you can perform the import process without affecting the integrity of email content. There will be no modification in mailbox data during the process.
- Folder Selection Option: The tool gives an option to select the email folders that are important. In this way, you can import only the selected one.
- Advance Filter Options: There are various email filters that make the EML to Office 365 import specific and specific. You can apply filters such as – to, from, cc, bcc, subject, name, content, date range, time and other various options.
- Import EML to Mail Accounts: With the help of this tool you can import EML to Zoho Mail, Yahoo, Google Workspace, Yandex and all other IMAP accounts.
- Windows-Based Utility: This automated tool is compatible with all Windows OS services. You can install and run this tool on Windows 11, 10, 7, XP and all other email accounts without any technical issues.
- Preview Mode: After your add EML file for importing, you can view all your emails. The tool show your emails in various modes for different users.
- Different File Saving Options: One can also convert EML to PDF, MBOX, HTML, TEXT and PST format. Most importantly all these saving options will be present in a single interface.
Conclusion
In this guide, we explored simple ways to import EML to Office 365 mailbox. The manual drag-and-drop method works for small numbers of emails and for users who already have Outlook installed. However, when handling bulk EML data, needing filters, or wanting to avoid long manual steps, a tool-based method becomes more practical. Choose the option that suits your data size, time, and comfort level.
