How to Migrate from 123 Reg to Office 365? 2 Easy Solutions

re you also looking to migrate emails from 123 Reg to Office 365? In this post, we will discuss an efficient way to migrate from 13 Reg to Office 365 mailbox. Read till the end and know the complete migration process in a few simple clicks.
Thinking of moving your emails from 123 Reg to Office 365 but not sure where to start? You’re not alone! Many people switch to Office 365 for its easy integration, useful business tools, and strong security. It helps with better email management, teamwork, and a more professional setup. Making the switch can improve your workflow and productivity.
Migrating emails can be confusing if you don’t know the right solution. For all those users, this guide will show you how to transfer 123 Reg emails to Office 365 easily. Without any delay, let’s get started!
How to Migrate from 123 Reg to Office 365 Effortlessly?
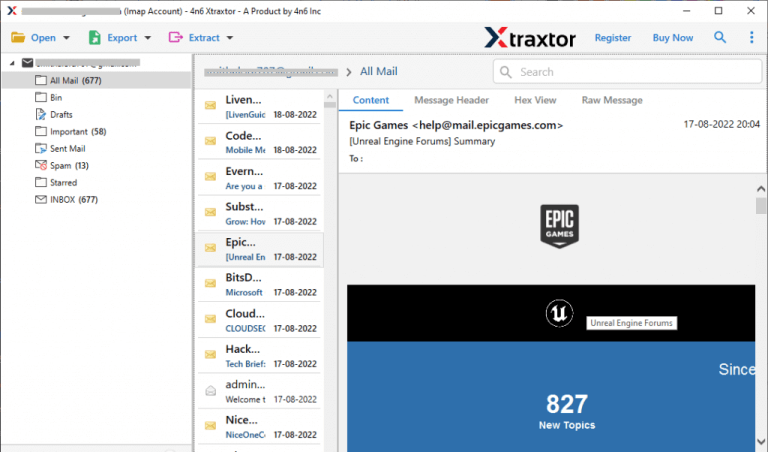
Check out the Xtraxtor tool to complete the 123 Reg to Office 365 migration process. With this tool there are various filters that will help you to migrate selective emails only. Moreover, to avoid any unwanted transfer, you can also choose the important email folders only. With its simple and user-friendly interface, it is easy to transfer emails from 123 Reg to Office 365 mailbox hassle-free.
The best part of this tool is its free demo version, which lets you export the first 25 emails per folder. Click the link below and download the free trial version.


Steps to Transfer 123 Reg Email to Office 365
Step 1. Launch Xtraxtor and click the Options tab at the top left.
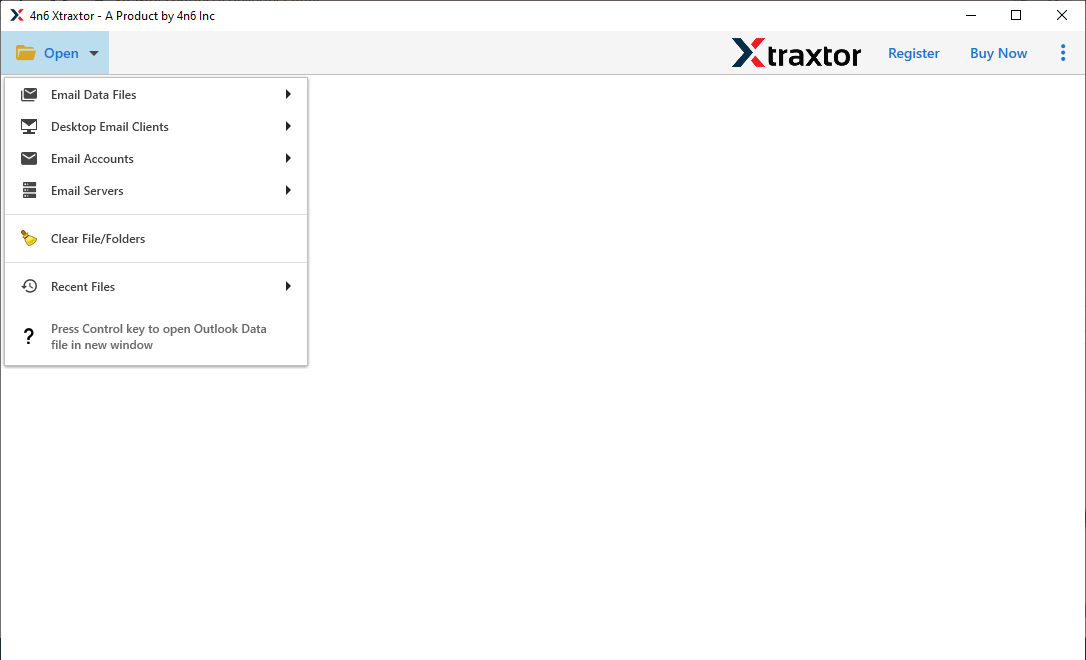
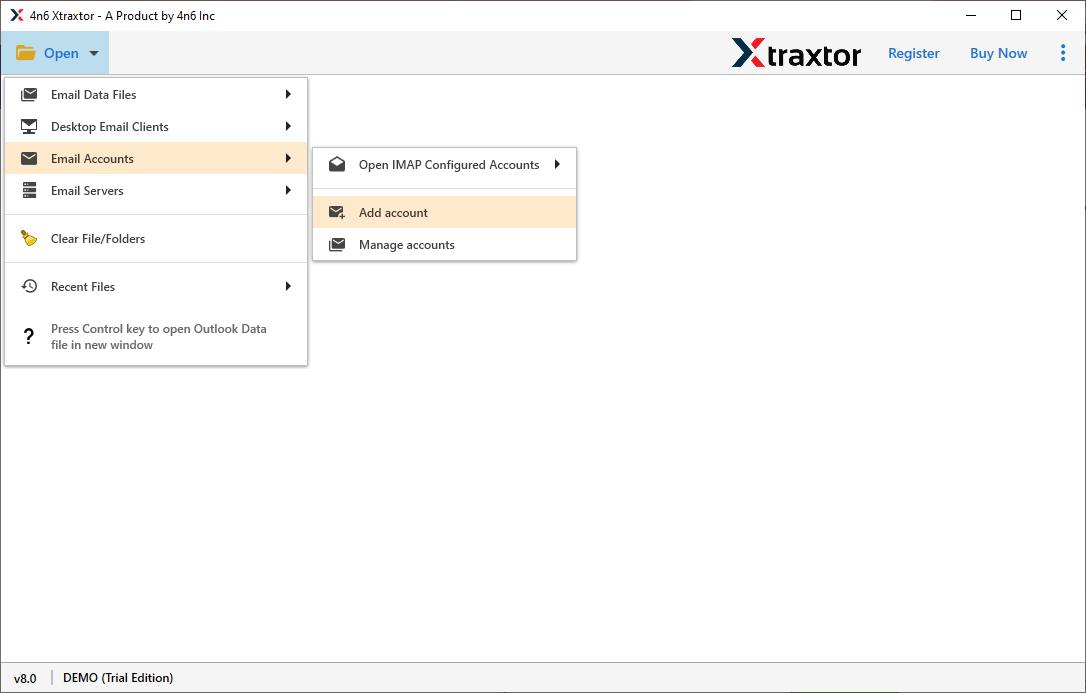
Step 2. After that, click on Email Accounts and select the Add Account option.
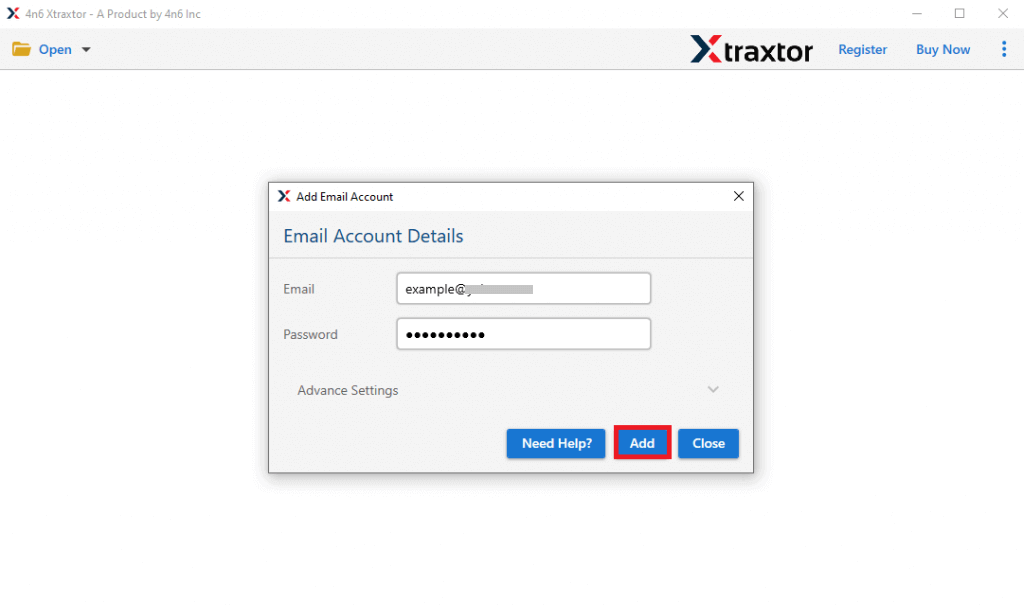
Step 3. Enter your 123 Reg email address and password, then click Advanced Settings.
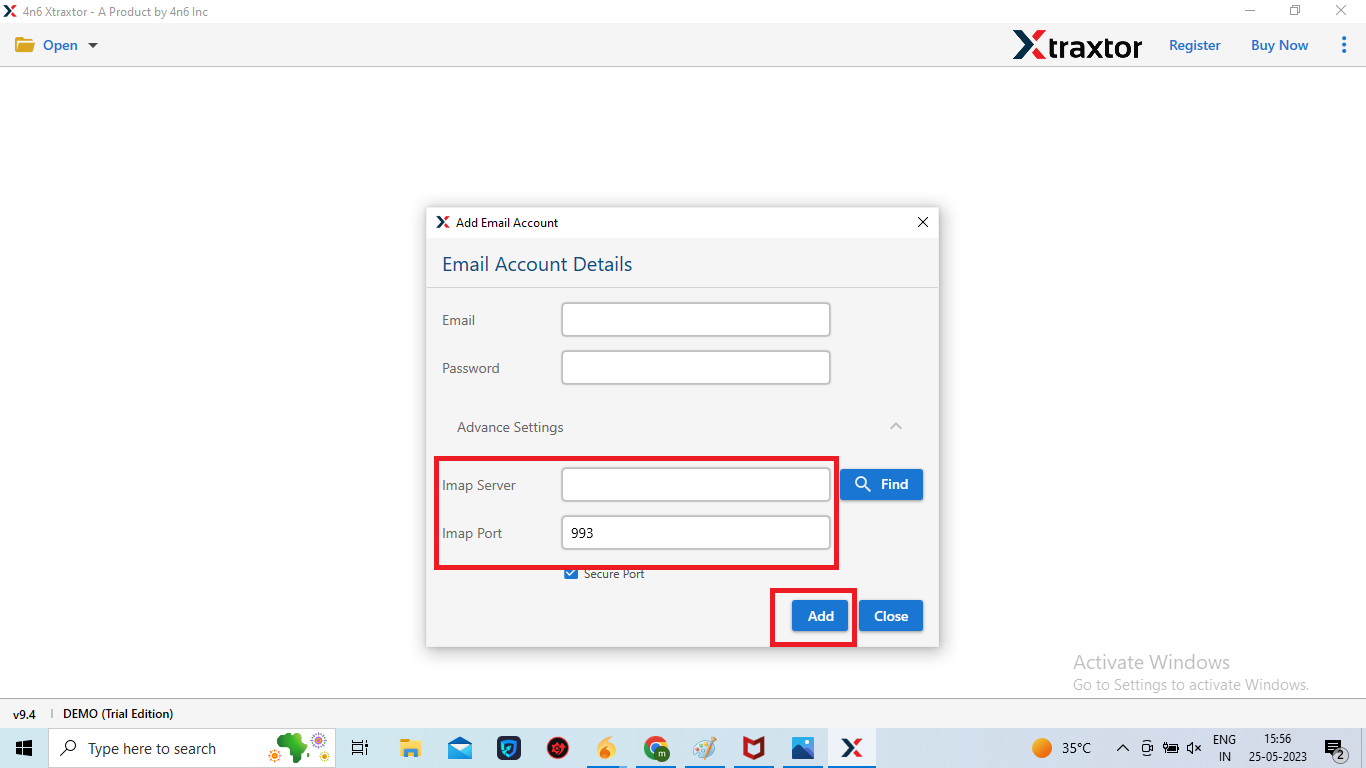
Step 4. Enter 123 Reg IMAP server (123-Reg.co.uk) and Port 993, then click Add.
Step 5. The software loads all emails from your 123 Reg account before migrating them to Office 365.
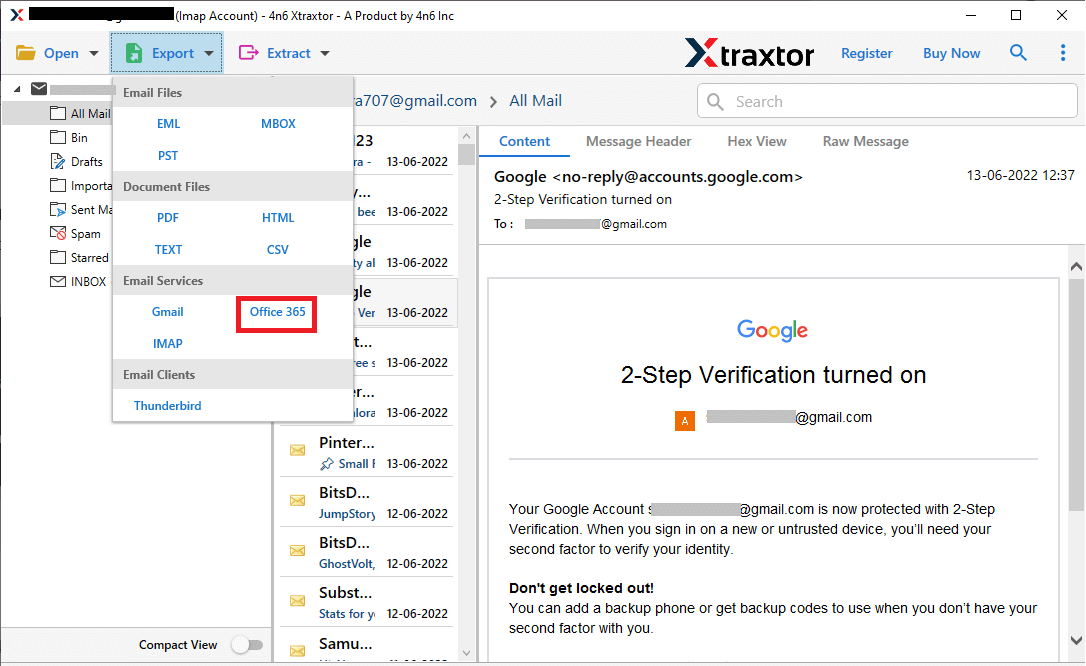
Step 6. After that, Go to Export and select Office 365 from the given options.
Step 7. Choose email folders from 123 Reg mailbox that you want to migrate to Office 365.
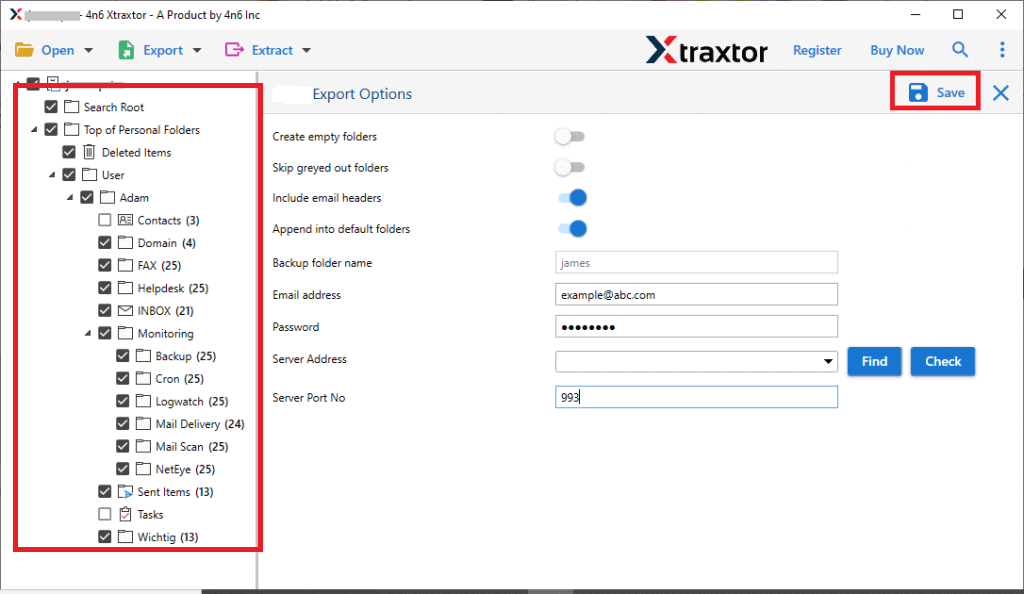
Step 8. If you want to migrate only selected emails then apply the filters.
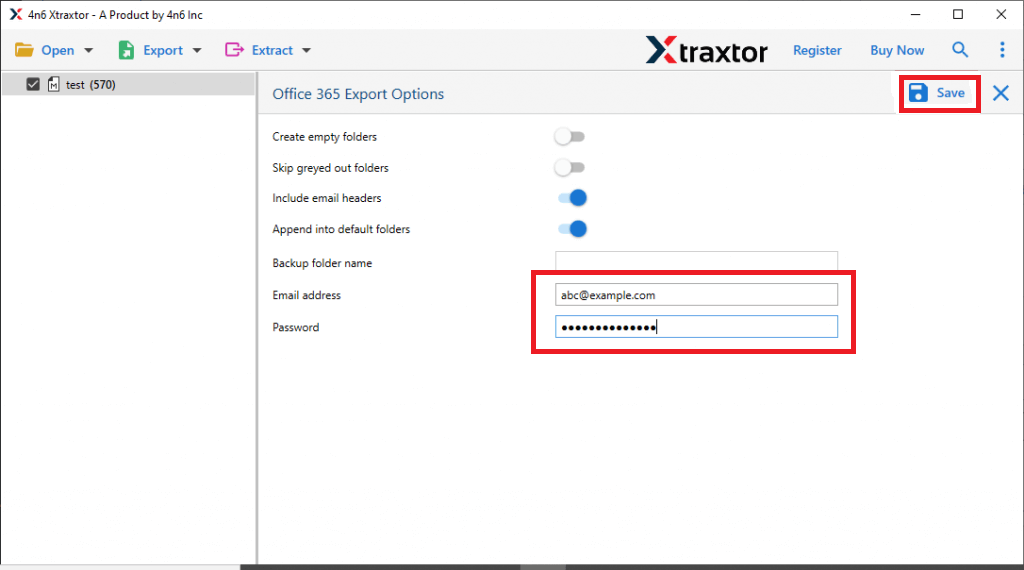
Step 9. Enter Office 365 credentials and click Save to start migration.
Done! With this professional tool, migrate from 123 Reg to Office 365 is quick and easy, allowing you to transfer emails and data with just a few clicks.
Why Choose Xtraxtor 123 Reg to Office 365 Migration Tool?
The software has many advanced features that help you to easily transfer emails from 123 Reg to Microsoft 365. Some of them are given below-
- Stand Alone Utility: The software is an undependable tool that directly import 123 Reg to Office 365 without installing any external applications. You just need to enter the login details of 123 Reg account and select the export option as Office 365. Hence, it completes the migration process in a few seconds.
- Bulk Migration: The software has a batch mode that enables you to migrate 123 Reg email to Office 365 in bulk. It saves your time and effort to transfer unlimited emails.
- Various Saving Options: There are multiple saving options to export 123 Reg emails. With this application, you can export 123 Reg email to PST, MBOX, EML, PDF, and 10+ file formats.
- Cloud-to-Cloud Migration: Using this utility, you can directly migrate emails from one cloud based email account to another without any hassle.
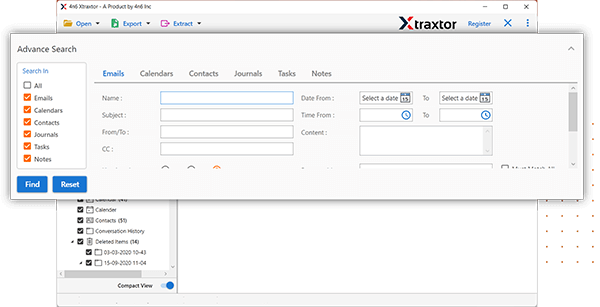
- Advanced Filter Options: The software has multiple email filter options such as to, from, date, time, cc, bcc, etc. If you do not want to move complete mailbox from 123 Reg to Office 365 then filters help you for selective migration.
- Easy to Use: The interface of this utility is very simple and easy to use. Any novice user can easily migrate from 123 Reg to Office 365 without any assistance.
- Free Trial Version: The software has a free demo version that helps you to check its work efficiency and accuracy before purchasing the licensed version.
How to Migrate Emails from 123 Reg to Office 365 Manually?
1. Add 123 Reg Account in Outlook
1. Launch the MS Outlook application on your system.
2. Now, click on File and select the Add Account option to add a 123 Reg account.
3. After that, enter the 123 Reg email address and click on the Connect button.
4. After that, select IMAP from the Choose account type option.
5. Enter the details and click on the Next button.
6. Enter the password of the 123 Reg email account and click on the Connect button.
7. After that, click on the Done button and complete the configuration.
Step 2. Export Network 123 Reg Emails to PST File
1. After configuration, click on File >> Open & Export >> Import/Export.
2. Select Export to a File from the import export wizard and click on Next.
3. Choose Outlook Data File (.pst) and press Next.
4. After that, select 123 Reg email id and choose email folders.
5. Browse the location to save the resultant file and then press the Finish button.
Step 3. Configure Office 365 with Outlook and Import 123 Reg Emails to O365
1. Open File and click Add Account.
2. Enter your Office 365 email and click Connect.
3. Type your password and click Finish to complete the setup.
4. Go to File > Open & Export and select Import/Export.
5. Choose Import from another program or file and click Next.
6. Select Outlook Data File (.pst) and click Next.
7. Browse and select the PST file exported from 123 Reg, then click Next.
8. Choose Import items into the same folder in and select your Office 365 mailbox. Click Finish to complete the migration.
Conclusion
Moving emails from 123 Reg to Office 365 can be challenging, but I hope this guide has made it easier for you. You can migrate emails manually, but if you run into any issues, you can use the recommended tool for a smooth and hassle-free transfer. Hope this article will helps you to migrate your emails effortlessly.
