How to Convert Windows Live Mail to PST File?

Are you looking for a reliable way to convert Windows Live Mail to PST but are unable to find a proper solution? If yes, you are in the right place. In this blog, you will learn easy and effective methods to export emails from Windows Live Mail to PST file format.
Windows Live Mail was once a popular email client, but since it is no longer supported by Microsoft, many users now want to move their emails to Microsoft Outlook. Outlook uses the PST file format, which makes it necessary to convert Windows Live Mail data before migration.
Read this guide till the end to understand simple manual steps and a faster automated solution to convert Windows Live Mail to PST safely and without losing any data.
How to Convert Windows Live Mail to PST? (Free Option)
You can manually export Windows Live Mail emails to PST using Outlook. Before starting, make sure both Windows Live Mail and Outlook are installed on the same computer.
1. Open Windows Live Mail.
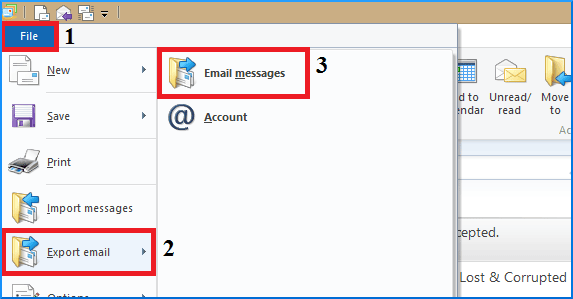
2. Click the File menu, go to Export Email, and select Email Messages.
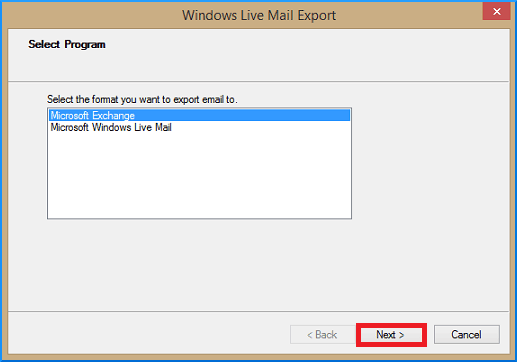
3. In the export wizard, choose Microsoft Exchange and click Next.
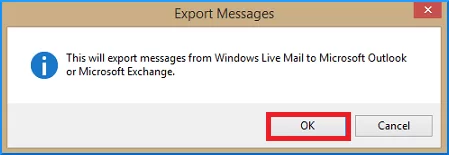
4. A message will pop up saying emails will be exported to Microsoft Outlook or Exchange; click OK.
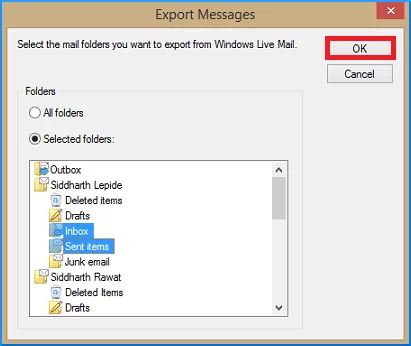
5. Decide whether to export All Folders or Selected Folders and click OK to start the process.
6. Here you import Windows Live Mail to Outlook account, Check your Outlook to verify.
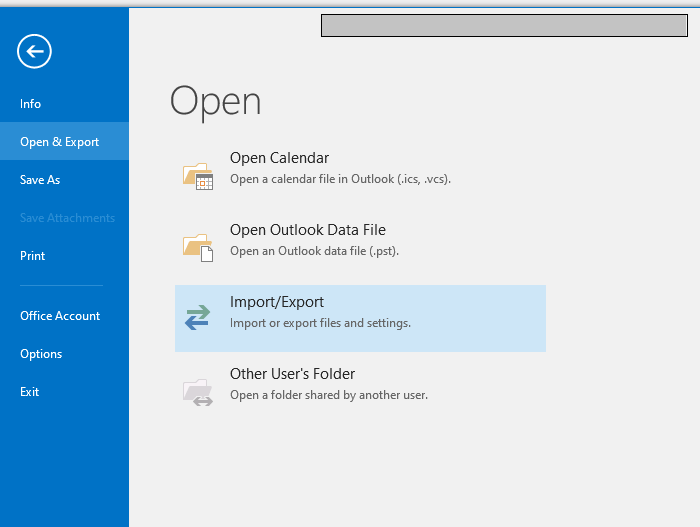
7. Using the Outlook Import/Export option, export your Windows Live Mail into a PST file.
Done! Here, you export all your emails from Windows Live Mail to Outlook PST file.
How to Export Windows Live Mail to PST Without Outlook?
With the help of the Xtraxtor tool, you can complete the exporting of your emails in a few simple clicks. With its advanced features, it is easy to convert Windows Live Mail to Outlook PST in a few simple clicks. The tool will export emails directly from your configured Windows Live Mail profile into PST file with complete data.
Additionally, you can also apply the filters and convert the selective emails only. Moreover, one can also export selective folders from Windows Live Mail account without any hassle.
Download the demo version of the software to know its working process.


Steps to Convert Windows Live Mail to PST File
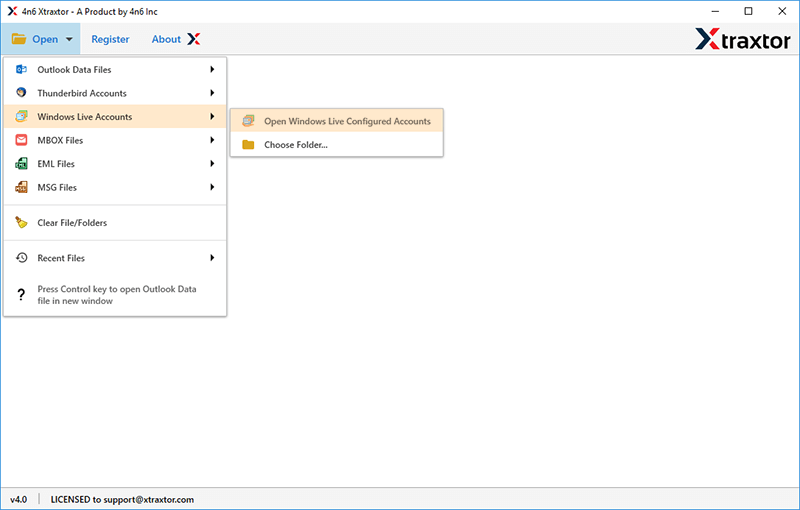
1. Run this Windows Live Mail to PST Converter tool on your system.
2. After that, select Open >> Desktop Email Clients >> Windows Live Mail >> Select your Profile.
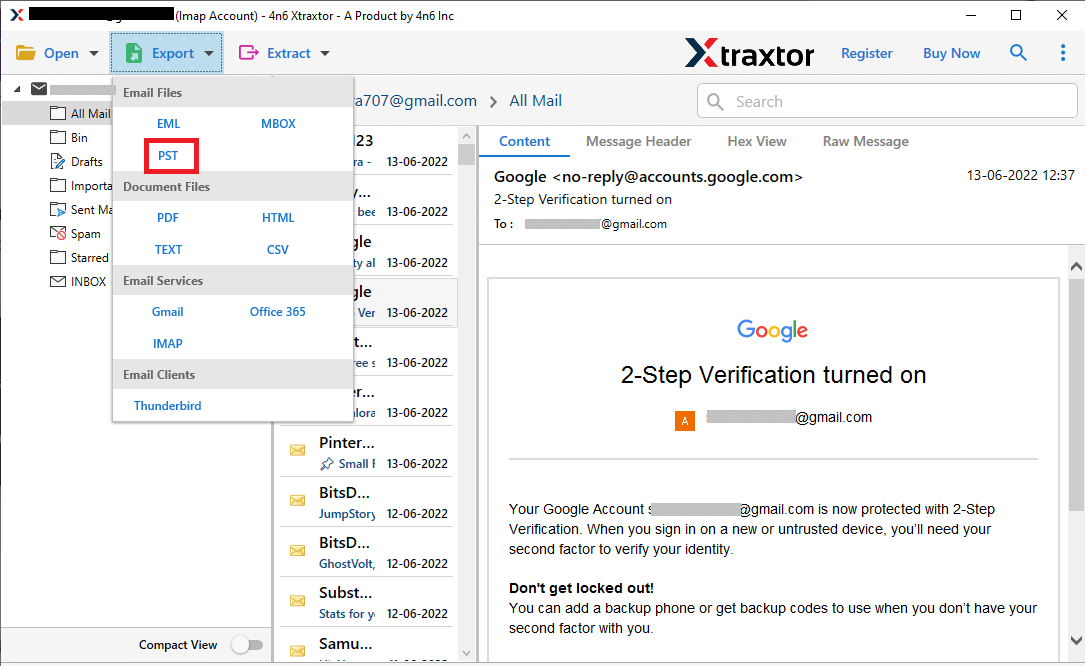
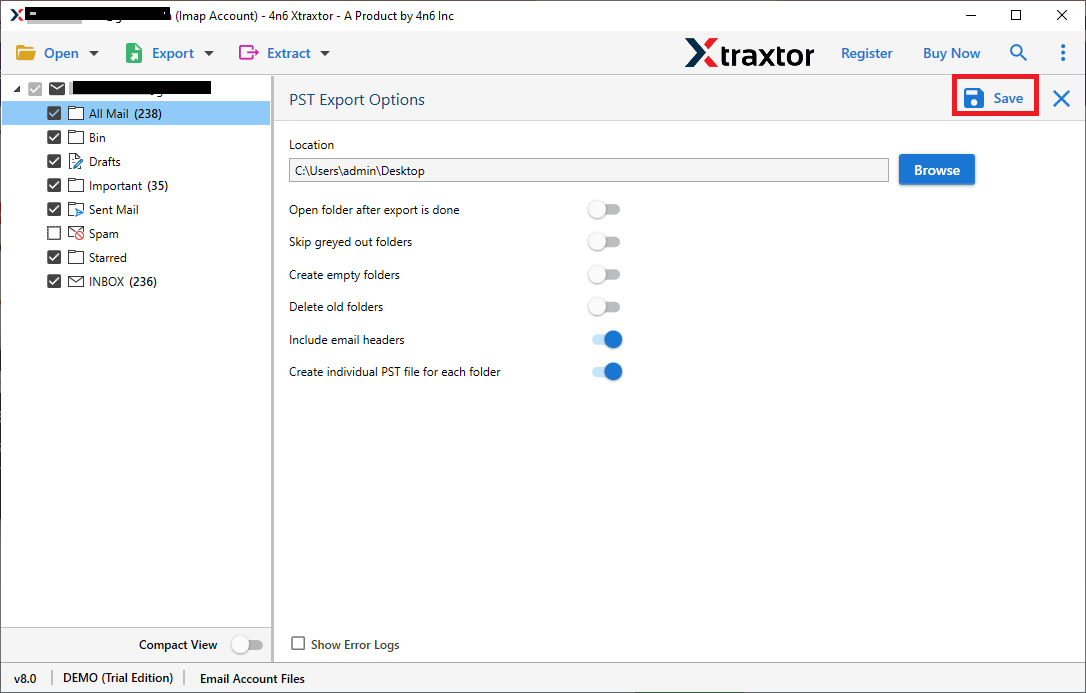
3. Click on Export and choose PST format.
4. Select the email folders you want to convert.
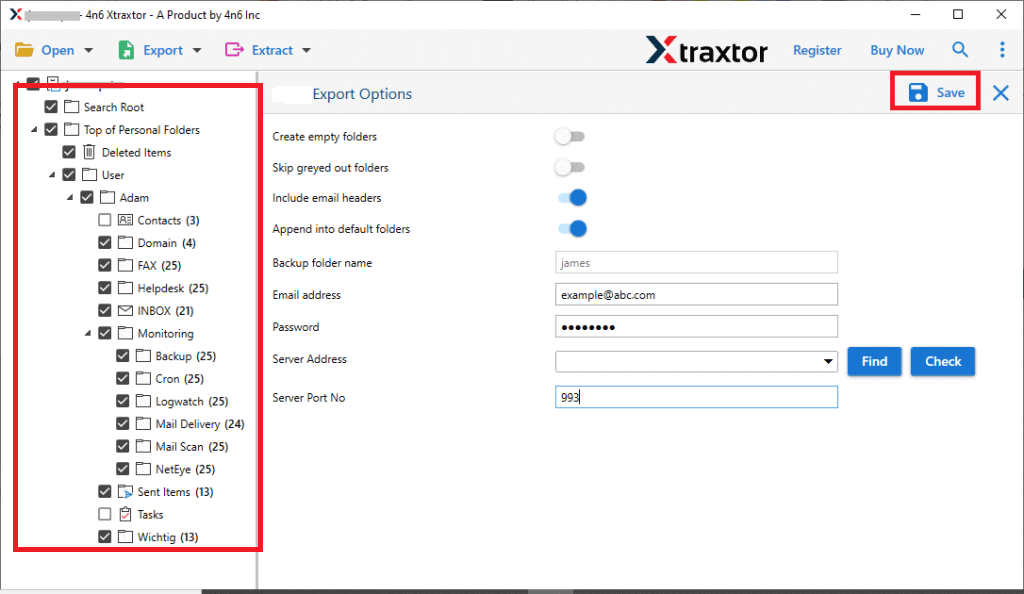
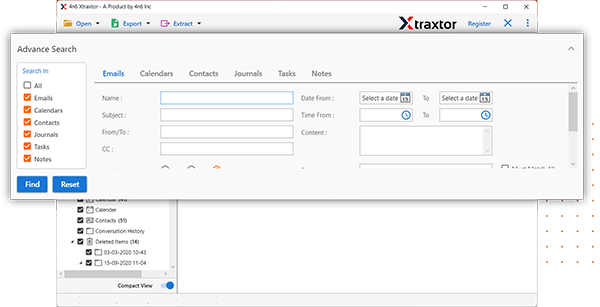
5. Apply filters if you want to export selective emails.
6. Browse the targeted location and hit the Save button.
Done! Here, complete the Windows Live Mail to PST conversion process.
Why Use Windows Live Mail to PST Converter?
With this tool, there are various outstanding features, including –
- Export multiple emails at once without losing data.
- Maintain the original folder structure of emails throughout the migration process.
- Convert Windows Live Mail to MBOX, EML, PDF, PST, TXT, HTML, MSG, and many other file formats.
- Designed with a simple interface for all users, which allows even beginners to export Windows Live Mail folders to Outlook PST easily.
- Use advanced filters like to, from, date, time, cc, and bcc to export specific data items.
- Migrate Windows Live Mail to Gmail, Office 365, Yahoo Mail, Hotmail, Zoho Mail, and other cloud-based email accounts.
- Designed with a simple interface for all users, allowing even beginners to export Windows Live Mail to PST without Outlook.
- Compatible with all Windows OS versions, including Windows 11.
- Offers a free demo version to try the tool, allowing export of the first 25 items per folder.
Conclusion
Converting Windows Live Mail to PST helps you move your emails to Outlook safely. You can do it manually if you have only a few emails, but using a tool is better for larger mailboxes. By following the steps in this blog, you can easily export emails from Windows Live Mail to PST and enjoy all the features Outlook offers. Upgrade your email today!
