How to Import PST to SiteGround Without Outlook?

Are you looking for a simple solution to import PST to SiteGround without Outlook? Are you facing issues while moving Outlook data to your SiteGround email account?
Don’t worry. In this article, we will explain the best ways to import PST files to SiteGround email accounts easily. Here, you will learn both manual and professional methods to complete the migration process without losing any important email data.
With the right approach, you can quickly transfer your PST emails along with attachments, folders, and other details to your SiteGround mailbox.
Why Do Users Want to Import PST to SiteGround?
There are several reasons why users want to move PST files to SiteGround email accounts.
Centralized Email Management: SiteGround allows users to manage their website and email accounts in one place.
Webmail Access: Users can access their emails anytime through webmail services like Roundcube.
Better Email Hosting: SiteGround provides reliable email hosting with good security and spam protection.
Easy Accessibility: Emails can be accessed from any device using IMAP settings.
How to Open PST File in SiteGround Email Account?
Step 1. Install Microsoft Outlook on your computer.
Step 2. Add your SiteGround email account in Outlook using IMAP settings.
Step 3. Import the PST file into Outlook.
Step 4. Drag and drop emails from the PST folders to the SiteGround mailbox folders.
Wait for Outlook to synchronize emails with the server.
After synchronization, you will see the imported emails in your SiteGround webmail.
Limitations of the Manual Method
Although the manual method is free, it has several limitations:
- Microsoft Outlook installation is required.
- The process is time-consuming for large PST files.
- There is a risk of data loss during synchronization.
- Users need technical knowledge to configure IMAP settings.
- Emails must be moved folder by folder manually.
How to Import PST to SiteGround Without Outlook
If you want a quick and safe solution, you can use Xtraxtor software. This tool allows users to import PST files directly into SiteGround email accounts without installing Microsoft Outlook. It securely transfers all emails along with attachments, email headers, and folder structure.
The tool has a simple interface, so even non-technical users can easily perform the migration. It also maintains complete data integrity during the process.
You can also download the free demo version of the software to test its features before purchasing.

Steps to Import PST to SiteGround Email
Follow these simple steps to move PST emails to SiteGround:
Step 1. Install and launch the software on your system.
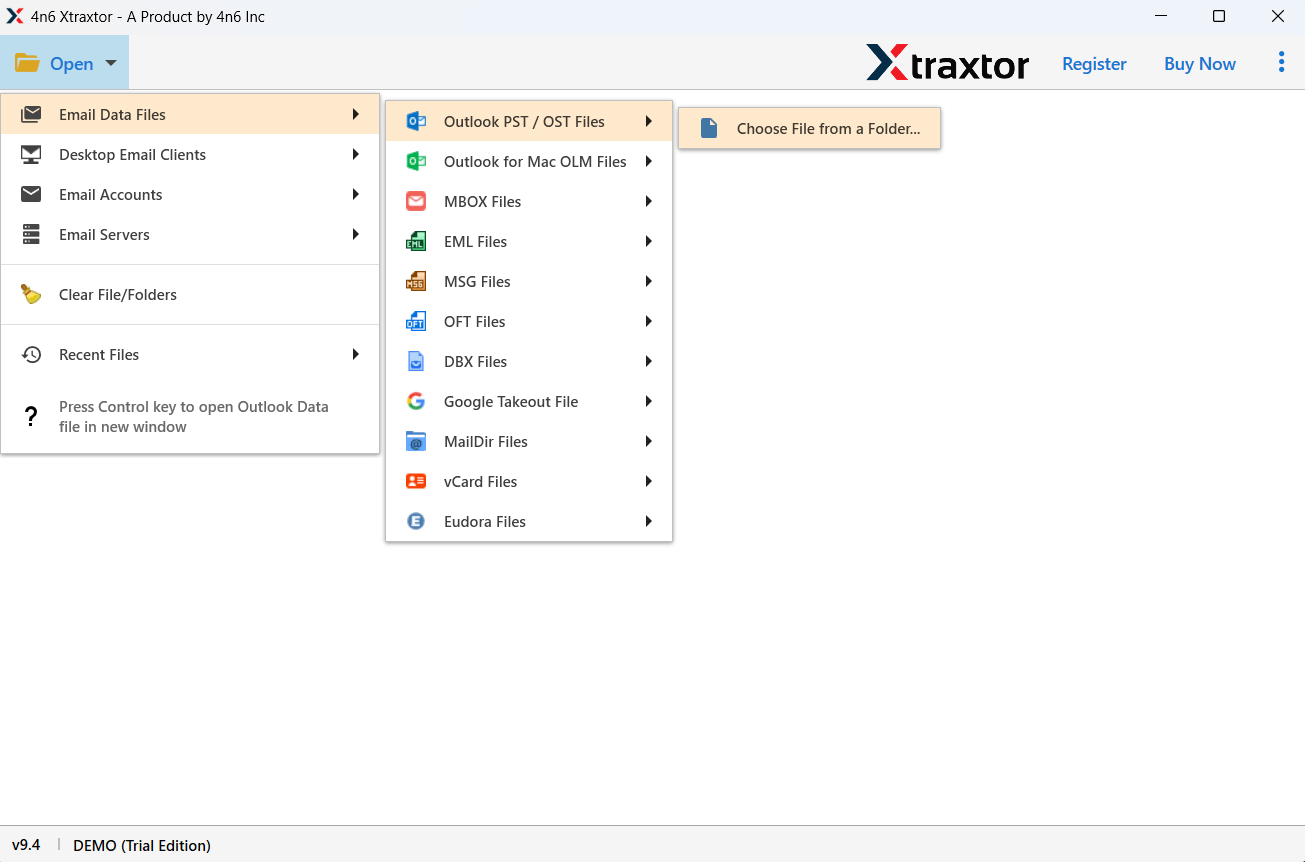
Step 2. Click Open >> Email Data File >> PST File >> Select File from Folder.
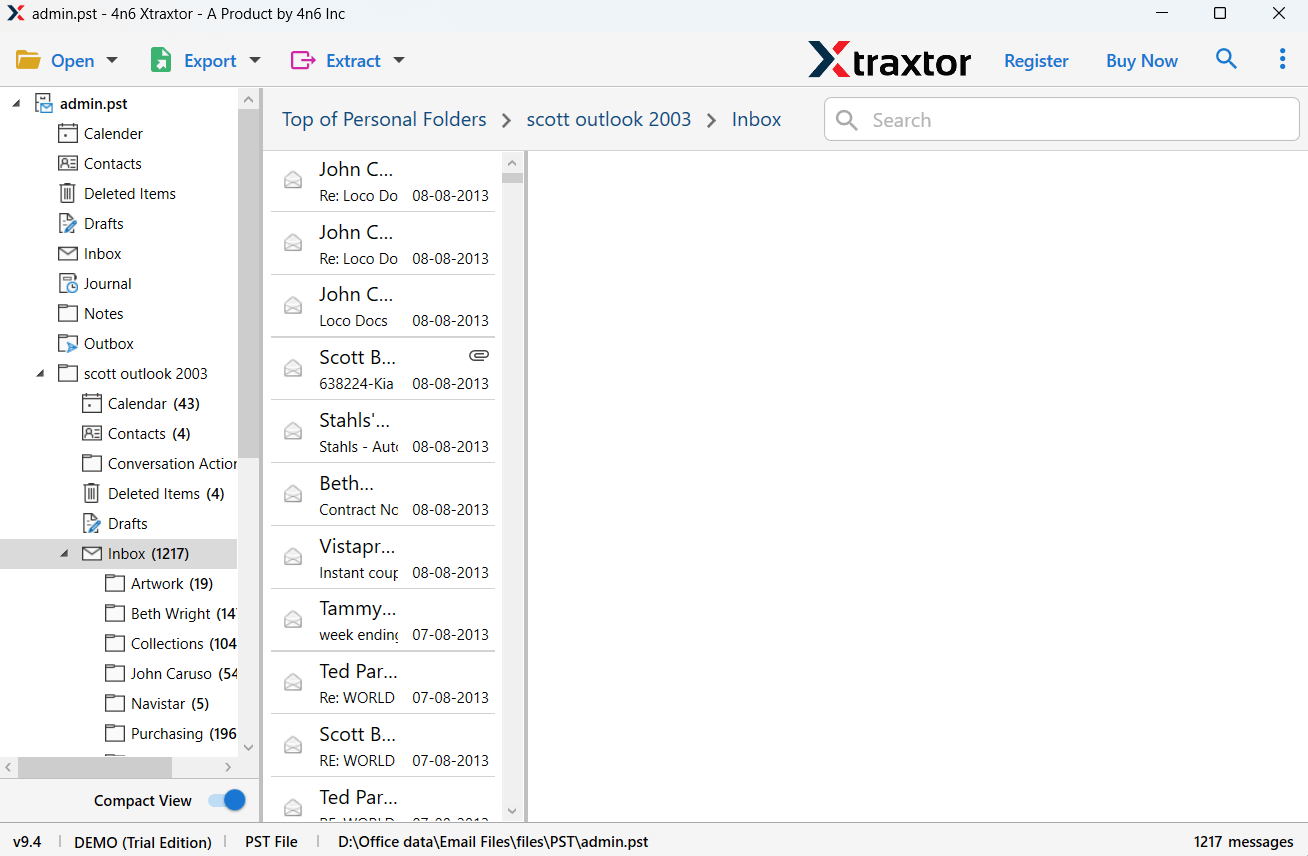
Step 3. Preview all emails and folders in the software panel.
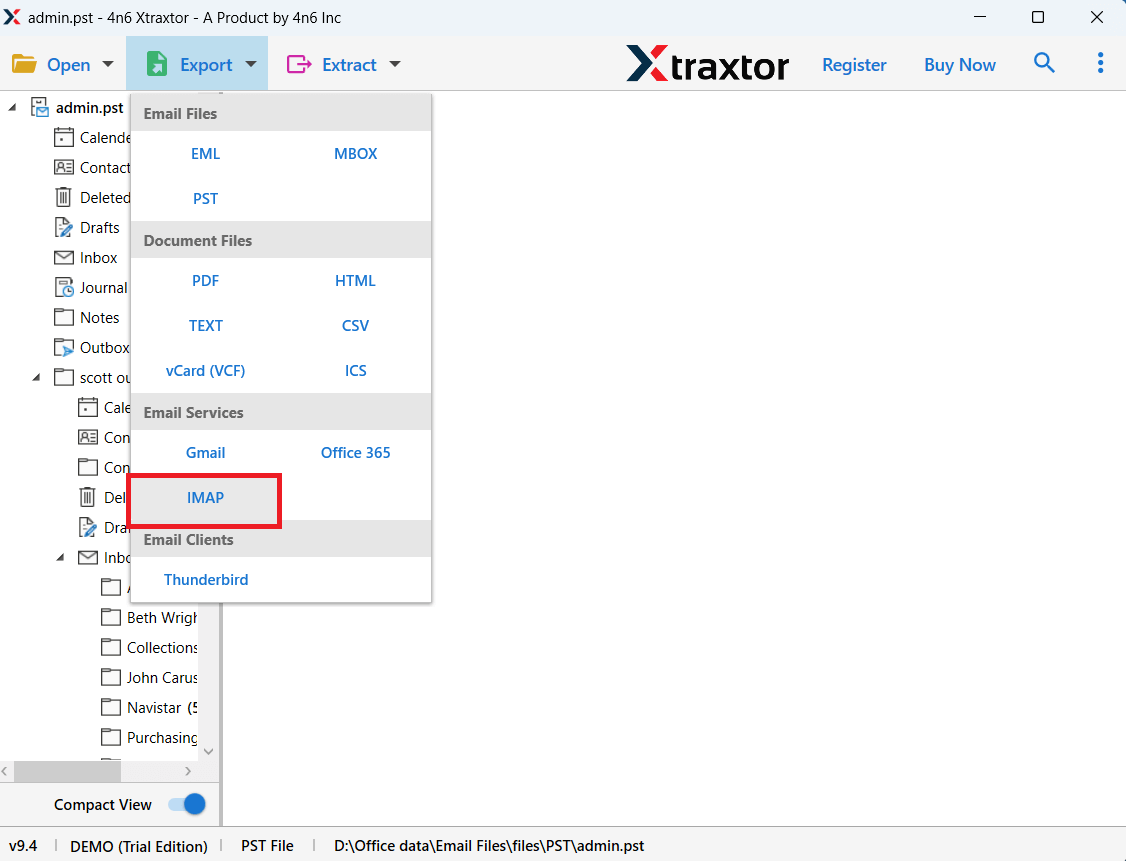
Step 4. Click on the Export option and select IMAP.
Step 5. Enter your SiteGround email account login details.
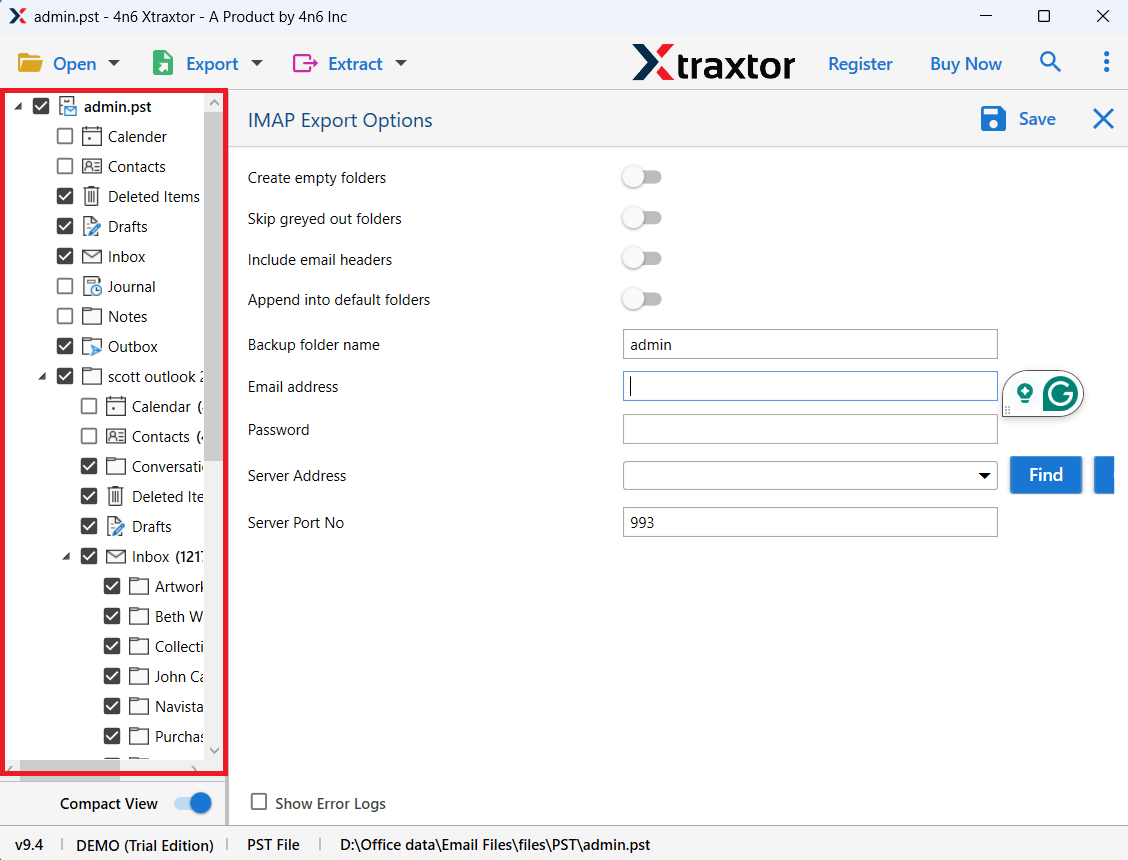
Step 6. Click on the Save button to start the migration process.
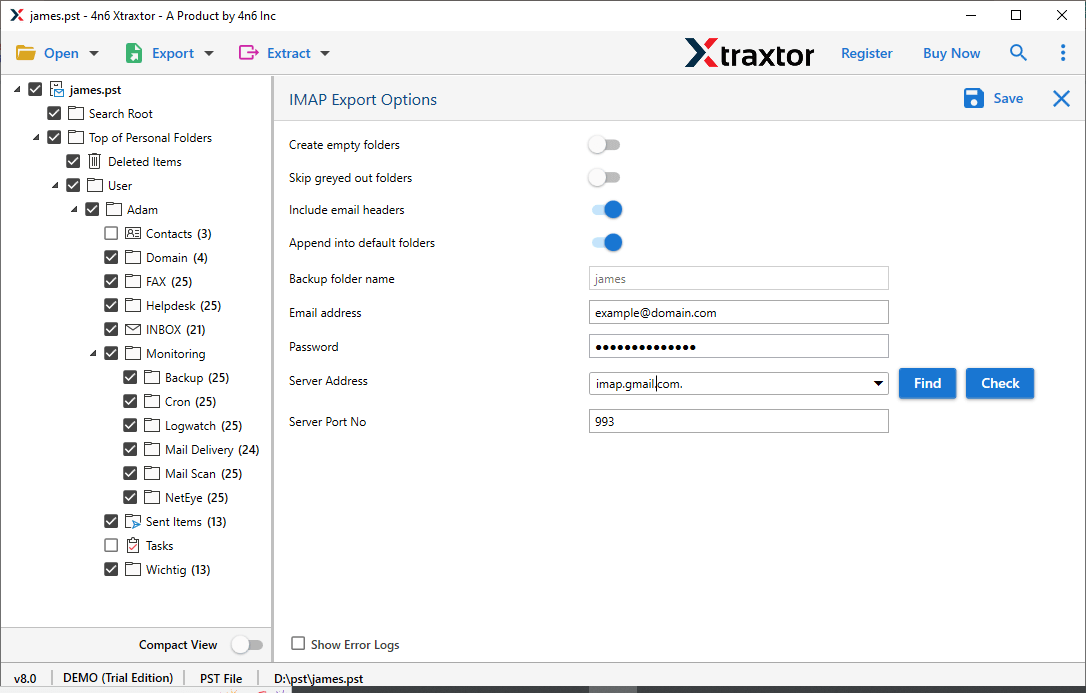
The software will automatically import PST emails into your SiteGround mailbox.
Benefits of Using a Professional Tool
Direct Migration Without Outlook: The software can import PST emails to SiteGround without installing Outlook.
Batch Migration: Users can upload multiple PST files at the same time.
Preserves Email Structure: The tool maintains folder hierarchy and email formatting.
Advanced Filter Options: Users can migrate specific emails based on date, subject, sender, etc.
Preview Option: The software allows users to preview PST emails before migration.
Supports Multiple Formats: Apart from SiteGround, the tool can export PST files to formats like MBOX, EML, PDF, and more.
Final Words
In this blog, we explained how to import PST to SiteGround without Outlook using both manual and automated methods. The manual method is free but requires Outlook and technical knowledge.
If you want a faster and more reliable solution, using a professional PST migration tool is the best option. It allows you to transfer PST emails to SiteGround safely while keeping all email data intact. You can also try the free demo version to check how the software works before purchasing.
