How to Export Emails from Mac Outlook to Windows Outlook?

Finding an effective solution to export emails from Mac Outlook to Windows Outlook? Don’t Worry. In this article, we are going to explain two simple methods to transfer emails from Mac Outlook to Windows Outlook. After reading this guide, you can easily get your emails in your Windows operating system.
Before we begin, understand why users switch from Mac to Windows Outlook.
Why users switch from Mac Outlook to Windows Outlook?
Mac Outlook users switches in windows due to multiple reasons, few of the main reasons are listed below.
- Microsoft Outlook improves its services daily for its Windows users by creating updates, delivering a powerful experience, improving collaboration tools, and adding new features for its Windows Outlook users.
- The latest version of Outlook integrates modern tools such as My Day, Tasks, Calendar, Sidebar, improved search functions and better handling of attachments under Windows.
- Outlook offers improved security with modern technology for increased reliability, especially in Windows, which every company needs.
- Windows version of Outlook offers deeper integration and native notifications, which makes outlook completely different for its windows users.
- Sometimes users known that person’s need certain emails or they want to share some important emails with someone, then they need Windows Outlook.
- If a user changes their workplace and moves to a different location and doesn’t know how to use Outlook on a Mac, then they need Outlook for Windows.
These were some of the few common reasons that show why users prefer Outlook on Windows.
Now, let’s move toward the methods.
How to Export Emails from Mac Outlook to Windows Outlook Free?
To transfer Mac Outlook emails to Windows Outlook Manually, you need to follow the below step-by-step process to get your emails in windows outlook free.
- Open Outlook application in your Macbook PC.
- Go to File option and click on “Export“.
- Now select the option “Outlook for Mac archive file (OLM)”.
- Click on “Continue” and browse the location to save your “OLM” files in your Mac.
- After that, click on “save” button to save your “OLM” files.
- Configure your “Gmail Account” with “Mac Outlook“.
- Now open your “gmail account” in your “Safari” or “Chorme” browser.
- Go to “Settings” by click on “Gear” icon and choose “See all setting” option.
- After that, go to “Forwarding and POP/IMAP” menu and enable the “IMAP” option.
- Now, again open “Mac Outlook” and click on “Preferences” option.
- Hear go to “Account option” add personal settings in the Preferences “window“.
- Click on “Plus” sign in the left corner and choose “Email” from the “drop down” menu.
- Enter “Gmail account” details and click on “Add Account” option.
- Move “OLM” File to “Gmail Account“.
- Right-click on the “Newly added Gmail” and choose “New Folder“.
- Name this “New Folder” and click on “File” and select “Import” option.
- Select the “OLM” file that is exported in the beginning of this steps.
- Click on “Move” button, then,”Choose Folder“.
- Now, find the “Gmail folder” and select “Copy” button.
- Finally your “Mac Outlook” emails are imported in “Gmail“.
- Add the Same “Gmail Account” in “Windows Outlook“
- Open Outlook on your Windows system.
- Go to “File” and select “Add Account” option.
- Here enter the same gmail account and click on “connect” button.
- Enter your login password and click on “connect” to finish the process.
Finally, you can see your “Mac Outlook” emails in “Windows Outlook“.
If you follow all the steps, you can export Mac Outlook emails to Windows Outlook for free.
Limitations:
Using the above steps you can get your Mac Outlook emails but, this method also has some disadvantages, which are listed below –
- It carries a high risk of data loss.
- The process is lengthy and time-consumeing for bulk files.
- This method is easy for tech users, but difficult for non-tech user.
- Exported emails can lose their attachments during this process.
- You need to switch from four times to export emails.
These were the some of the main limitation of using this method.
If you are confused or unable to follow the procedure, you can also try the next method.
How to Export Emails from Mac Outlook to Windows Outlook Professionally?
As we know, the method described above is lengthy and time-consuming. That’s why we are recommonding a best tool for this, i.,e Xtraxtor. Using this software you can export emails form mac outlook to your Windows Outlook. The software is user-friendly and specifically designed for both tech users or non-tech users. It allows you to export emails in bulk with just a few clicks. Additionally, it offers an advanced filter option that allows you to easily export required and non required data.
Click on the below download button to check its working.

Steps to Export Mac Outlook Emails to Windows Outlook
- Install and run the software.
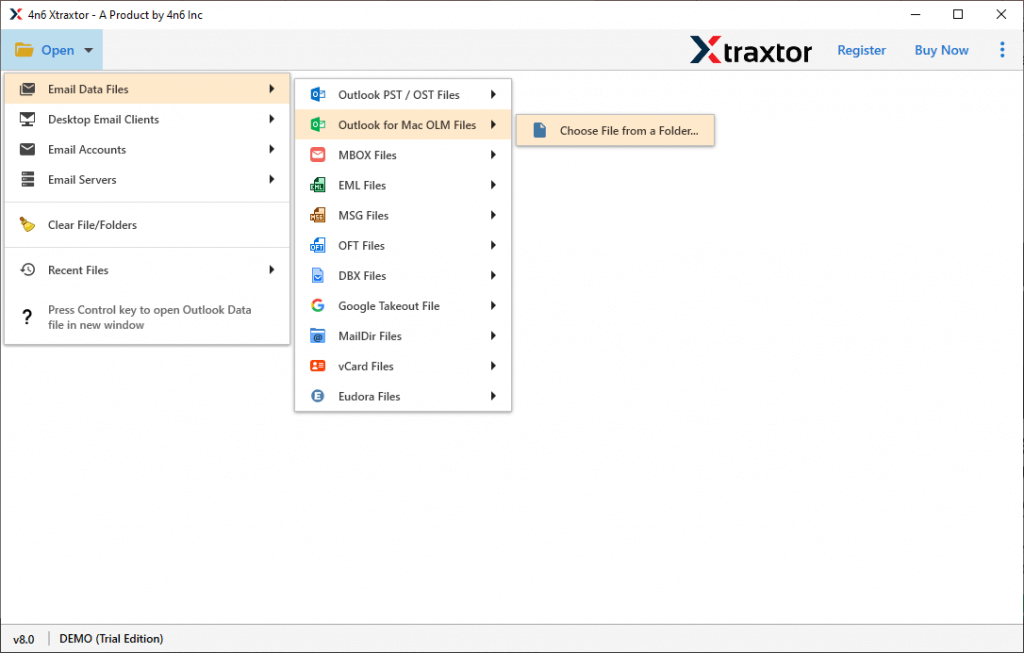
- Click on “Open” button, select “Email Data Files” and choose “Outlook for Mac OLM“Files option.
- Then, click on “Choose File from Folder” option.
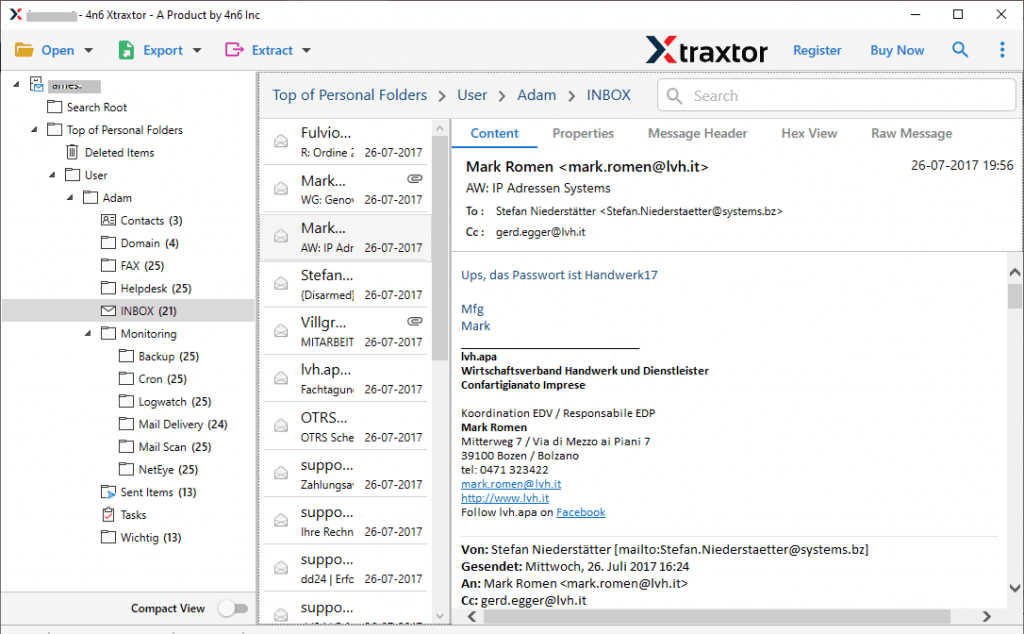
- Now you can see your all emails of Mac Outlook.
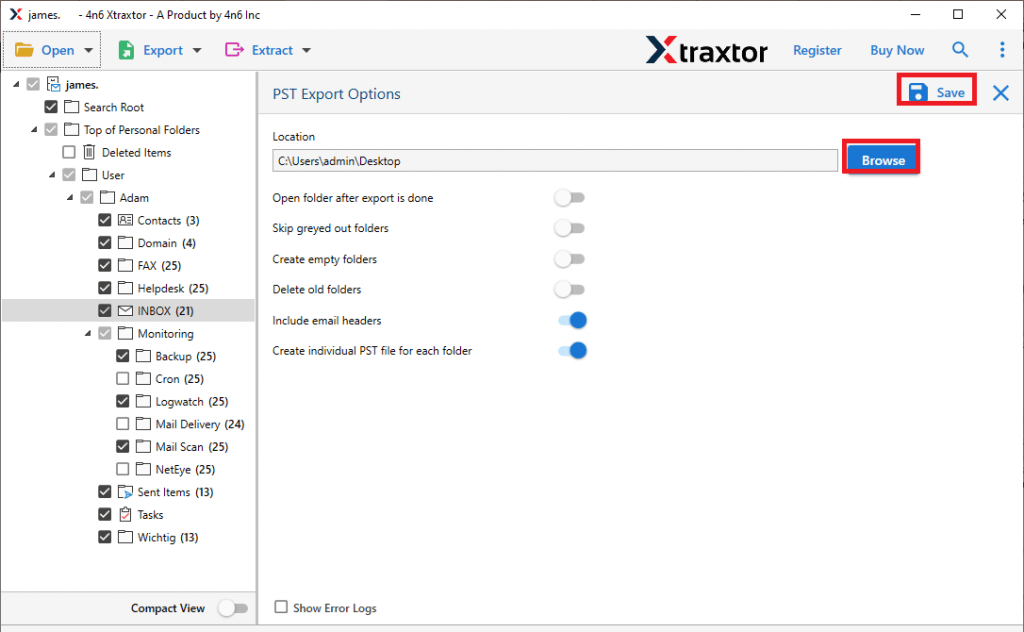
- Click on Export button and choose PST file format.
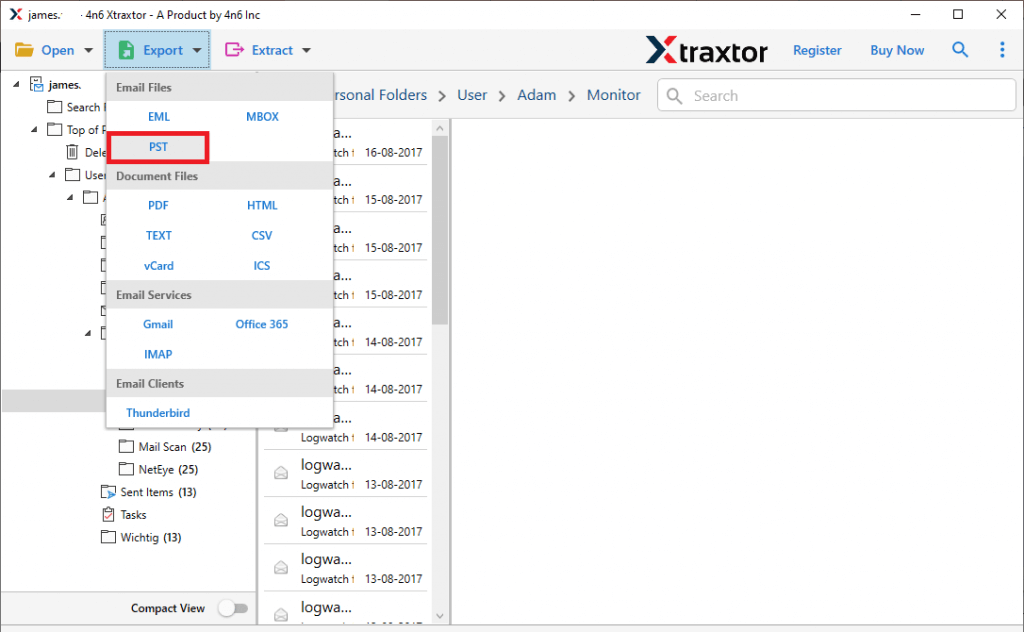
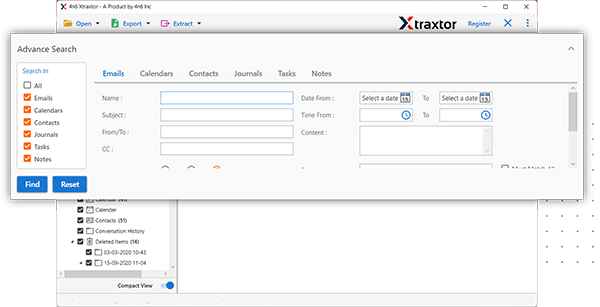
- Now, use the filters according to your need and do selected emails export from Mac Outlook.
- Browse the location in your windows and save exported file in your system.
- Now, press the “Save” button to start the process.
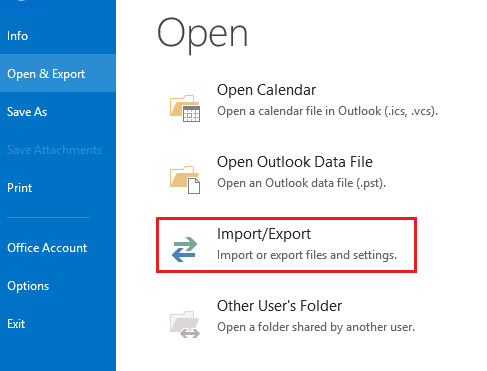
- Open your outlook application and import this exported PST file by use of import/export option.
Finally, your PST is exported in Outlook Windows.
If you use this software, you can easily export your emails.
Features of Professional Tool
- This tool offers with a free trial version, that allow you to explore its features.
- You can transfer complete mailbox of Mac Outlook to Windows Outlook at once.
- It maintains data integrity when exporting emails with attachments.
- Software enables bulk export all at once with just a few clicks.
- This software works on Windows 11, 10, 8, 8.1, 7, and all other OS versions.
- It gives advance filter option such as to, from, subject, date, name, etc.
Final Thoughts
In this blog, we explained step-by-step methods to export emails from Mac Outlook to Windows Outlook. Here, we have disscussed both manual and professional solutions. When we tried this manual solution, we found that this solution was lengthy and time-consuming. A minor mistake during the manaual process can loss the original email structure. Therefore, using a mentioned professional tool is safest option for tech and non-tech users. You can use both the methods to transfer emails from Mac Outlook to Windows Outlook.
You can also try the free trial version of the suggested software. If you are satisfied with the results, you can then opt for the licensed version.
