How to Export Thunderbird Emails to PST File?

Trying to export Thunderbird to PST file in a secure and reliable way? You are not alone. Many users struggle to find a working method because most online solutions are either outdated or incomplete. If you are converting Thunderbird to PST for the first time, choosing the right approach can be confusing. To help you, this blog explains all the tested and reliable methods to export Thunderbird emails to PST, with clear steps and important limitations, so you can choose the best solution based on your needs.
This guide covers both manual and professional ways to convert Thunderbird emails to PST without data loss.
Before you start exporting Thunderbird emails to PST, there are a few important things you should understand. Knowing these points will help you avoid errors, data loss, and wasted time.
- Thunderbird does not support PST format natively
- PST files are mainly used by Microsoft Outlook
- Manual methods have limitations and are suitable only for small amounts of data
- Large mailboxes may take more time and system resources
- Attachments and folder structure need special attention
- Choosing the right method depends on your email volume and technical comfort
Understanding these basics will help you choose the most suitable method to convert Thunderbird emails to PST safely.
Methods to Export Thunderbird Emails to PST
Neither Thunderbird nor Outlook provides any built-in feature to convert Thunderbird to PST directly. Hence, you need to take an indirect approach or any third-party tools. Let’s explore all the possible methods to solve your query quickly.
How to Convert Thunderbird Emails to PST Manually?
You can export Thunderbird emails to PST files using Gmail as a mediator. Follow the steps to move Thunderbird emails to PST format-
- Open the Thunderbird application.
- Click on horizontal lines in the top right corner, select the “Account Settings” option.
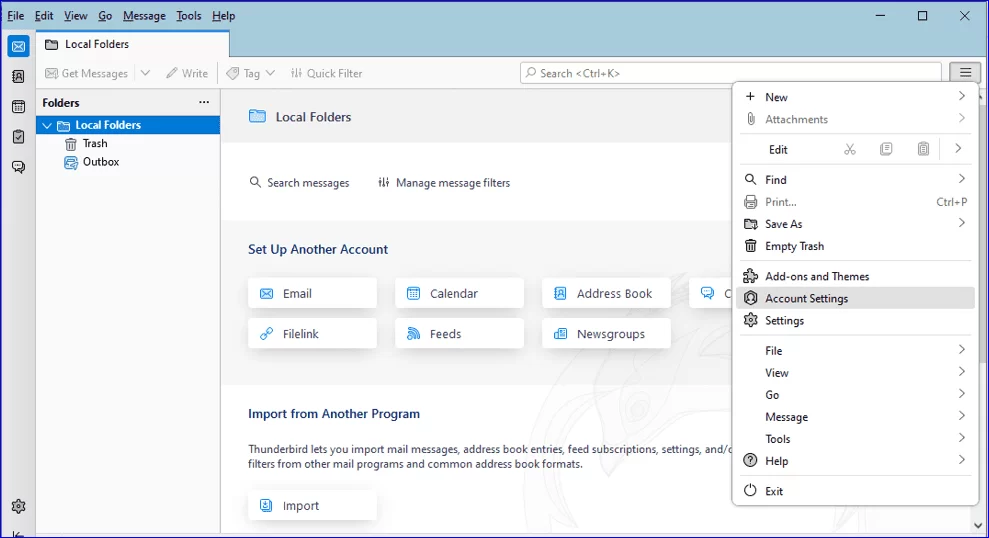
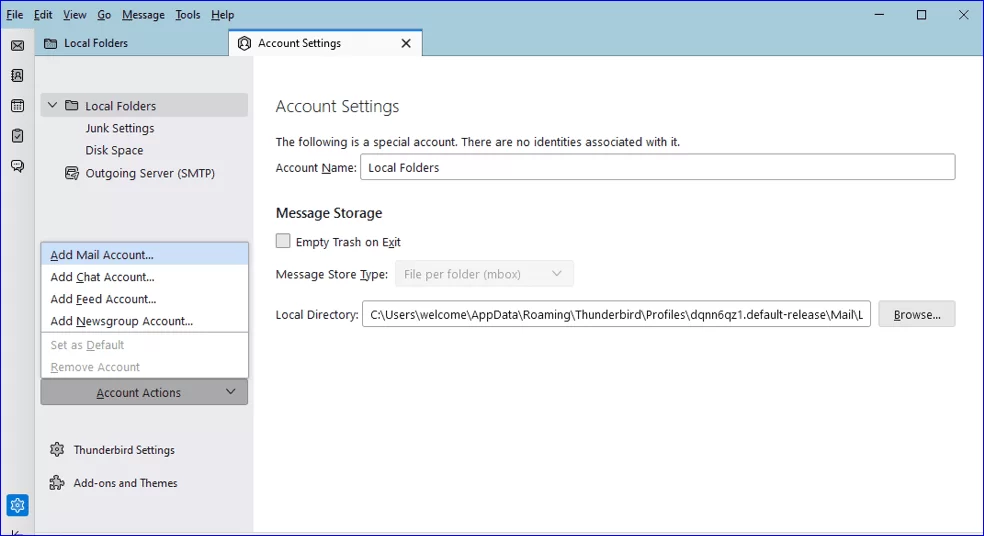
- Click the “Account Actions” and select the “Add Mail Account” option.
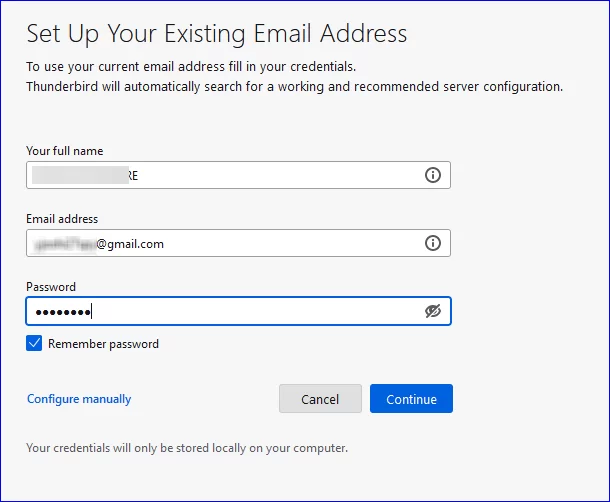
- After that, provide the following details and click “Continue“.
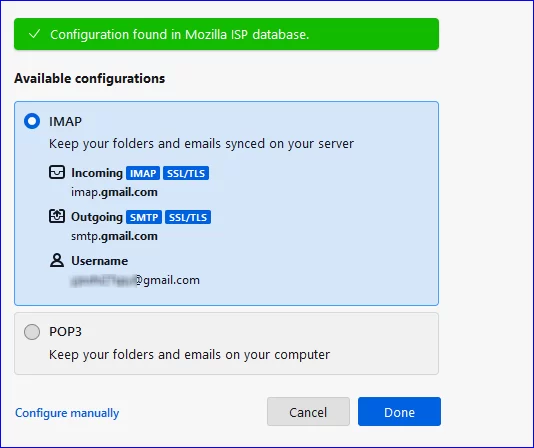
- Select the “IMAP” option and click “Done“.
- Your Thunderbird email account is configured completely.
- After the 2nd step, your Gmail account is on Thunderbird.
- Click “Right” on Gmail mailbox, create a “New folder“.
- Name this folder and click on “Create Folder“.
- Now, go to Thunderbird mailbox and select “Emails“.
- Right-click on selected emails and choose “Copy option“.
- After that, click on “Gmail mailbox” and select the newly created “Folder“.
- Paste selected “Thunderbird emails” in this folder.
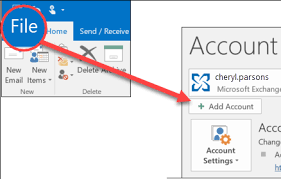
- Open the Outlook application.
- Click on “File” and select the “Add Account” option.
- Enter your Gmail address and click on “Connect“.
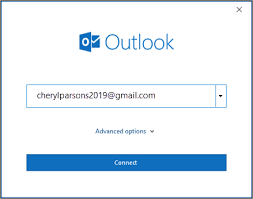
- Enter the Password of your Gmail account and click the “Finish” button.
- Now, the Gmail account is added to Outlook.
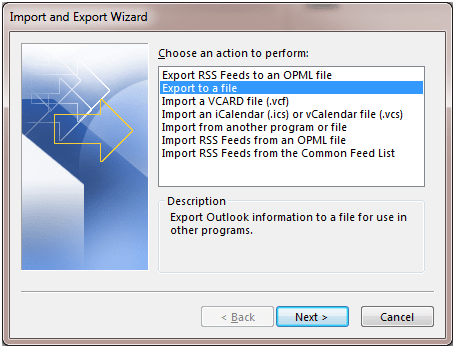
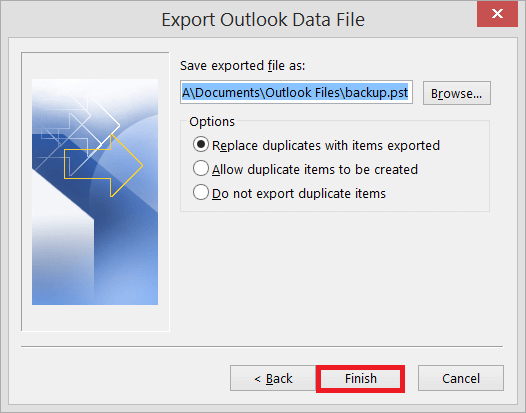
- Navigate to File >> Open & Export >> Import/Export.

- Select “Export to a File” and click on “Next” button.
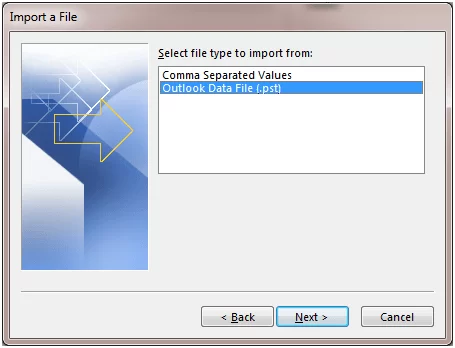
- Choose “Outlook Data File (.pst)” and press “Next“.
- After that, select the newly created “folder” in which Thunderbird emails are “saved” and hit “Next“.
- Browse the location to save the resultant file and then click on the “Finish” button.
Done! Your process of exporting Thunderbird emails to PST format is completed. However, there are a few limitations you will face some limitations with the manual method described below.
-
- It consumes too much time.
- Not helpful for non-tech users.
- You need to install two different applications.
- It has a high risk of data loss during the process.
- This method has 5 steps, which are not easy to remember.
These are some of the limitations of the manual method, which prevent us from easily exporting Thunderbird emails to PST.
Now we will learn how to easily and seamlessly convert Thunderbird emails to PST.
How to Export Emails from Thunderbird to PST File Automatically?
Try Xtraxtor on your Windows system and convert Thunderbird emails to PST in just a few clicks. The tool will export emails directly from Thunderbird, without modifying folder structure. Additionally, you can export selected email folders in PST files.
This software is designed with advanced algorithms and a simple, easy-to-use interface that makes it suitable for all types of users.
You can download the free demo version and export Thunderbird to PST for free.


Steps to Export Thunderbird Email to PST File
- Run Xtraxtor on your system.
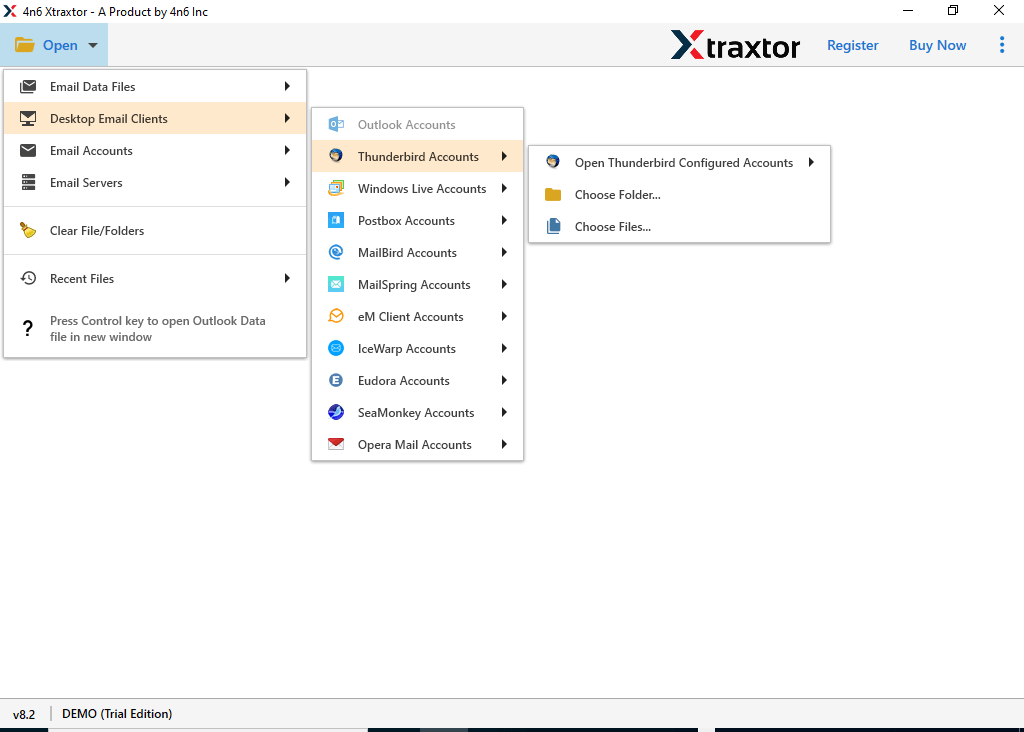
- Now, click on Open >> Desktop Email Clients >> Thunderbird Accounts >> Choose configured Thunderbird Account.
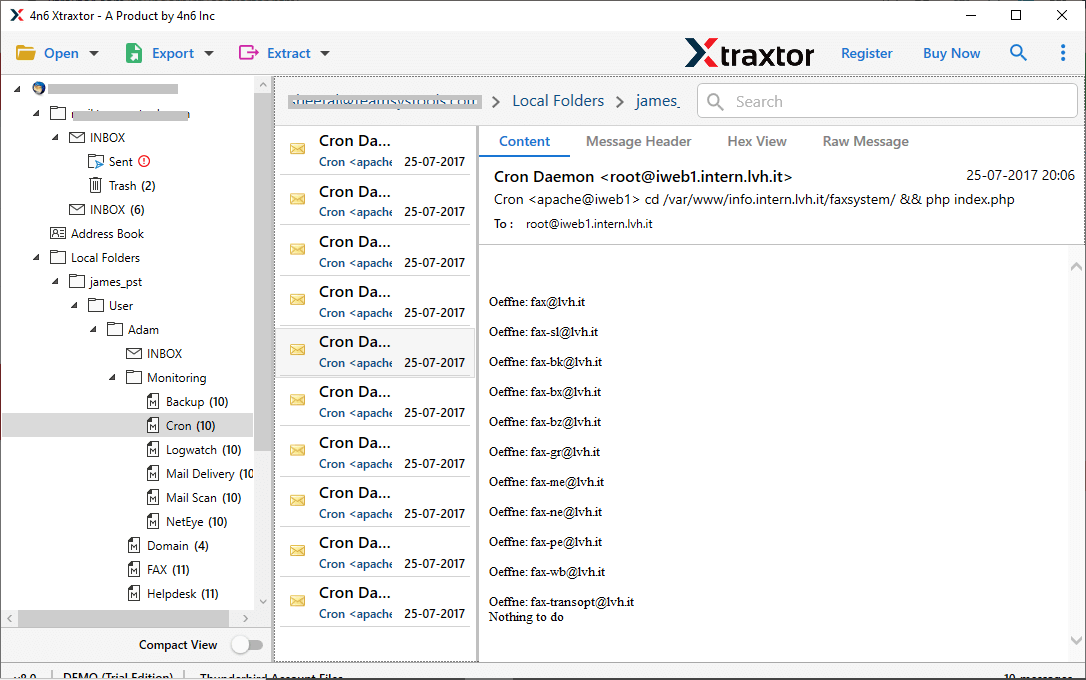
- After all, you will see a preview of all Thunderbird emails before exporting them to PST.
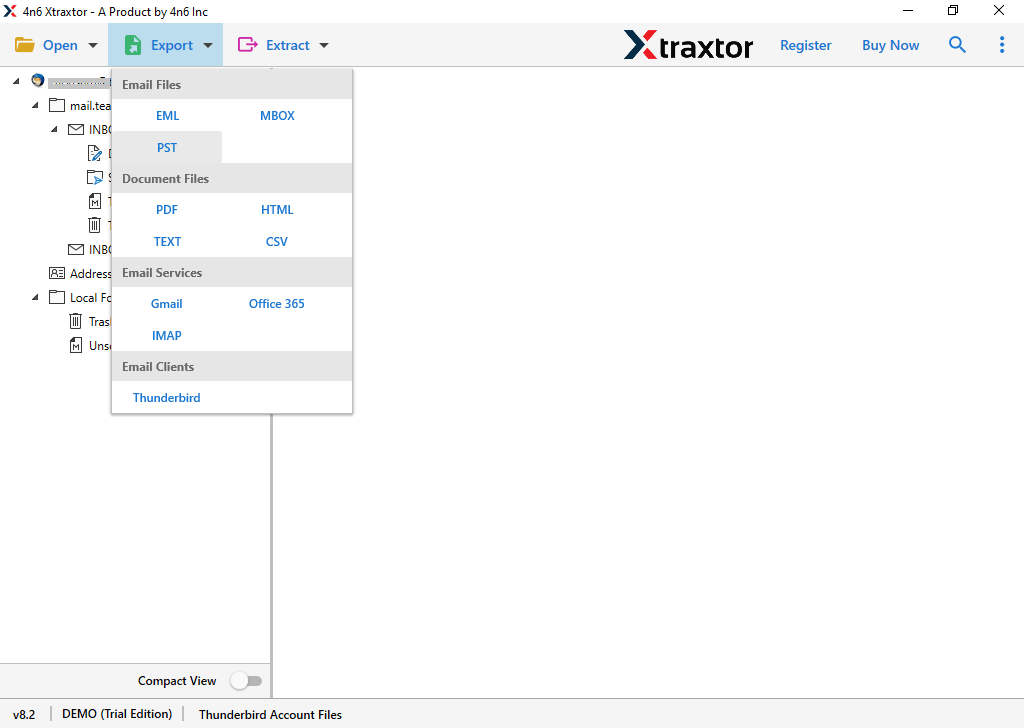
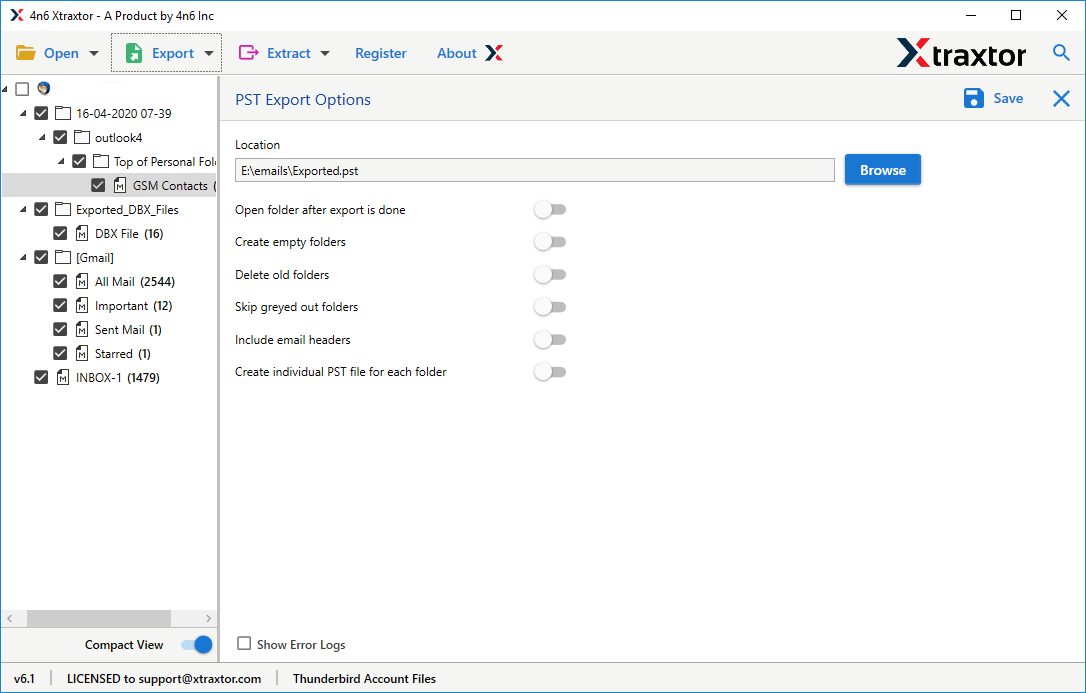
- After that, click on “Export” and choose “PST” options.
- Select “Thunderbird folders” and “subfolders” that you want to convert.
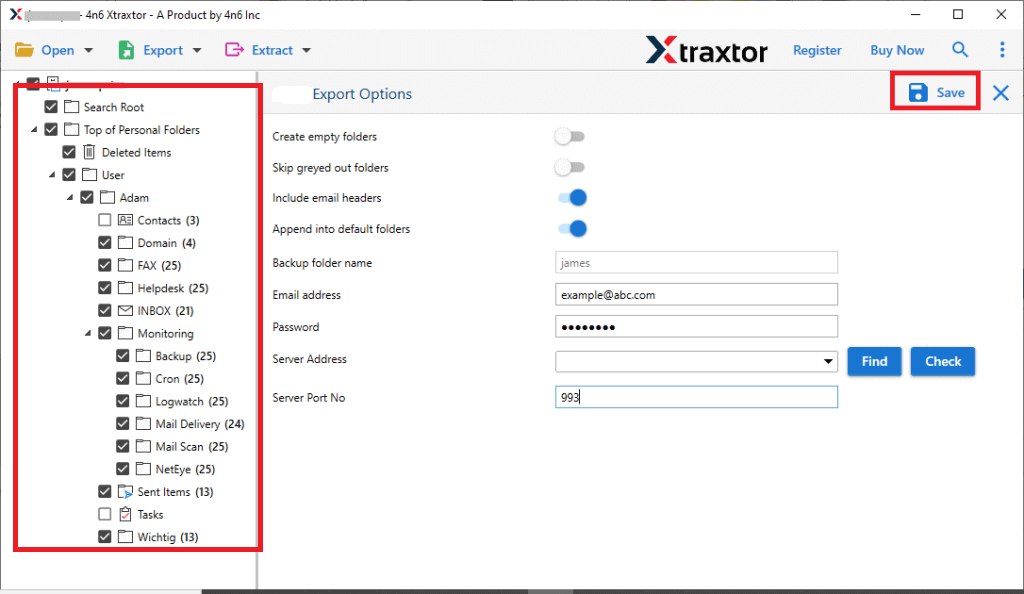
- Add “filters” to export selected emails from Thunderbird.
- Browse the target location and then press the “Save” button.
Done! By following the above steps, you can easily export Thunderbird to PST file format.
Features of Automatic Software
- This tool comes with a free trial version.
- It gives you error-free results with 100% security.
- The software can export emails to PST files in bulk at a time without loss of single data.
- It can convert PST files directly, without using any other applications.
- You can also migrate Thunderbird to Gmail using the same tool.
- Software’s simple user interface makes it easy to use for tech and non-tech users.
- Support on all the latest and older versions of windows such as 11, 10, 8, 8.1, 7, and others
Final Thoughts
In this guide, we discussed both manual and automatic methods to export Thunderbird emails to PST. While the manual method is free, using this method to convert Thunderbird emails to PST is quite tricky, and it also has some limitations. However, using an automated solution will make exporting easier.
You can try a free trial version of this software to export Thunderbird emails to PST file format. If you are satisfied with the results, you can switch to the licensed version of this tool.
