How to Export IMAP to PST File Format?

Summary: If you are looking for a reliable solution to export IMAP to PST format, this blog is for you. Here, you will learn how to convert IMAP mailbox data into a PST file easily and securely. Just read the complete guide carefully to understand the process step by step.
PST is the most commonly used file format for importing and exporting data in Microsoft Outlook. So, if you want to access your IMAP emails in Outlook, converting IMAP emails to PST becomes necessary. Once converted, you can easily manage, store, and access your IMAP emails directly in Outlook without any limitations.
However, IMAP-based email accounts depend on server connectivity, while Outlook allows users to work offline and sync data with Exchange Server. Due to this difference, many users look for a compatible and safe way to export IMAP emails to PST format without risking data loss.
In this blog, we will explain the most effective methods to export IMAP mailbox to PST while ensuring complete data safety and accuracy. Let’s get started.
Why Users Export IMAP to PST File?
There are many reasons why users want to convert IMAP to PST file format. Some of the most important reasons are given below;
- Sometimes users need to manage and organize their work and database, so they choose PST.
- To prevent their important data from cyber attacks.
- Get access to their email offline, or to avoid server errors.
- The IMAP server’s mailbox may be full, preventing new messages from being stored.
- Users have a risk of losing important emails.
These were the most common reasons that they needed the PST file format.
Now, let’s move towards the methods.
How to Backup IMAP Emails to PST for Free?
You can easily convert emails from IMAP to PST format by configuring IMAP with the Outlook application. After setting up IMAP with Outlook, follow the steps below:
- Open the Outlook application on your Windows PC.
- Add your email account to Outlook First.
- Enter your Login credentials in Outlook and log in to your account.
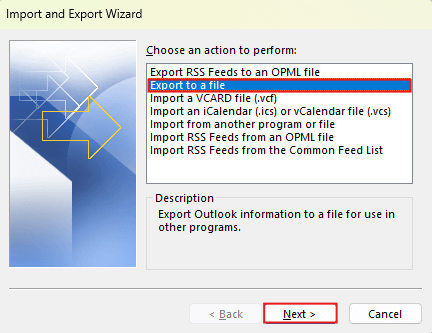
- Then, go to the File menu and select.
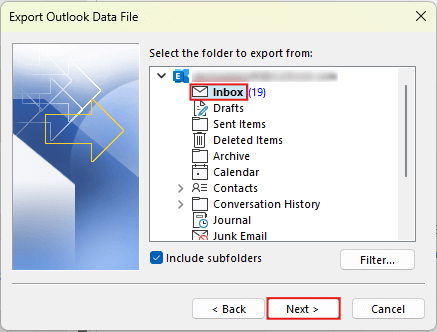
- Go to the Open & Export option and select the “Import/Export” button.

- Now, choose the option “Export to a file” and click on the “NEXT” button.
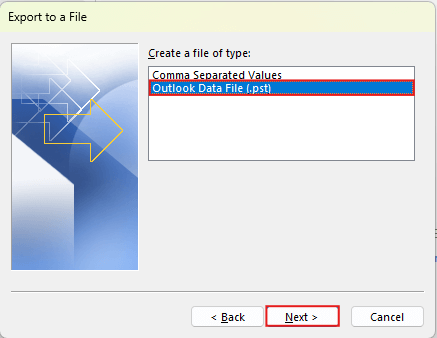
- Select the option “Outlook Data File(.pst)” and click “OK” to export IMAP to PST.
- Select folders and choose all the folders manually that you need.
- Browse the location to save your converted file in PST format and click on the “Finish” button.
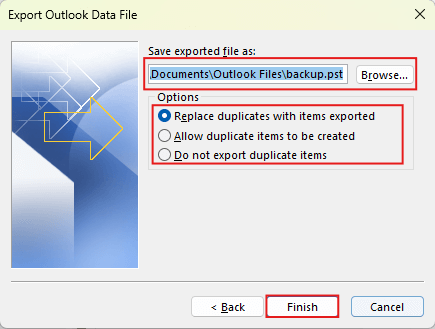
Finally, you have successfully converted the IMAP to PST file.
If you follow these steps, you can create PST files in just a few clicks.
Limitations:
- This process is time-consuming for bulk data.
- The steps are lengthy and easily forgettable for non-tech users.
- Even the smallest errors can lead to the permanent loss of emails.
- Selective export is not possible.
- High risk of losing email attachments.
- Older emails can not be converted easily.
These were some of the primary limitations of using a manual process.
If this process didn’t meet your requirements, you can try the next method.
How to Convert IMAP Emails to PST Professionally?
If the above method won’t work and you need an instant solution, you can try Xtraxtor software. This tool simply export IMAP to PST files while maintaining file hierarchy with email attachments. It also offers the option to selectively convert IMAP emails to PST using an advanced filter. Additionally, you can also backup IMAP to PST . It also offers advanced filter options for selective export.
Click below to download the free demo version of this software and test its functionality.

Steps to Export IMAP to PST File Format
- Install and open the Software in your operating system.
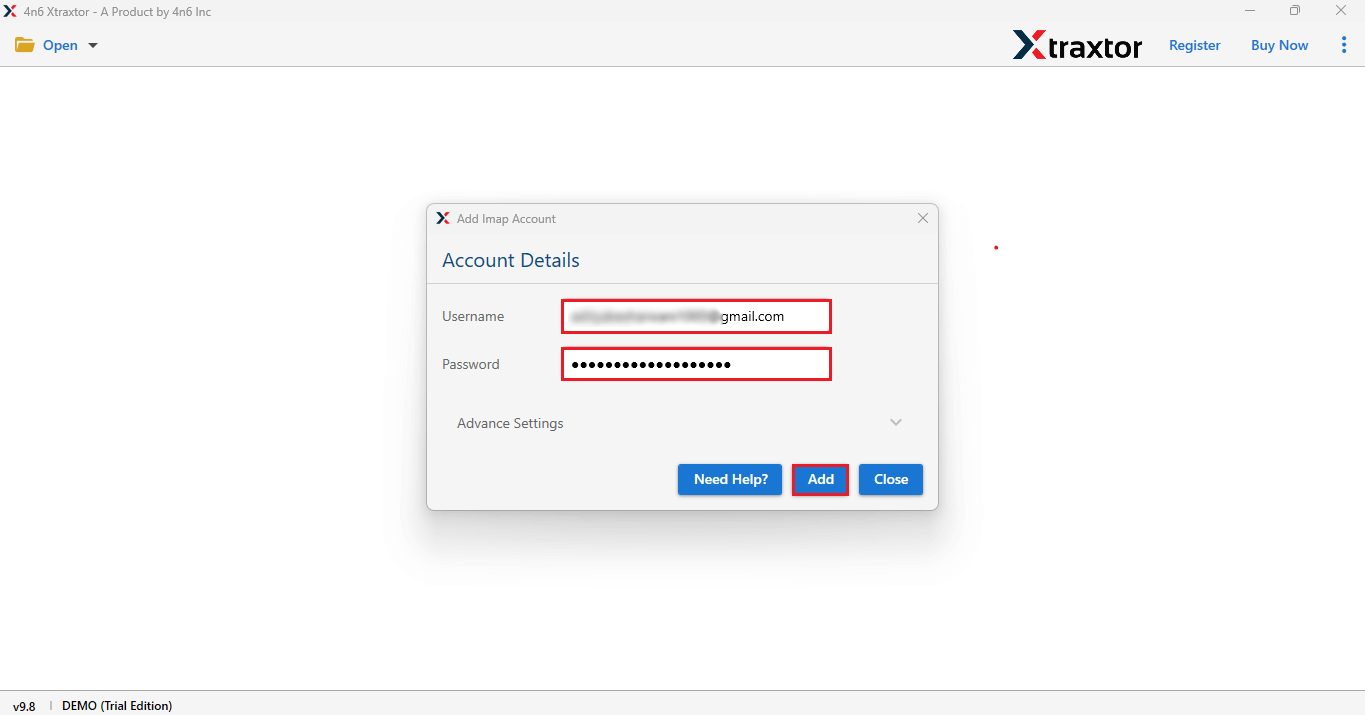
- Go to the Open button and click on the email account option, and choose Add account.
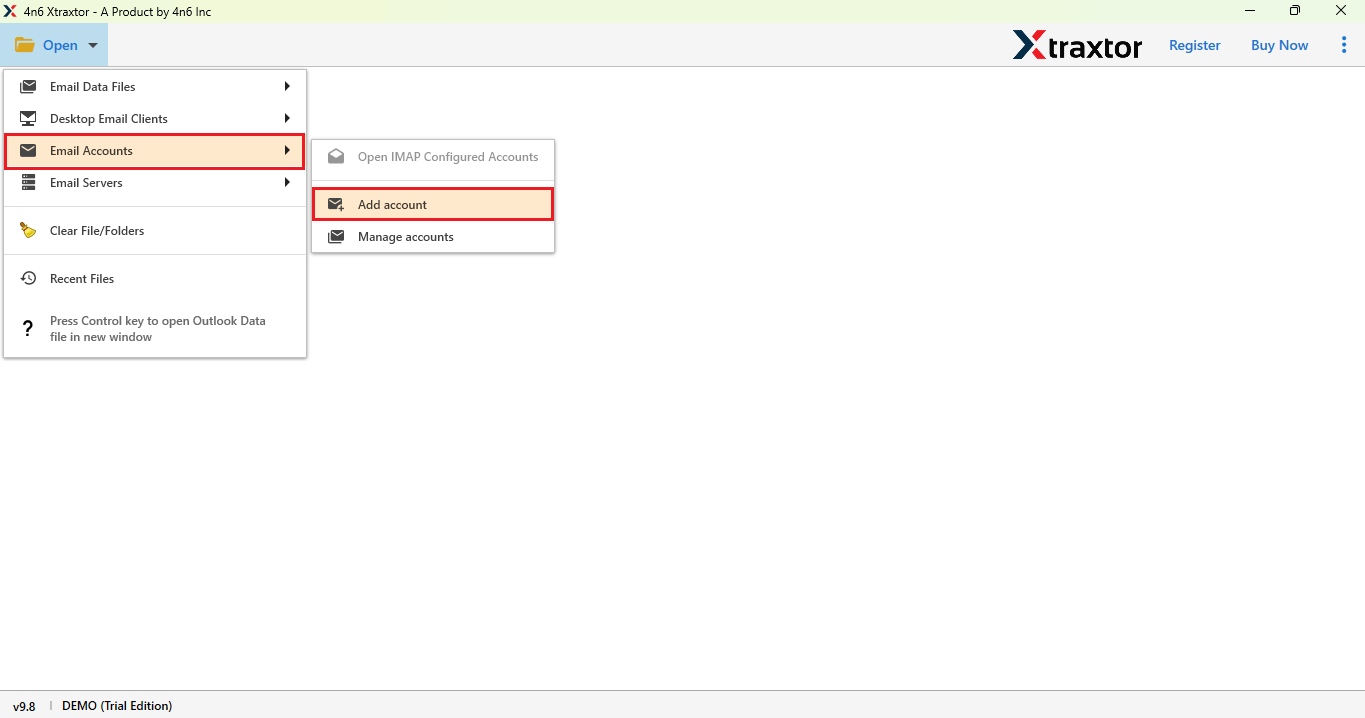
- Add your Email account with its App password.
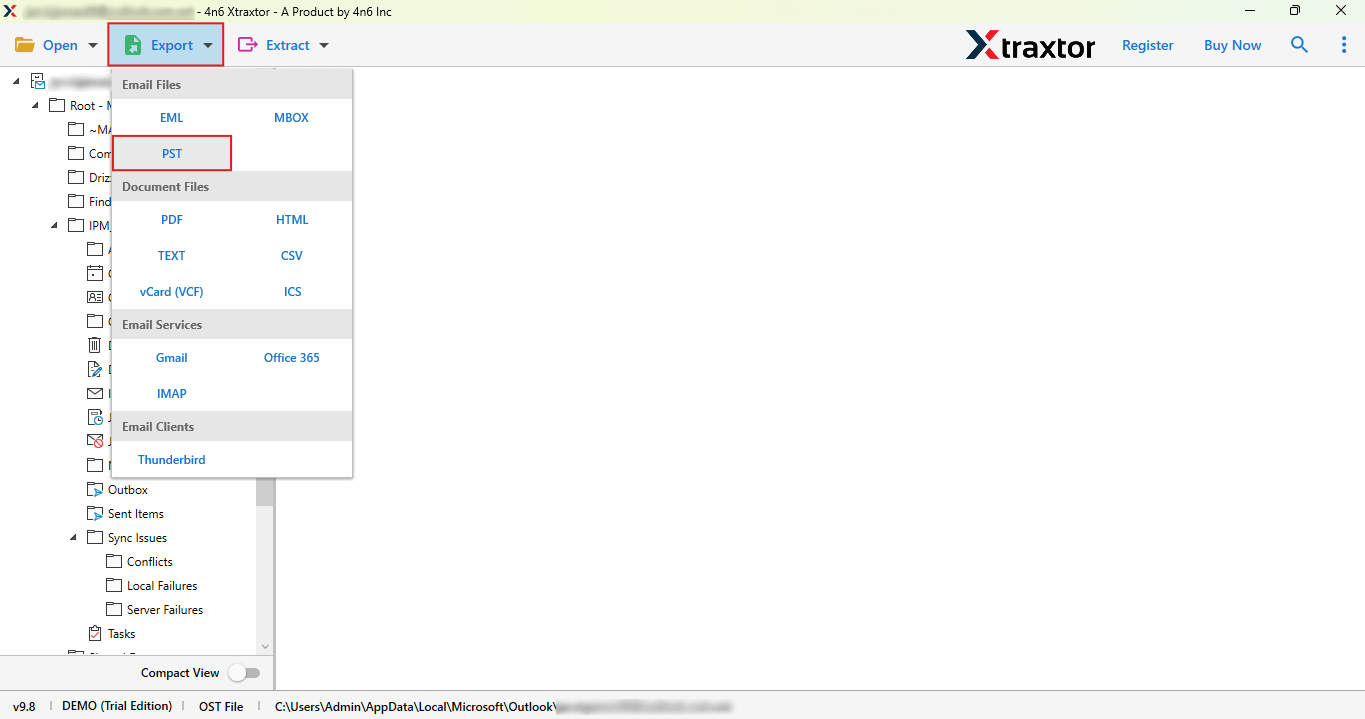
- Now, click on the export button and choose PST.
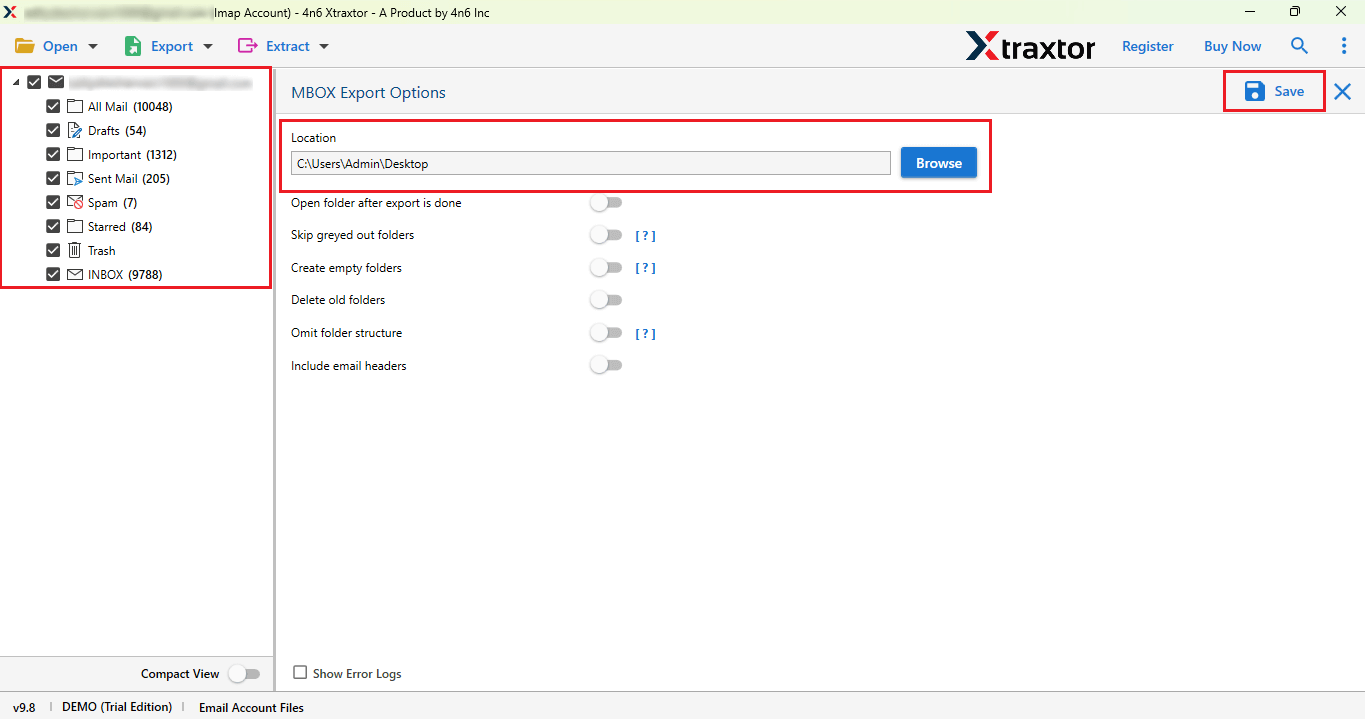
- Lastly, select the folder, browse the location, and click on the Save button.
Done! You will successfully download IMAP to PST.
Using the method described above, you will easily get a PST file.
Advantages of Using a Professional Solution
- Maintains original folder hierarchy during export for easy access
- Preserves email metadata like To, From, Subject, Date, cc, and bcc
- Offers advanced filter options to export selective emails by date, sender, subject, or keywords
- Supports multiple IMAP accounts export in a single session
- Includes a preview option to review emails before exporting
- No file size limitation for exporting large mailboxes
- Ensures 100% data integrity with zero data loss
- User-friendly interface suitable for technical and non-technical users
- Does not require the installation of any email client or third-party application
- Generates a detailed export report/log after completion
- Secure login using IMAP authentication without storing credentials
These were the advantages of using the professional solution.
Final Thoughts
In this blog, we have explained two solutions to export IMAP to PST. While using the manual solution, we found that saving IMAP emails to PST file format is time-consuming, carries the risk of data loss, and is a lengthy process. Therefore, using a professional solution is the best and most reliable option to convert IMAP to PST files.
You can try a free demo version of this software to check if it works. If you are satisfied with the outcomes, you can also go with its licensed version. This professional solution is easy to use for both tech and non-tech users.
