How to Export Hostinger Emails to PST File?

Are you searching for a way to export Hostinger emails to PST file but don’t know how to start? Don’t worry. Many users want to convert Hostinger emails into PST format for backup and Outlook access.
Hostinger email works online, so you can access your emails from anywhere. But keeping emails only on the server is not always safe. If your account gets hacked, suspended, or deleted, you may lose important data.
To keep your emails safe, you can export Hostinger emails to a PST file. PST is the file format used by Microsoft Outlook. Once you create a PST file, you can open and manage your emails easily in Outlook anytime.
In this guide, we will explain both manual and automatic methods to convert Hostinger emails to PST format.
How to Export Hostinger Emails to PST File for Free?
Follow these steps:
- Open Microsoft Outlook on your computer.
- Go to File >> Add Account.
- Enter your Hostinger email details and configure it using IMAP settings.
- After setup, go to File >> Open & Export >> Import/Export.
- Choose Export to a File and click Next.
- Select Outlook Data File (.pst) and press Next.
- Choose the Hostinger mailbox folders you want to export.
- Select a destination location and click Finish.
Your PST file will be created successfully.
Limitations of Manual Method:
- Microsoft Outlook installation is required.
- The process can be time-consuming.
- Import/Export option may sometimes be disabled.
- No option to export selective emails easily.
- Risk of syncing errors during configuration.
How to Convert Hostinger Mailbox into PST File?
Now, try Xtraxtor software to export Hostinger emails to PST with attachments. It allows you to transfer complete mailbox data, including emails, attachments, and folder structure, without losing any information. The software supports bulk export, so you can convert multiple folders at once and save time. It also provides advanced filters to export only selected emails based on date, subject, or sender. You can preview emails before exporting them and choose the desired location to save the PST file. The tool does not require Outlook installation and works smoothly on all Windows versions. With its simple interface and secure login process, anyone can easily use it without technical knowledge.
You can also download the free demo version to check how the software works.

Steps to Export Hostinger Emails to PST File
Step 1. Download and install the software on your Windows computer.
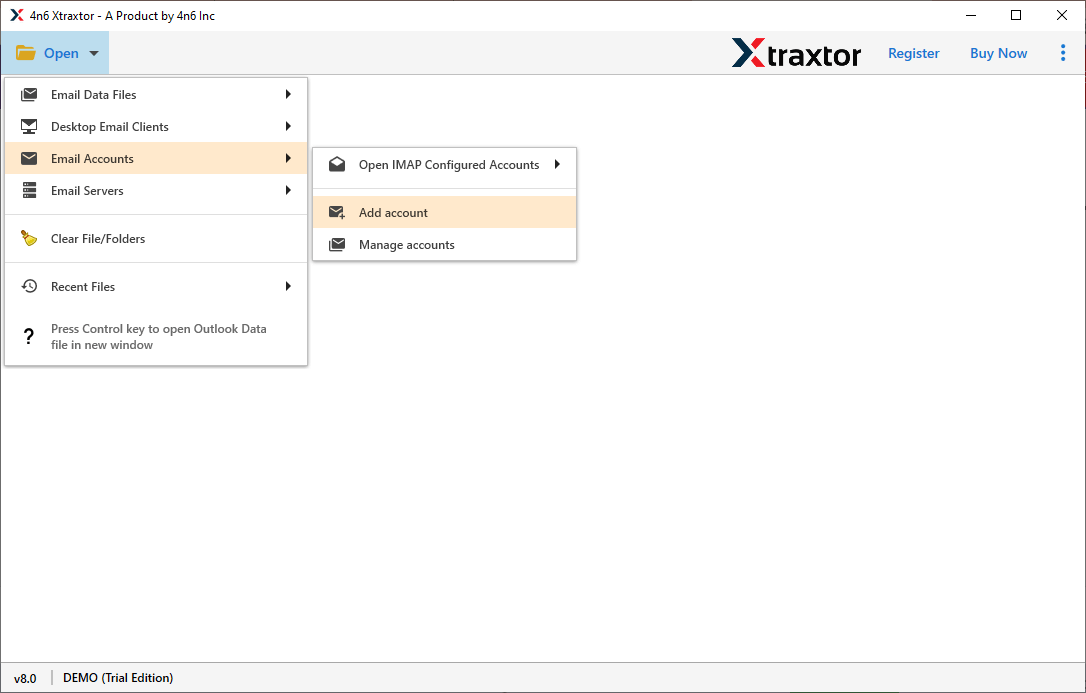
Step 2. Open the software and go to Open >> Email Accounts >> Add Account.
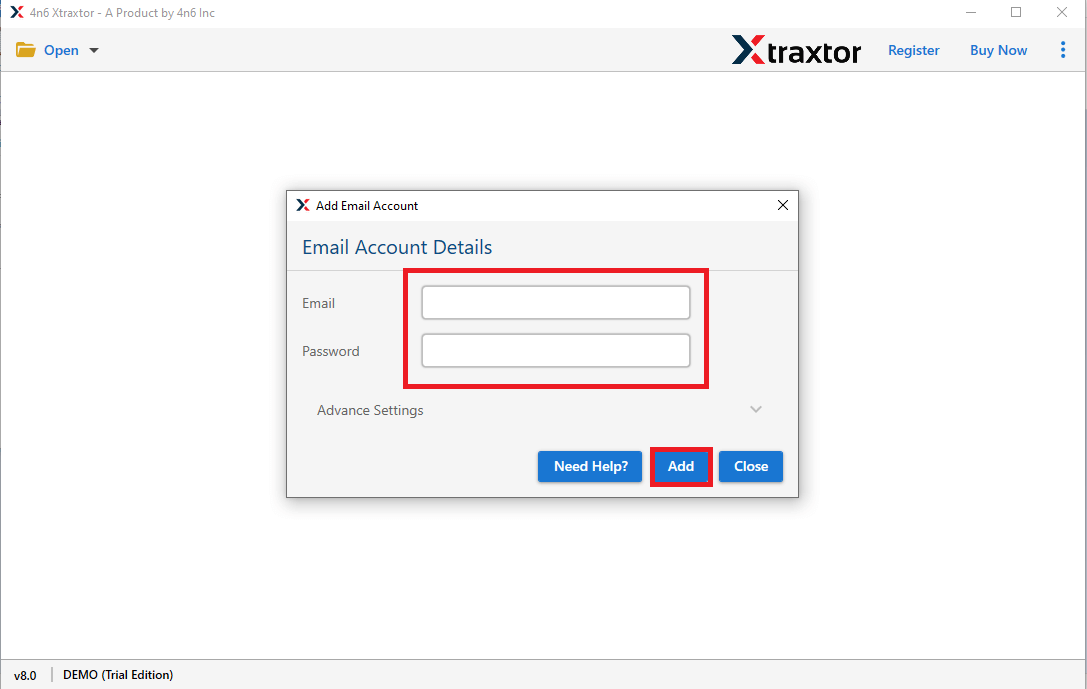
Step 3. Enter your Hostinger email login credentials and click on the Add button.
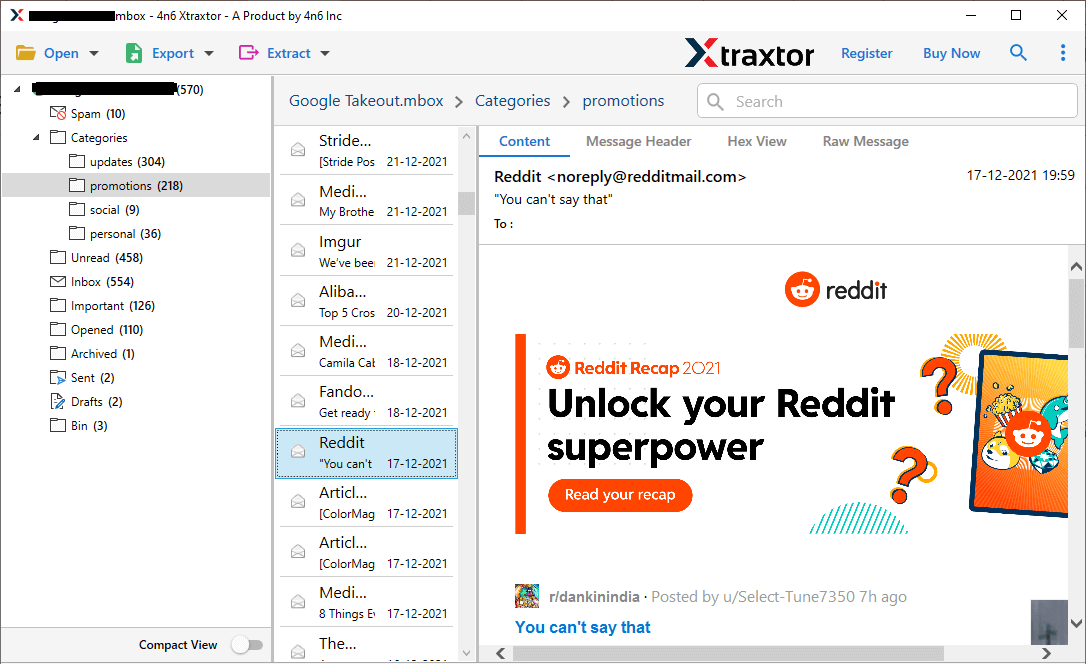
Step 4. After the mailbox loads, you can preview all your Hostinger email folders.
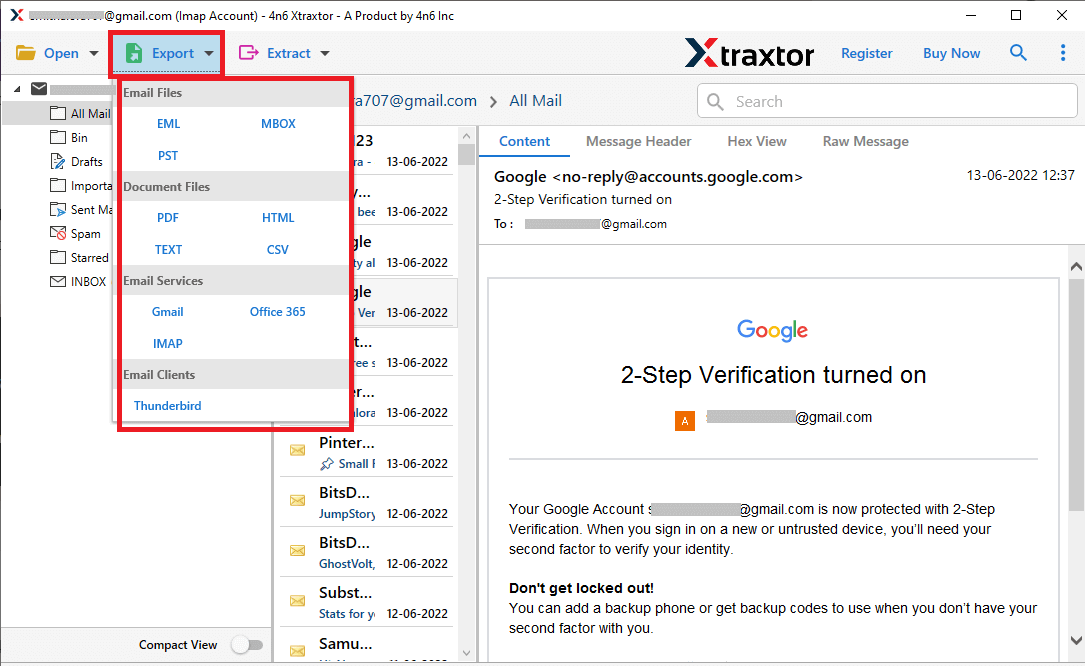
Step 5. Click on Export and select PST as the saving format.
Step 6. Choose the required Hostinger email folders that you want to export.
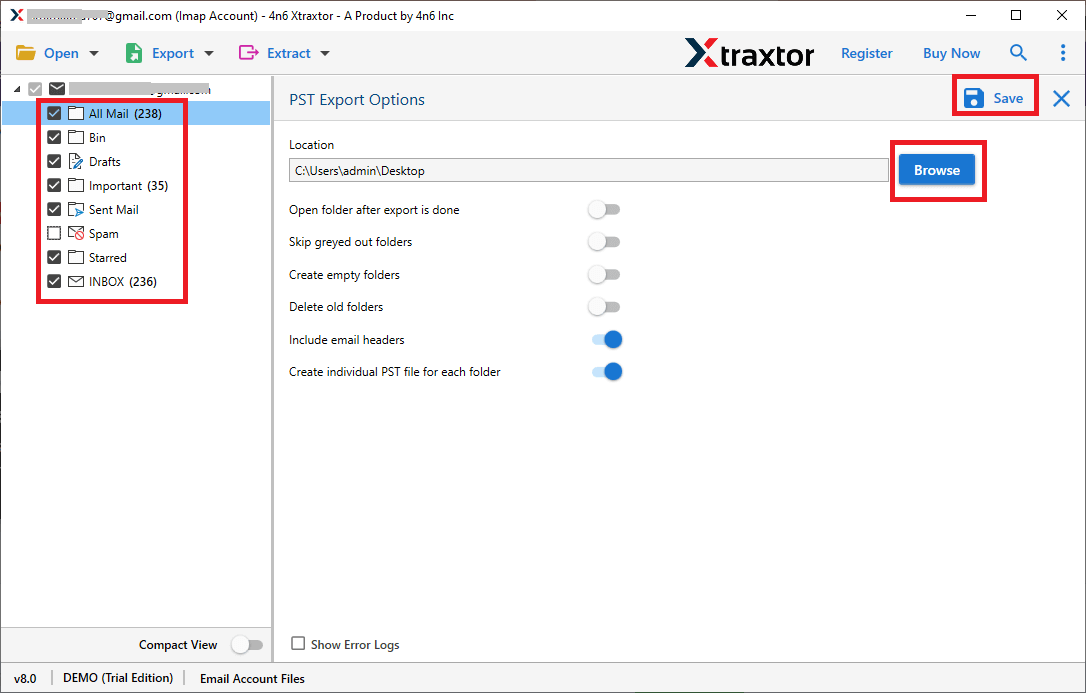
Step 7. Click on Browse to select the destination location, then click Save to start the process.
The export process will begin immediately. Within a few minutes, your Hostinger emails will be successfully saved into PST format.
Some of the major benefits of using the automated software;
- Export complete Hostinger mailbox to PST in one go
- Keep all email attachments safe during export
- Maintain original folder structure
- Preserve email details like To, From, Date, and Subject
- Export selected folders only if needed
- Use date filter to export specific emails
- No need to install Microsoft Outlook
- Simple and user-friendly interface
- Fast and secure export process
- Supports bulk email conversion
Conclusion
In this blog, we explained two methods to export all emails from your Hostinger account to PST format. In the manual method, you can connect your Hostinger account with Microsoft Outlook and export emails, but the process can be limited and time-consuming. With the automated solution, you can easily export emails from all Hostinger mailbox folders to PST in one go.
So, just give it a free try and check its complete working process. Once you are satisfied with its working, then upgrade to it’s licensed version.
