How to Add Blueyonder Email to Outlook?

If you are looking for the right guide to add Blueyonder email to Outlook, then you are in the right place. In this blog, you will learn how to easily add and migrate Blueyonder emails to Outlook PST format.
In the following section, we will share quick steps and also explain a professional solution to make the process simple and fast. But first, let’s understand what Blueyonder email is.
Blueyonder is an email service used by many users for personal and business communication. However, many users want to switch from Blueyonder to Outlook due to various reasons, such as:
- Want to use Outlook for better email management
- Need offline access to emails
- Moving from webmail to a desktop-based email client
- Backup and security purposes
- Personal or professional requirements
How to Add Blueyonder Email to Outlook Manually?
One of the easiest ways to add Blueyonder email to Outlook is by using IMAP settings. This method allows you to sync your emails with Outlook.
Follow the steps below:
- Open Outlook and go to File >> Add Account.
- Enter your Blueyonder email address and click Connect.
- Choose IMAP as the account type.
- Enter the required server details.
- Enter your Blueyonder login credentials and click Next.
- Once configured, your emails will start syncing in Outlook.
This method works, but it has some limitations.
How to Transfer Blueyonder Email to Outlook Easily?
If you are looking for a simple, fast, and secure way to transfer Blueyonder emails to Outlook, then Xtraxtor is a perfect solution. This tool is specially designed to help users migrate emails without any technical knowledge or complicated steps.
With this software, you can easily export Blueyonder emails into PST format, which is fully supported by Microsoft Outlook. Once the conversion is done, you can directly open or import the PST file into Outlook and access all your emails without any issues.
One of the biggest advantages of this tool is its bulk migration feature. It allows you to transfer multiple emails and folders at once, saving a lot of time and effort. You don’t need to repeat the process again and again for each folder.
The software also ensures that all your email data remains completely safe during the process. It maintains all important email properties such as To, From, Subject, Date, attachments, and formatting. Additionally, it keeps the original folder structure intact, so your emails stay organized even after migration.
Please Note: Free Trial Available

You can try the free demo version of this tool to understand how it works. It allows you to migrate a few emails from each folder. For unlimited migration, you can upgrade to the full version.
Steps to Export Blueyonder Email to Outlook PST
Step 1. Open the Xtraxtor application on your Windows system.
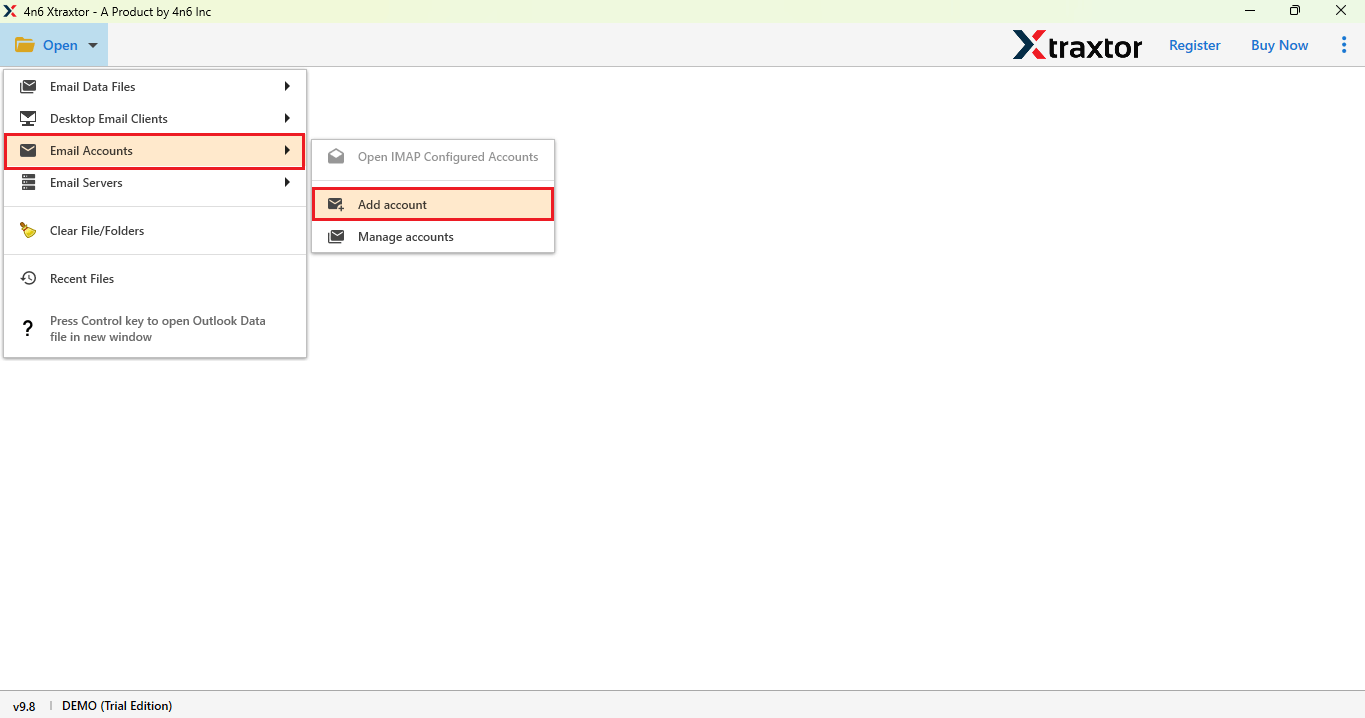
Step 2. Click on the Open button and select Email Accounts option.
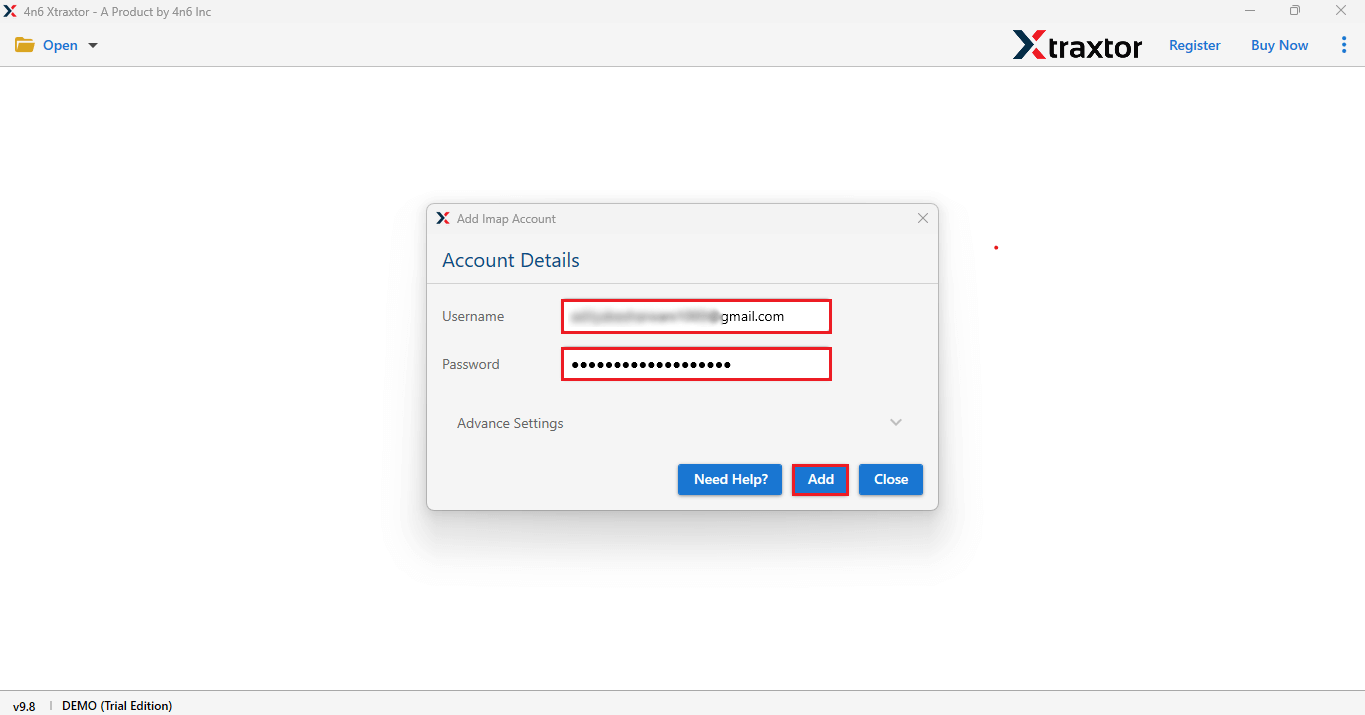
Step 3. Enter your Blueyonder email login ID and password in the tool.
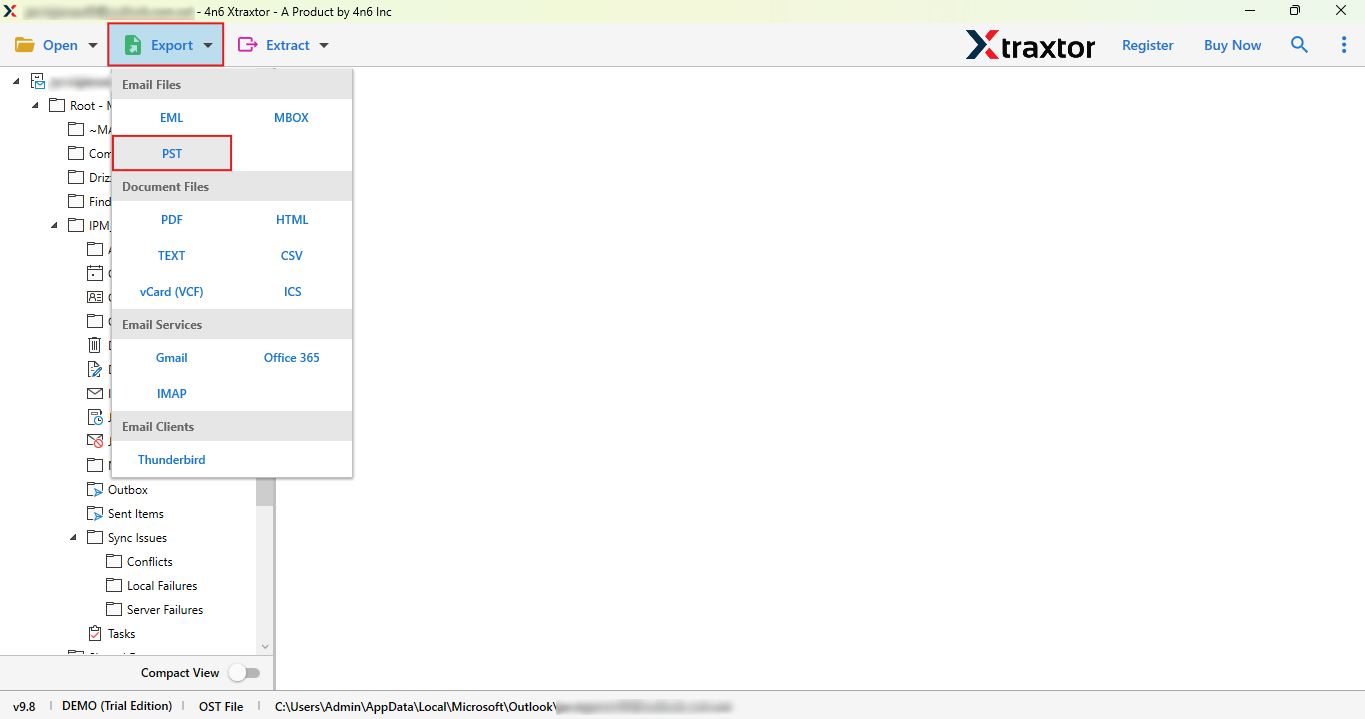
Step 4. Now, go to the Export option and select PST format.
Step 5. Choose the email folders that you want to export.
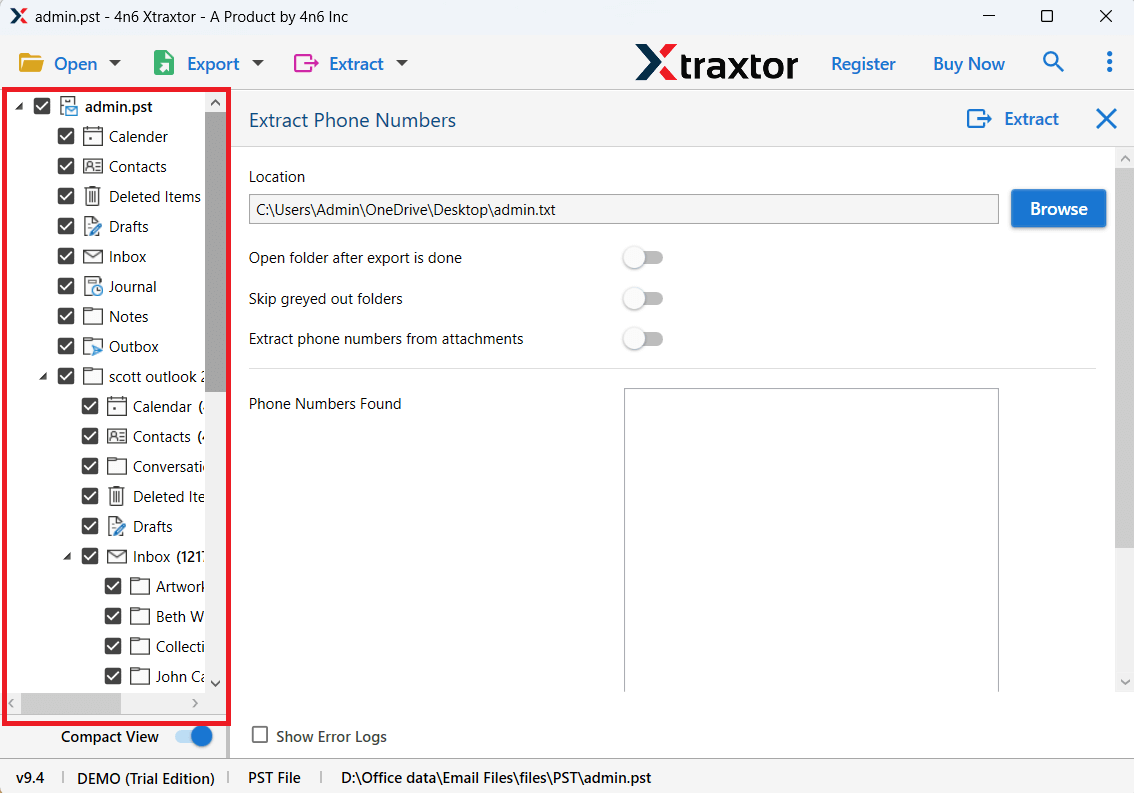
Step 6. Select a destination location & click on the Save button to start.
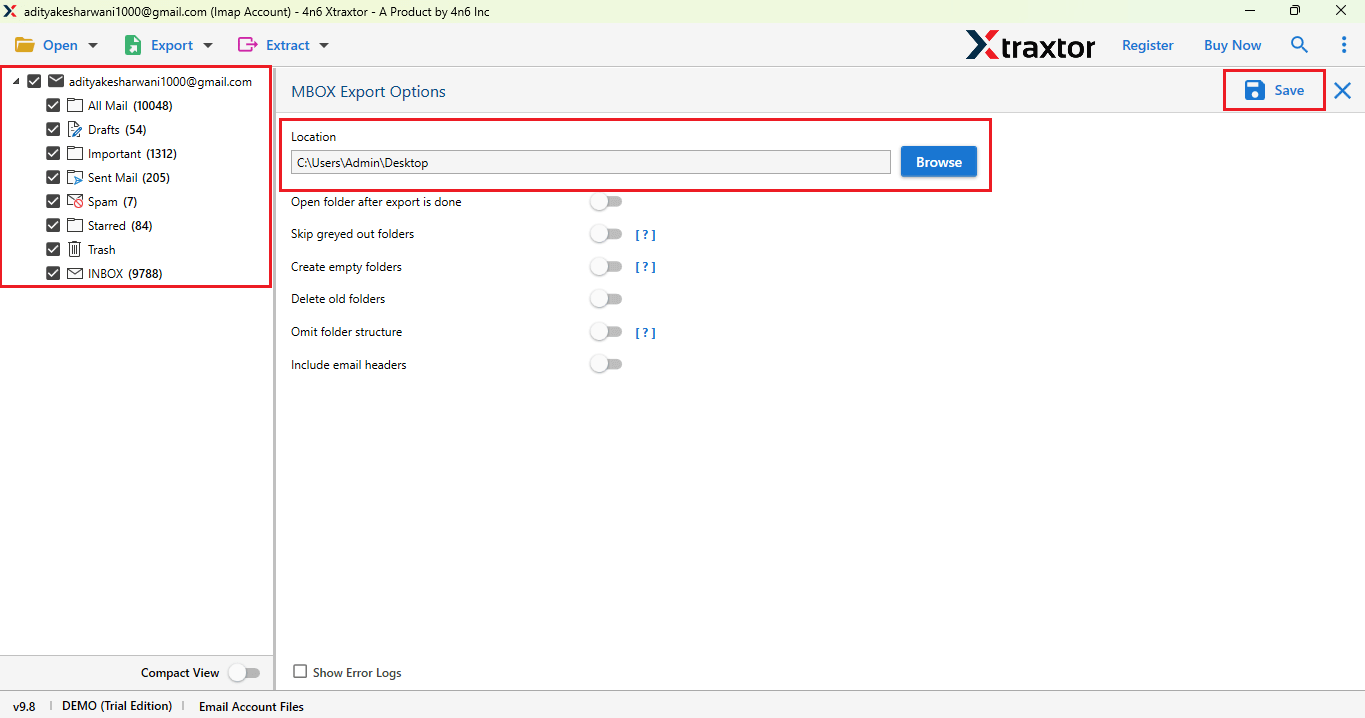
Done! Your Blueyonder emails are successfully transferred to Outlook.
Highlighted Features of the Automated Software
- Simple and easy-to-use interface
- Export multiple Blueyonder accounts at once
- Maintain folder structure during migration
- Keep all email details safe (attachments, subject, etc.)
- Supports selective email migration using filters
- Fast and secure process
- Compatible with all Outlook versions
- Works on all Windows systems
Conclusion
Now you know one of the easiest ways to add Blueyonder email to Outlook. The process is simple, fast, and secure. It keeps all your email data safe, including attachments and folder structure.
Using a professional tool makes the migration process smooth and error-free. You don’t need any technical knowledge, and the tool works without any extra setup.
