If you are planning to move your email data to Rackspace email hosting, you may also want to bring your existing Outlook PST data with you. However, importing PST files to Rackspace can be confusing because Rackspace webmail does not support direct PST file uploads.
Many individuals and businesses face this issue when migrating from Microsoft Outlook to Rackspace email services.
In this guide, we will explain how to import PST to Rackspace step by step using both manual and automated methods. By following this guide, you will be able to safely move your emails, attachments, and folders into your Rackspace mailbox.
How to Import PST to Rackspace for Free
One of the free ways to move PST emails to Rackspace is by using Microsoft Outlook as a bridge. The process involves configuring your Rackspace account in Outlook and then importing the PST file.
This method works but requires multiple steps.
Steps to Configure Rackspace with Outlook
- Launch the MS Outlook application on your system.
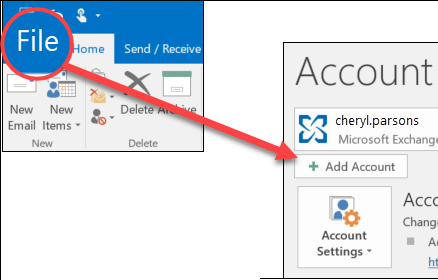
- Now, go to the File tab and click on Add Account.
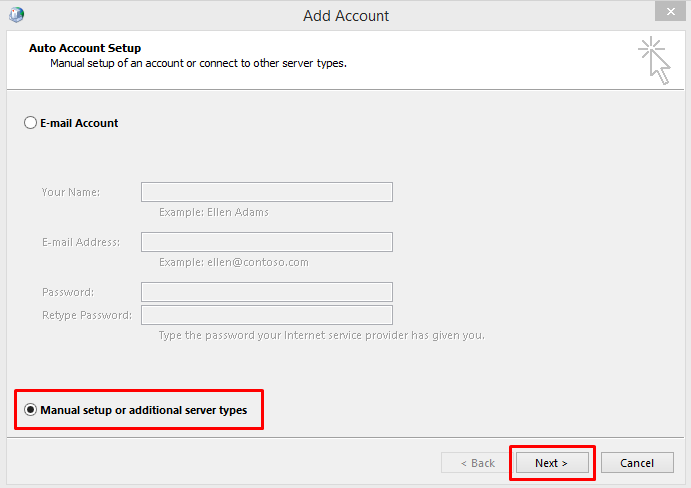
- Then, Select the Manual setup or additional server types option and press Next.
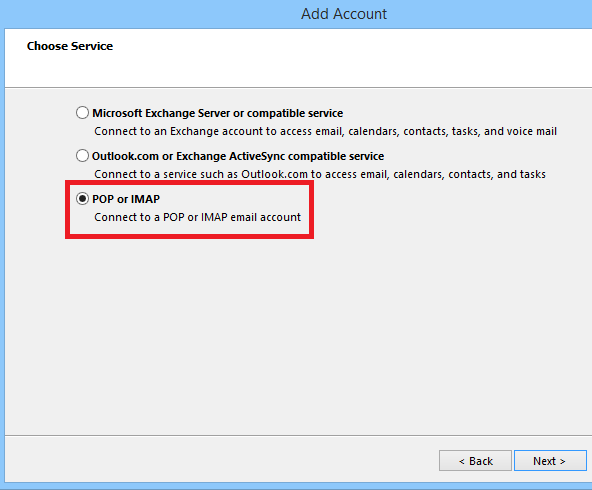
- After that, choose POP or IMAP and click on Next.
- Enter the asked details in the respective field.
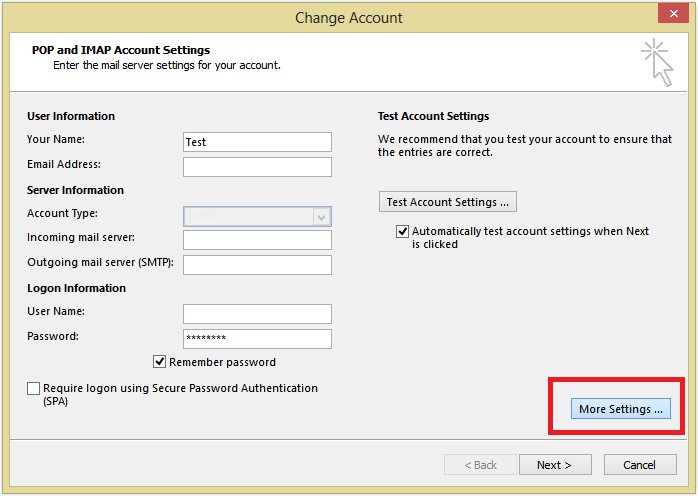
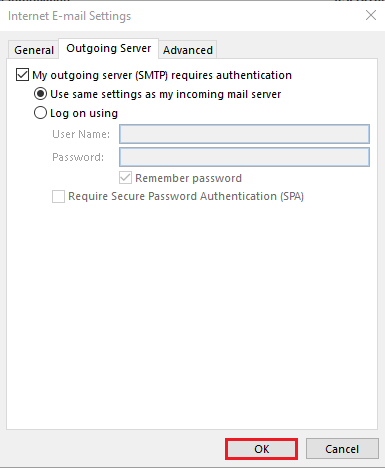
- Now, click on the Outgoing Server tab and tick on My Outgoing Server requires authentication.
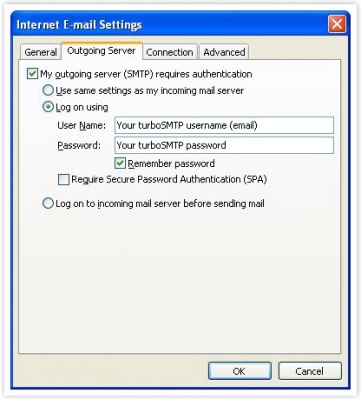
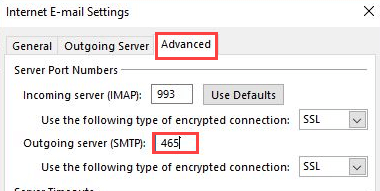
- After that, click on Advanced tab and set Incoming server (POP3 or IMAP): 995 or 993 & Outgoing server (SMTP): 465 or 587.
- Click Ok to close Internet E-mail Settings window.
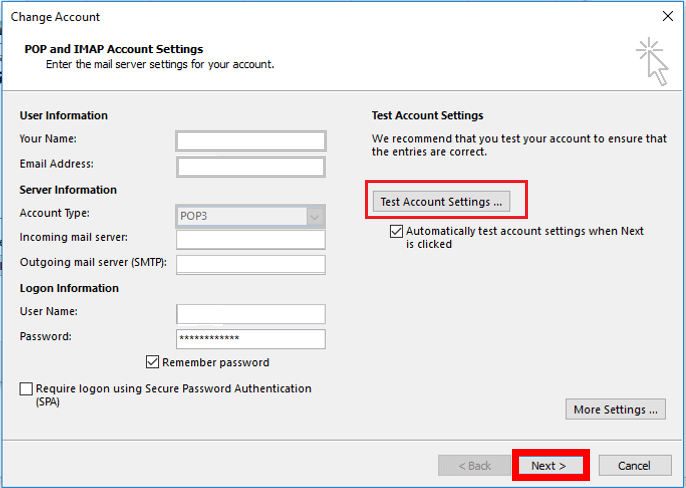
- Now, click on Test Account Settings option and then click Next to complete the configuration process.
Steps to import PST File into Rackspace Mailbox Folder
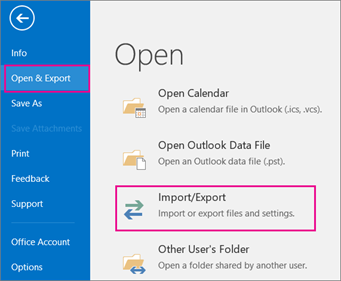
- Navigate to Open & Export >> Import/Export.
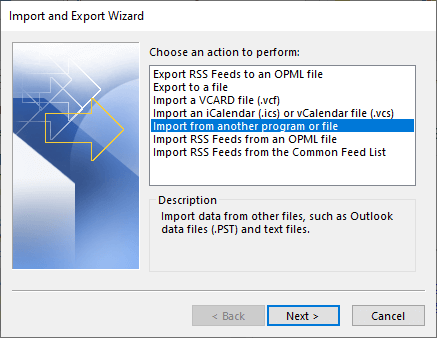
- Choose import from another program or file and press Next.
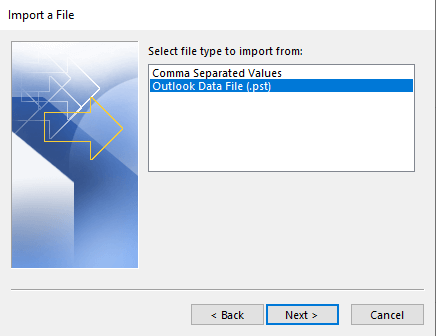
- Now, select Outlook Data File (.pst) and click on Next.
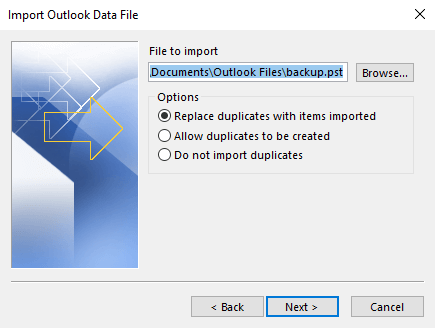
- After that, click on Browse and choose PST file that you want to import.
- Select Rackspace mailbox folder and click on Finish button.
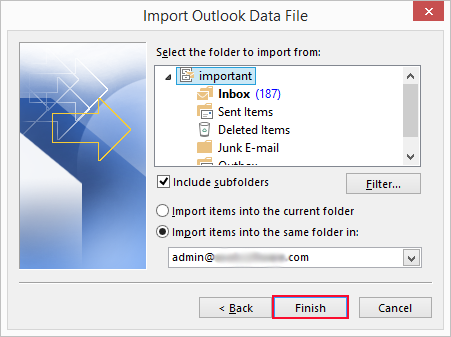
Done! Hence, you can import PST to Rackspace webmail account, but it is a lengthy and time-consuming process. You can not upload PST to Rackspace with this approach if you do not have in-depth technical knowledge.
How to Transfer PST Files into Rackspace Mailbox Automatically?
Use Xtraxtor to instantly import PST to Rackspace webmail accounts without any trouble. This utility is smart enough to directly import PST file into Rackspace mailbox without any data loss. Along with that, you can use this utility and import selective emails to your webmail account using various filter options.
Additionally, you also use the filters – to, from, cc, bcc, name, date, time etc., to import specific emails.
Try out the demo version of the software to know its working process.


Steps to Import PST to Rackspace
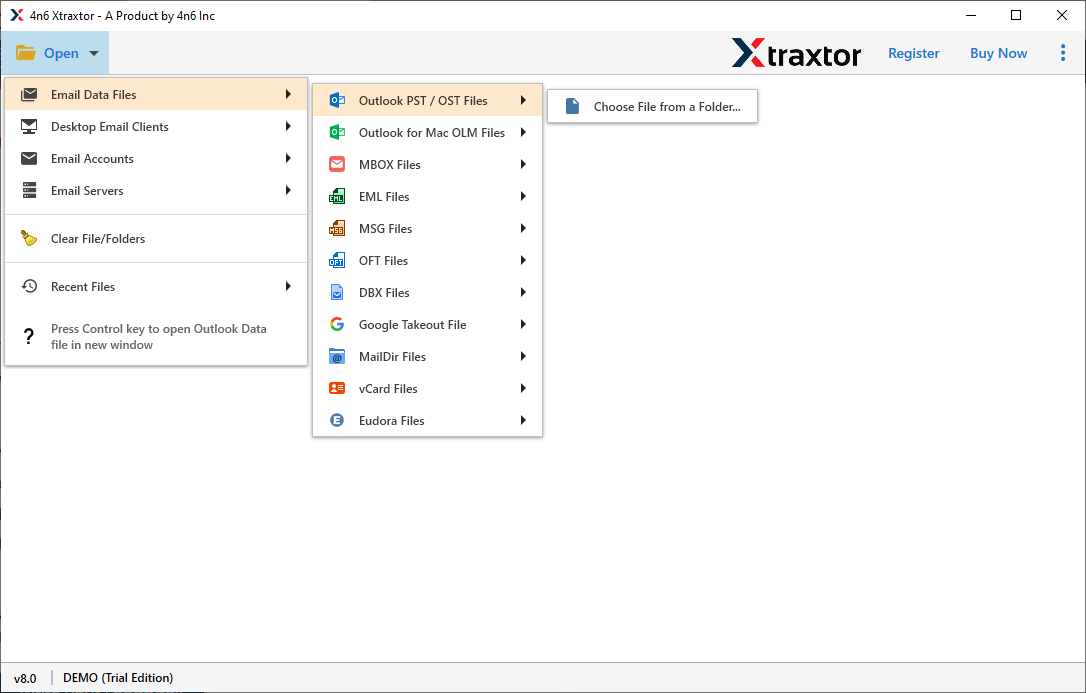
- Install and run the software on your Windows system.
- Click on Open >> Email Data File >> Outlook PST File >> Select File or Folder.
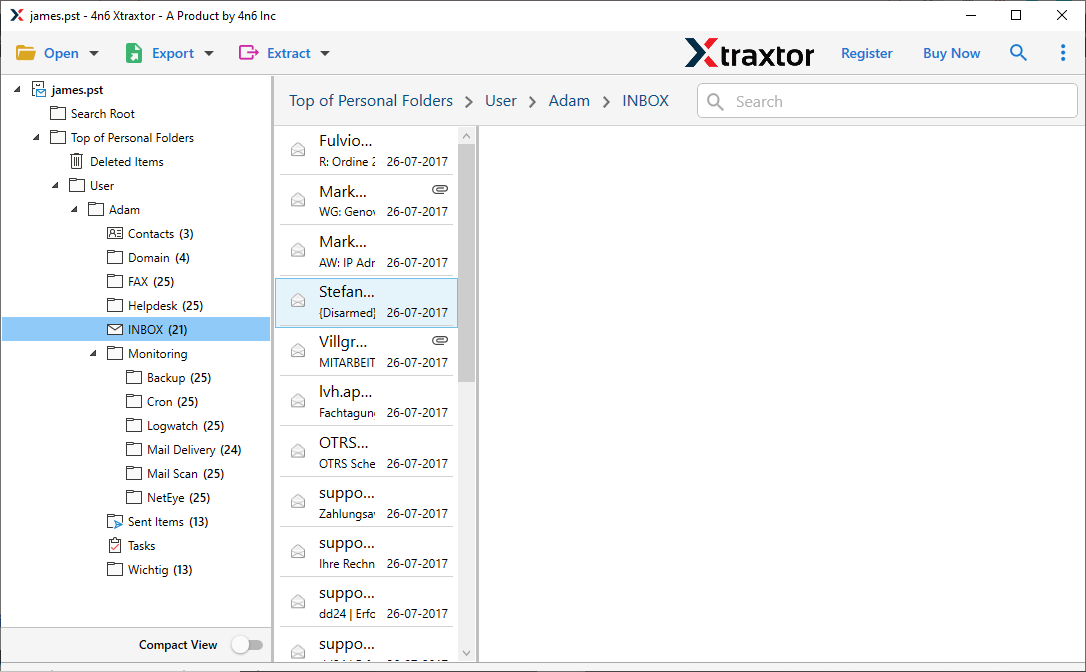
- Here you can view all your emails from PST file before importing them to Rackspace.
- Click on Export and select IMAP option from the given list.
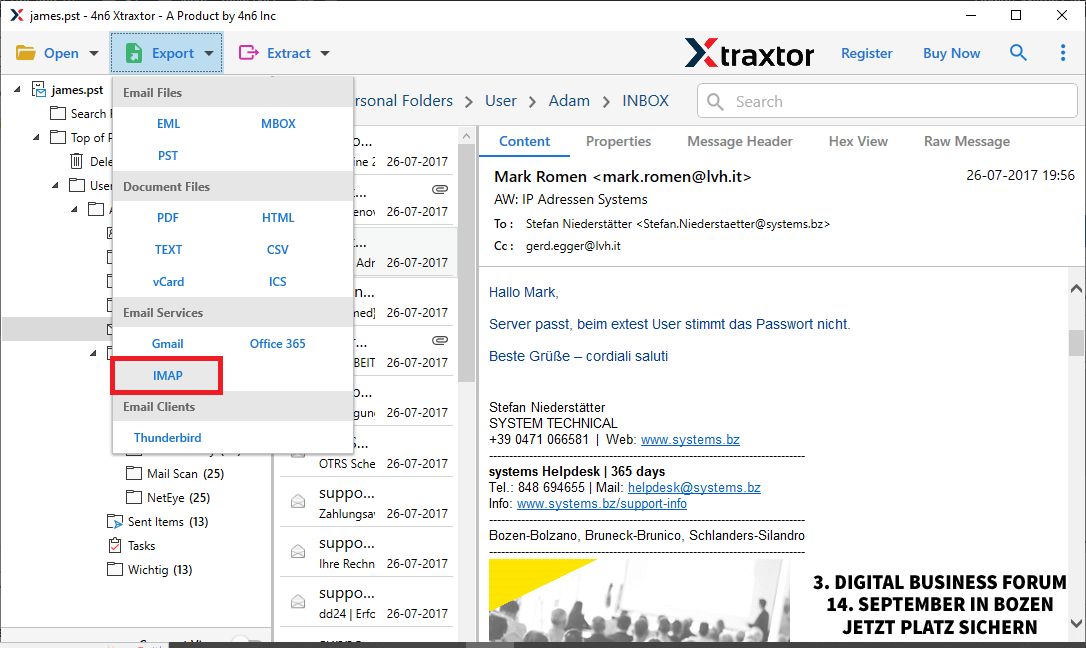
- Now, you can select the email folders if you want to import only the needed mailbox folder.
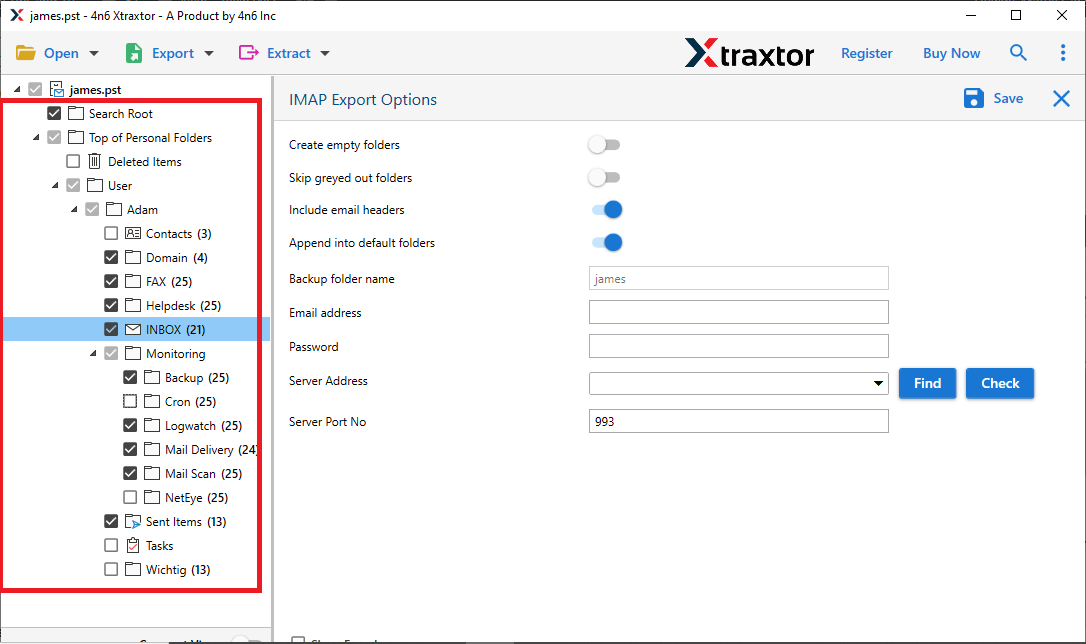
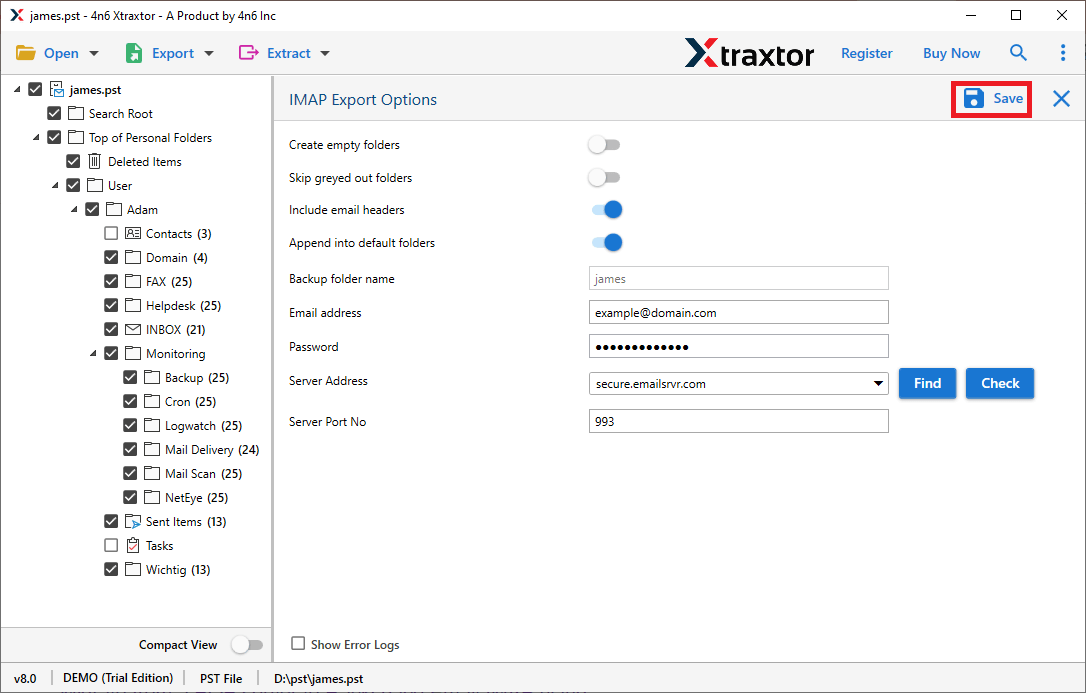
- At last, enter your Rackspace login details and then press the Save button.
Done! Here you import PST to Rackspace webmail account in a few simple clicks.
Now let’s know why you need to use this automated tool to upload PST file to Rackspace mailbox.
Key Features of PST to Rackspace Import Tool
There are various reasons to choose this tool to import PST emails to Rackspace webmail account.
- Directly Import PST to Rackspace Mailbox: This import tool will directly import the data from PST file to your Rackspace mailbox. You just need to add the .pst file and enter your IMAP account login details and hit on the Save button to start the importing process.
- Various Saving Options: The tool has multiple saving options that enable you to convert PST to EML, PDF, MBOX, TXT, HTML, and many other formats.
- Maintain Folder Hierarchy: While performing the import process, this tool makes sure to uphold the mailbox folder or sub-folder hierarchy and structure. Thus there will be no alteration to your email data and their formatting.
- Import PST to Other Webmail Accounts: This tool is also capable of performing other import processes. You can use this tool and import PST to Office 365, Gmail, Yahoo, Yandex, and many other cloud-based email accounts.
- Selective Email Import: If you have a large .pst file to import, but you only want to upload some important email folder. Then, in that case, this tool offers an option to select the email folder and import them into Rackspace webmail account.
- Windows-Based Utility: The PST to Rackspace Import tool is basically for Windows OS users. It can be installed and run on Windows 11, 10, 8, Vista, XP, and all other previous versions without any issue.
Conclusion
In this blog, we learn about the best workable and secure way to import PST to Rackspace account with complete data. We also mention the step-by-step process of importing PST file to Rackspace account. You can manually open PST file in Rackspace using Outlook. However, automated software can complete this process in a few simple steps. One can use the demo version of this utility and perform the importing process without any hassle.
