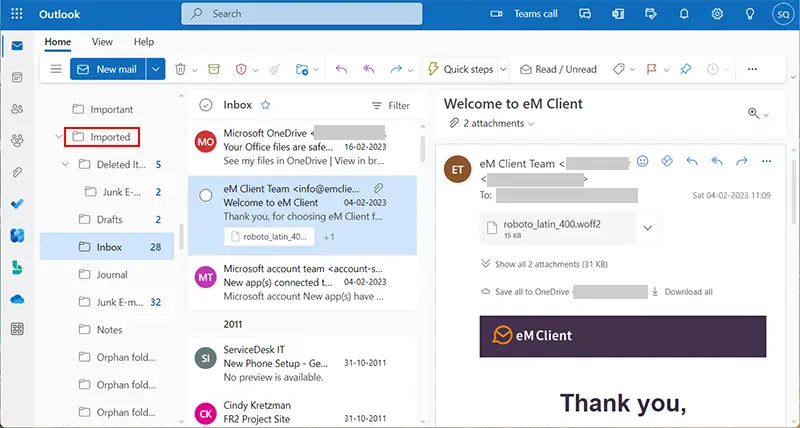
Need to move PST emails into a shared mailbox in Office 365? You’re not alone. Many organizations want to centralize old emails, allow team access, or meet compliance requirements. However, importing PST files into a shared mailbox is not always straightforward.
In this guide, you’ll learn why users import PST to Office 365 shared mailboxes, manual methods, and the easiest automated solution to complete the task without data loss.
A shared mailbox in Office 365 is a mailbox that multiple users can access to send and receive emails. It is commonly used by teams or departments such as support, sales, or HR.
Instead of sharing login credentials, permissions are assigned to users. This makes shared mailboxes secure, organized, and easy to manage.
Ways to Import PST to Office 365 Shared Mailbox
There are three commonly used methods:
- Import PST using Outlook
- Import PST using Network Upload (Microsoft Purview)
- Import PST using an automated PST migration tool
Let’s explore each option in detail.
Method 1. How to Upload PST to Office 365 Shared Mailbox using Outlook?
In this method, first of all, you need to configure Office 365 account with MS Outlook and then you can upload PST file to the shared mailbox Office 365. Follow the below-given steps to Import PST to Shared Mailbox Office 365-
Step 1. Open MS Outlook email client on your system.
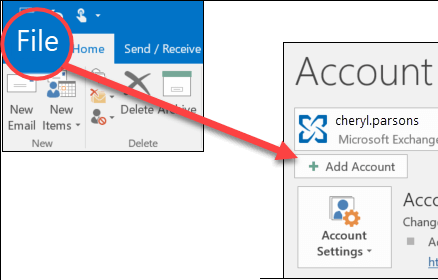
Step 2. Now, Click on File >> Add Account.
Step 3. Enter Office 365 shared mailbox email address and hit on Connect.
Step 4. After that, Type Office 365 shared mailbox password and Click on Finish.
Step 5. Now, your Office 365 account is successfully added to Outlook.
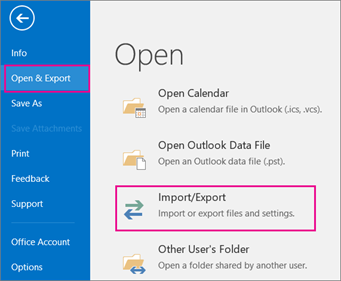
Step 6. Again Click on File >> Open & Export >> Import/Export.
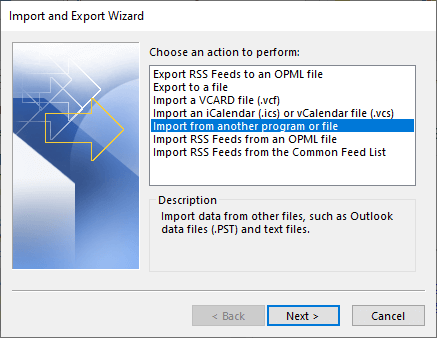
Step 7. Select Import from another program or file and press Next button.
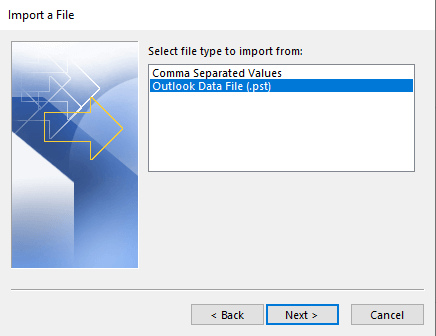
Step 8. Choose Outlook Data File (.pst) and hit on Next button.
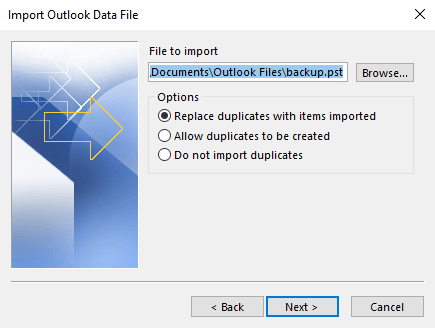
Step 8. Click on the Browse button and select the PST file that you want to Import.
Step 9. Enables Do not Import Duplicate radio button and press Next.Step 10. Choose the Shared Mailbox as Destination and click on Finish button to start the import process.
Limitations of this method
- It is lengthy and time consuming Process.
- Need necessary permissions to import PST to shared mailbox Office 365.
- If Outlook import export option is greyed out then you can not transfer PST files to shared mailbox.
Method 2. How to Import PST File to Office 365 Shared Mailbox using Network Upload Method?
This method work in multiple phases to import PST to shared mailbox Office 365 which are given below-
Phase 1. Create Import Export Role in Office 365
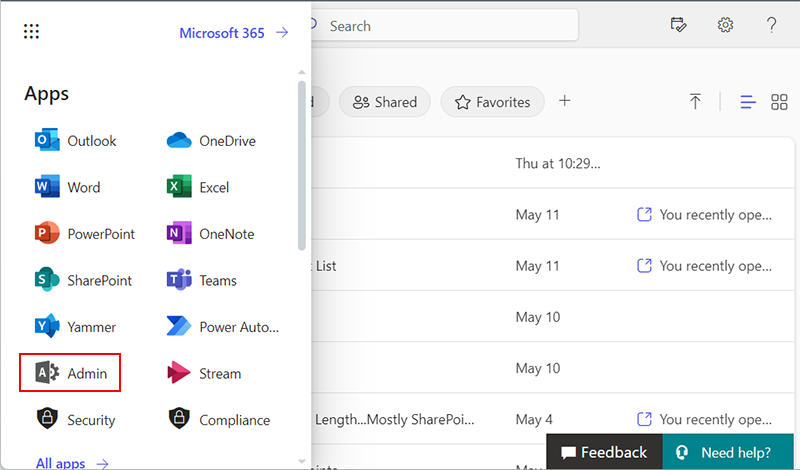
Step 1. Login in to your Office 365 account and go to Admin option.
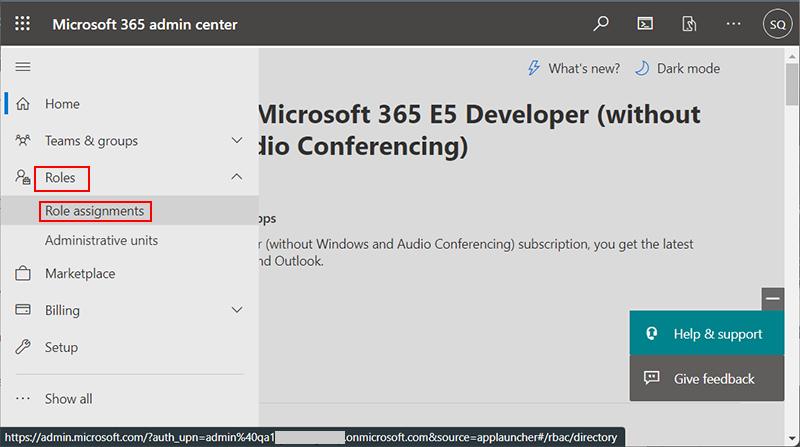
Step 2. Now, navigate to Role >> Role Assignment.
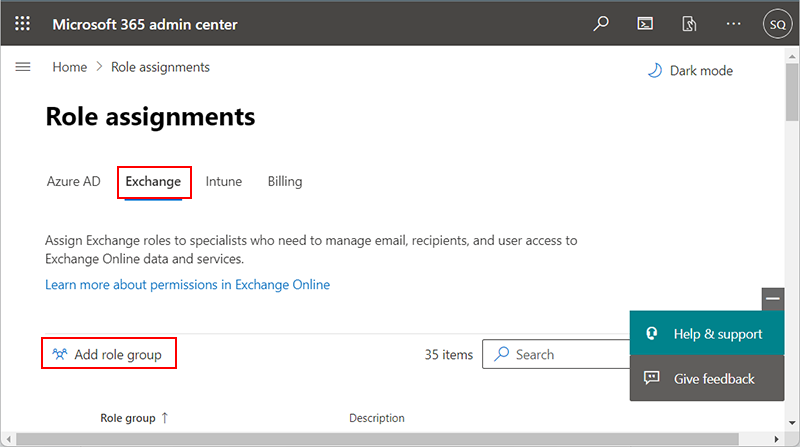
Step 3. After that, Click on Exchange and select Add role group option.
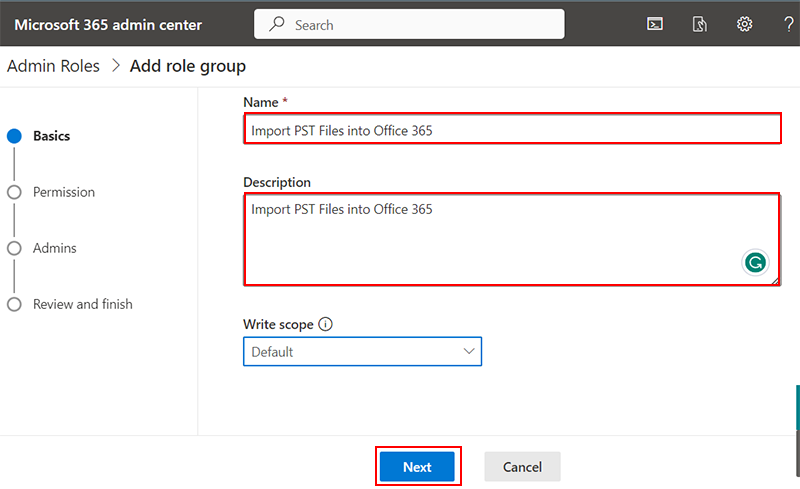
Step 4. Enter the Add role Group name and description in the respective field and hit on Next.
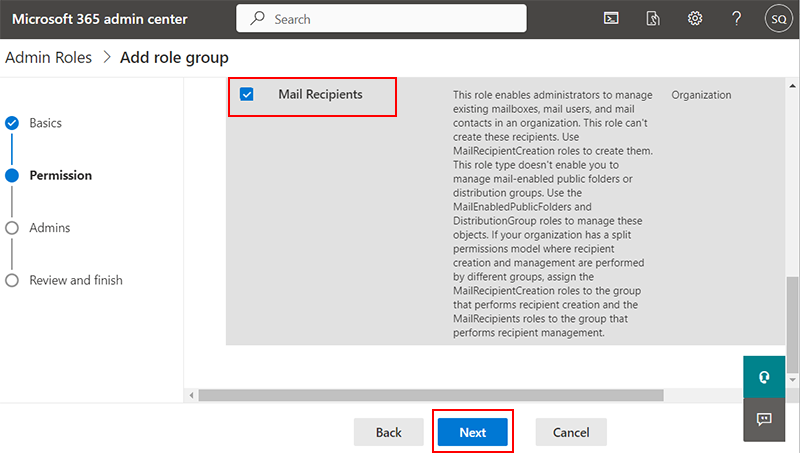
Step 5. After that, Choose Mail Recipient and click on Next.
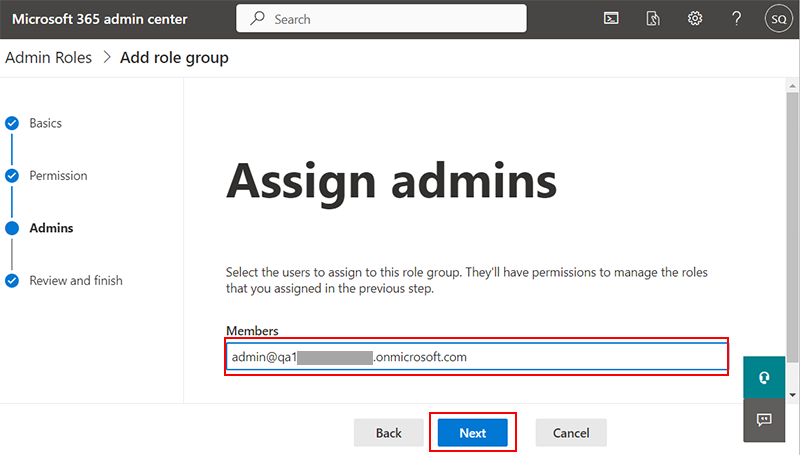
Step 6. In the Admins, enter your shared mailbox email address and press Next.
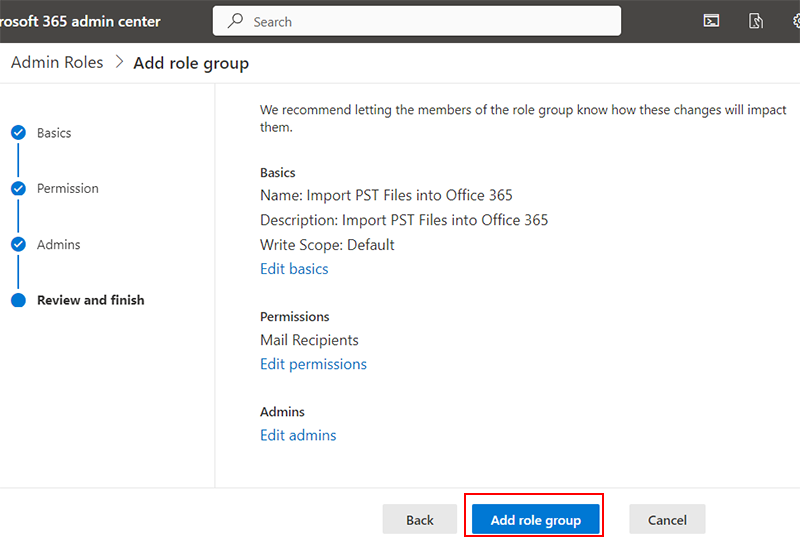
Step 7. Review and finish your role and press Add role group to complete the phase.
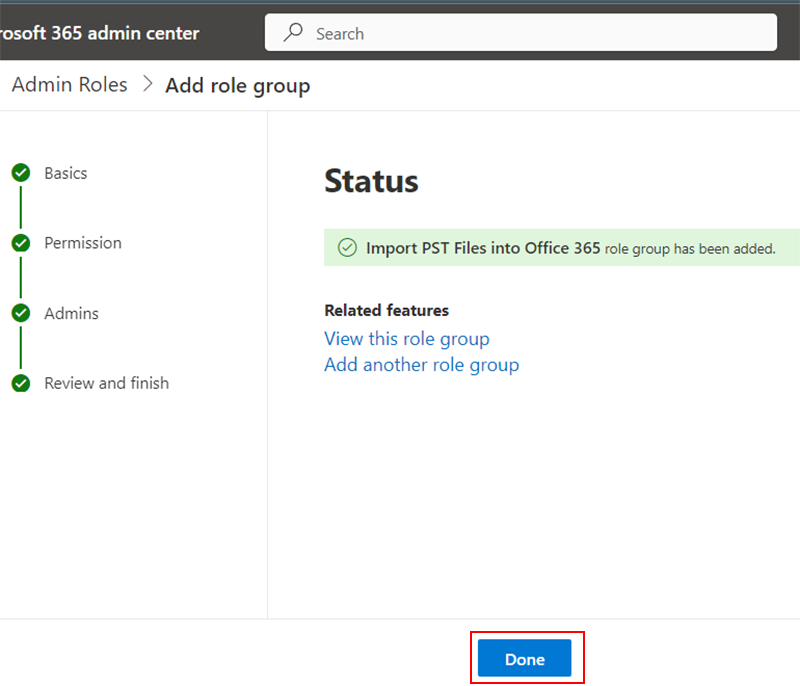
Step 8. Now, you can check import PST files into Office 365 role group has been added and then hit on Done button.
Phase 2. Generate SAS URL
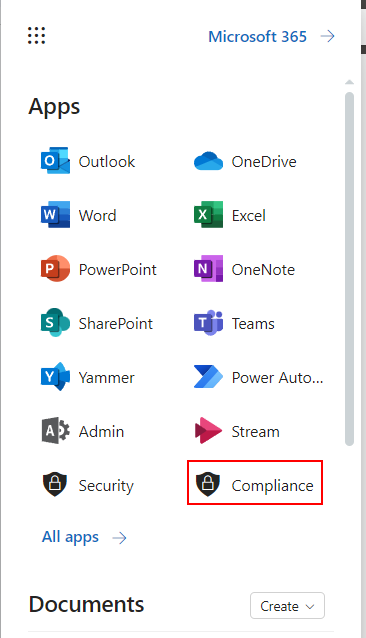
Step 1. Login Microsoft 365 account and choose Compliance option.
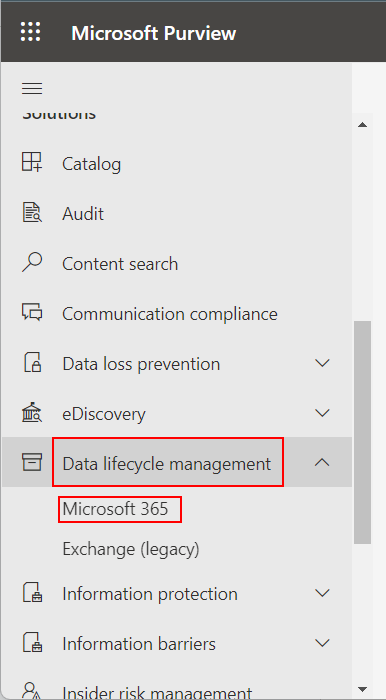
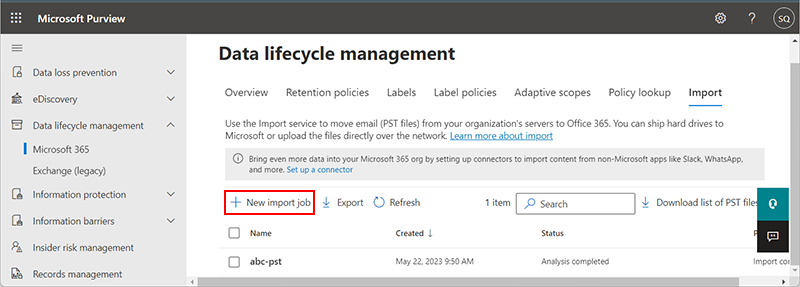
Step 2. Go to the Microsoft Purview and select Data Lifecycle Management >> Microsoft 365.
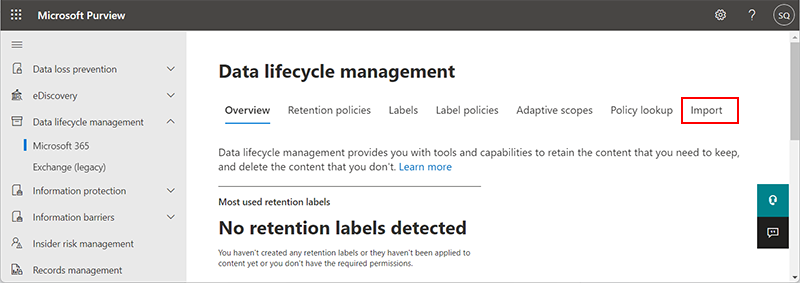
Step 3. After that, Choose Import button under Overview section of Data Lifecycle Management.
Step 4. Now, Select +New Import Job.
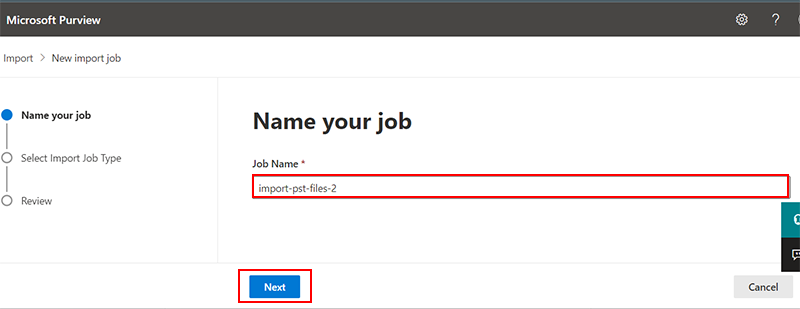
Step 5. Enter your Job Name and press Next.
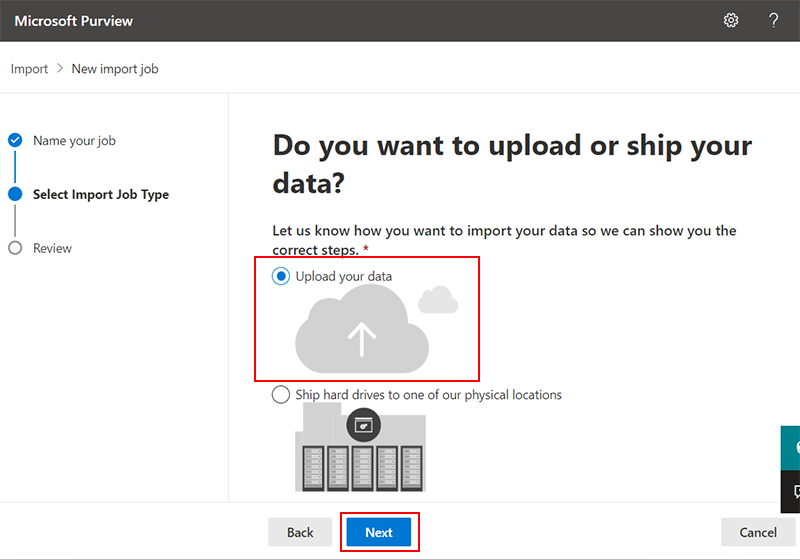
Step 6. After that, Choose Upload your data option and hit on Next.
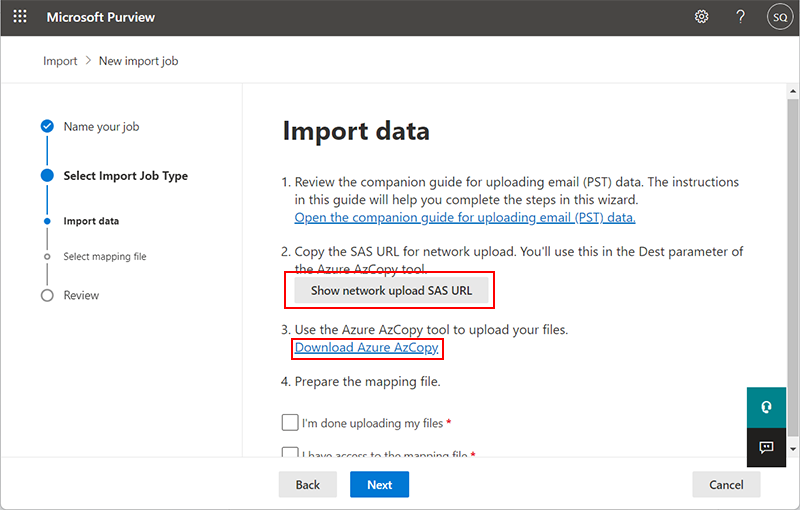
Step 7. Choose Show Network Upload SAS URL to Create SAS URL.
Phase 3. Download Microsoft AzCopy Executable File
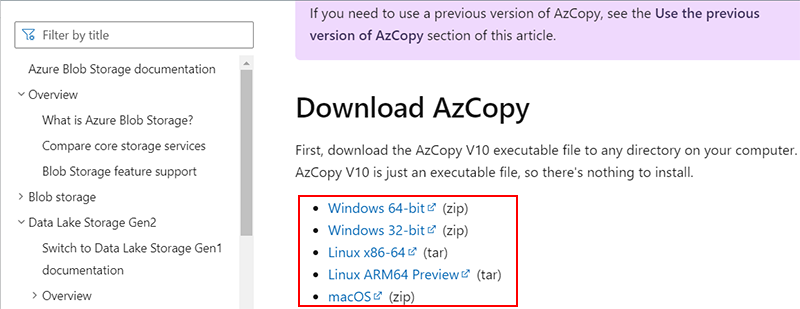
Step 1. Download AzCopy according to the bit of your computer.
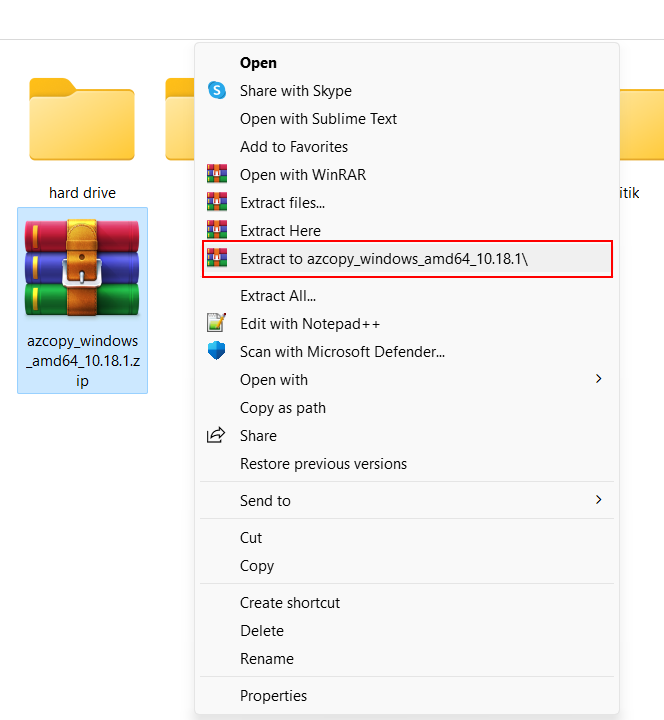
Step 2. Now, Go to the the path of File and right click on ZIP file and choose the option Extract to azcopy_windows_amd64_10.18.1.
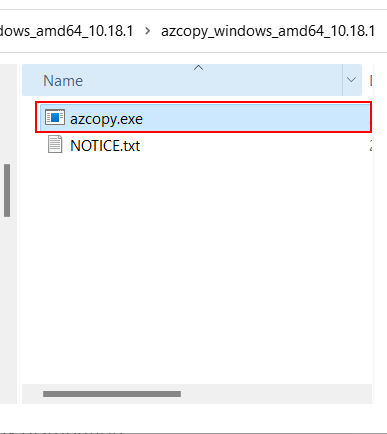
Step 3. Double-click on azcopy.exe to complete its setup.
Phase 4. Create a CSV Mapping File
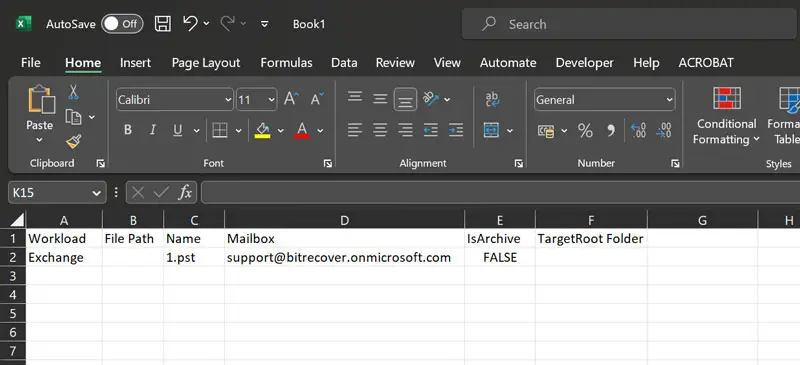
Step 1. To create a CSV file, open MS Excel and create a New Excel Sheet.
Step 2. Now, create File Path, Name, Mailbox, Is Archive, Target Rool Folder columns in the Excel Sheet.
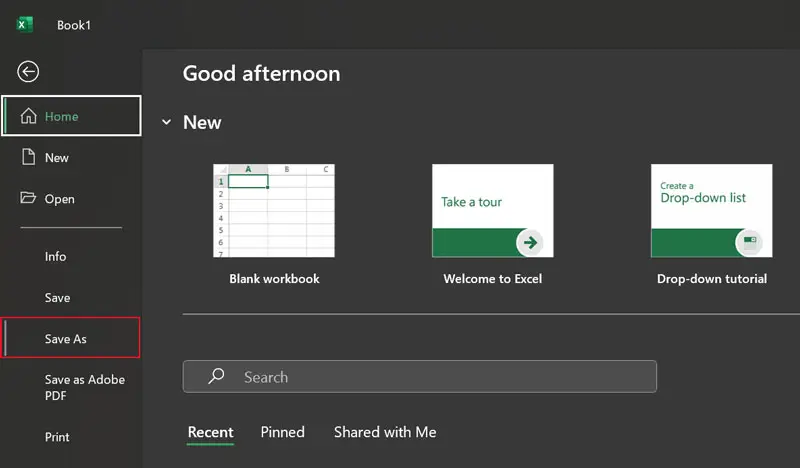
Step 3. After that, Click on File >> Save As.
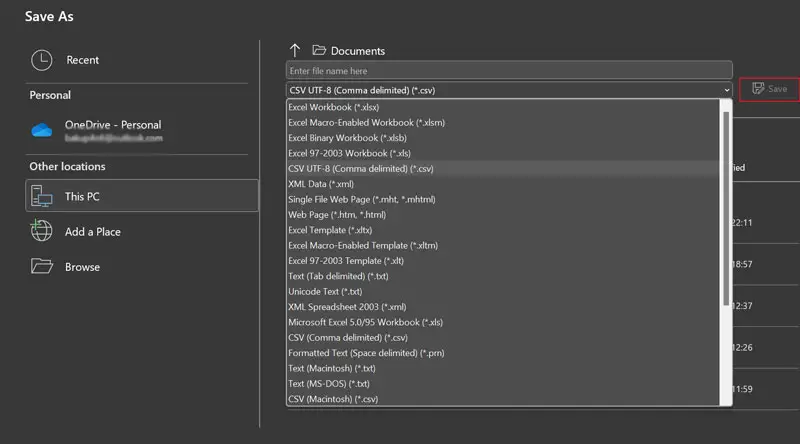
Step 4. Choose CSV UTF(Comma Delimited) (.csv) from given list and click on Save to generate CSV.
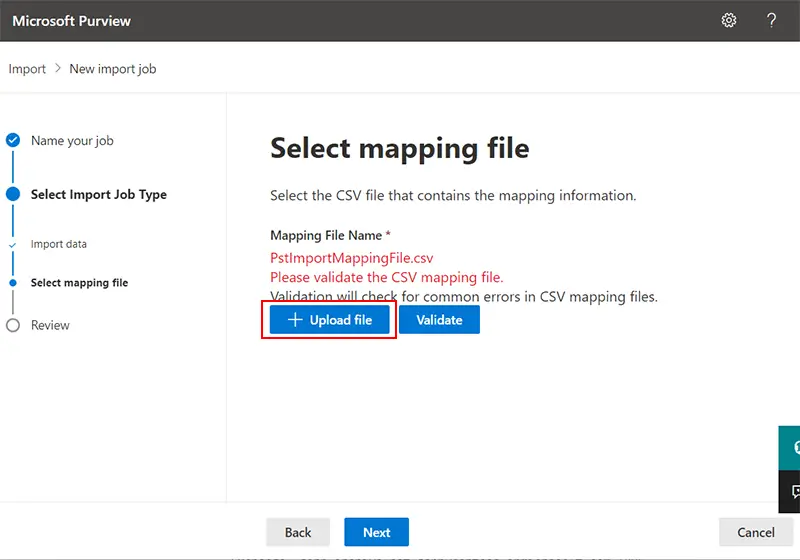
Step 5. After that, again back to the Import window to Upload CSV file and press Next.
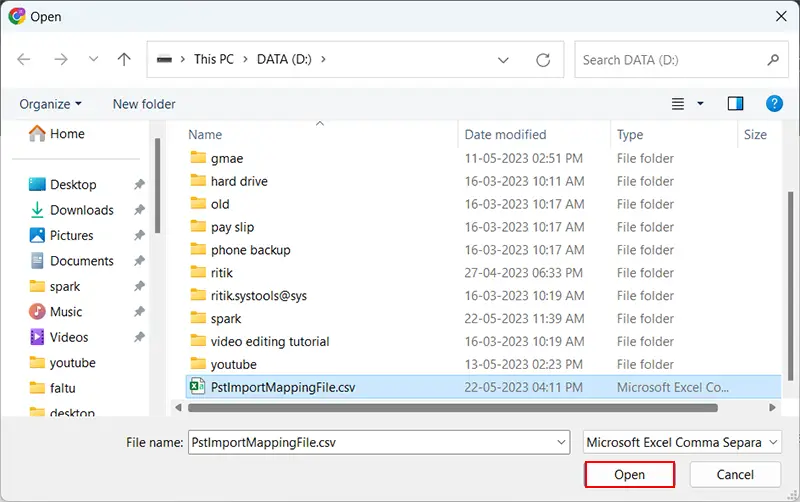
Step 6. Choose CSV PST Import Mapping File and hit on Open button.
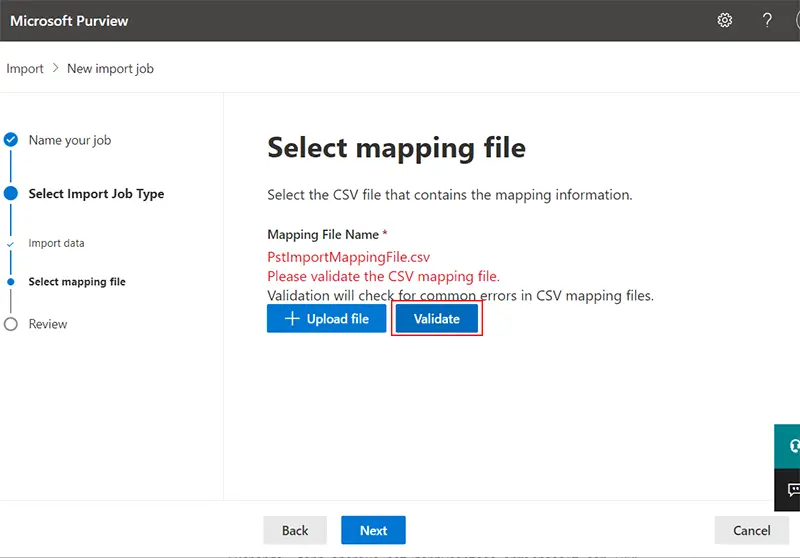
Step 7. Click on Validate button to validate the mapping.
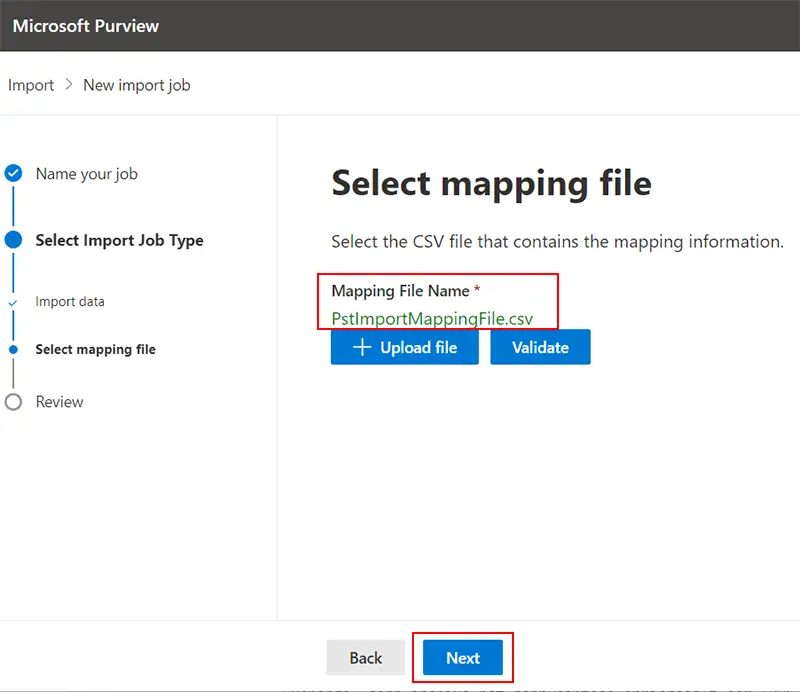
Step 8. Validation of CSV file is successfully completed and press Next button.
Phase 5. Import PST to Shared Mailbox Office 365 with Filters
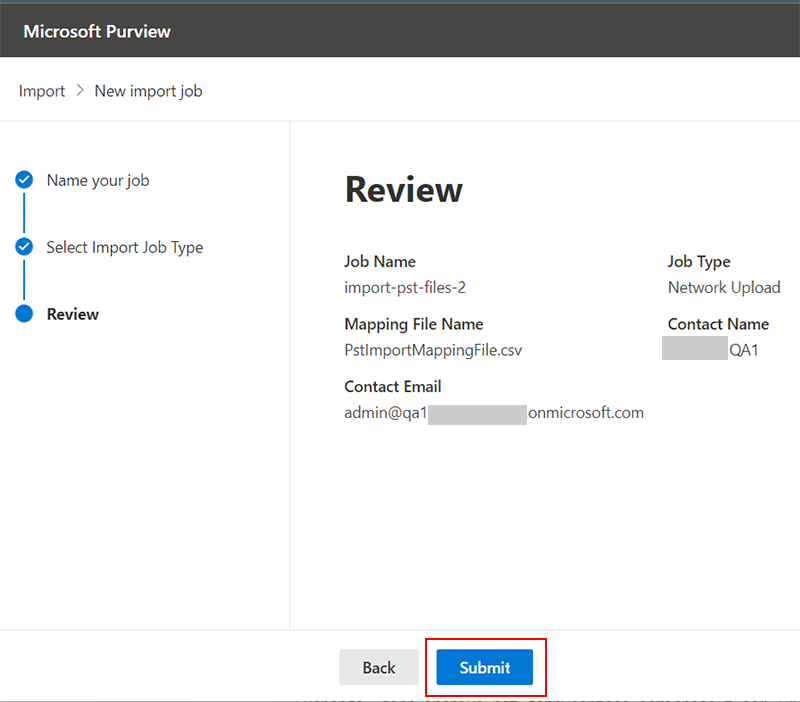
Step 1. Now, check the entire process and click on Submit.
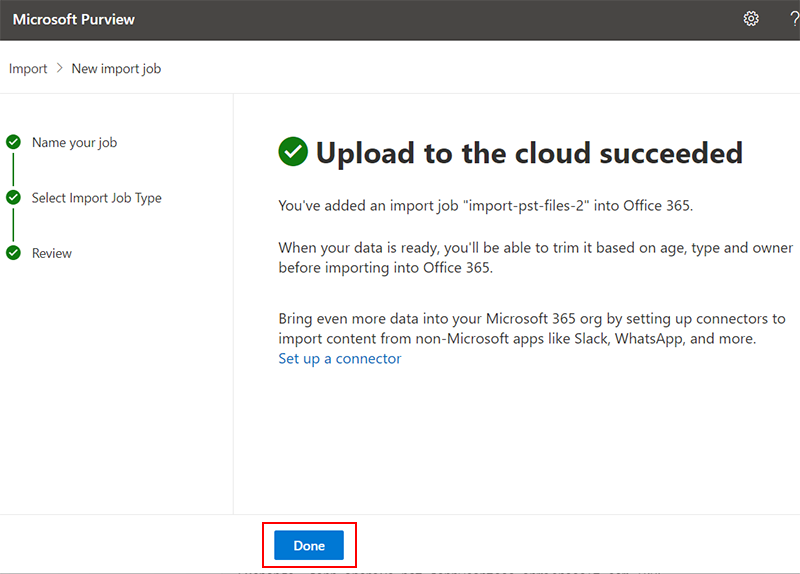
Step 2. Now, you can see that PST file is uploaded to AzCopy cloud storage to Import and press Done button.
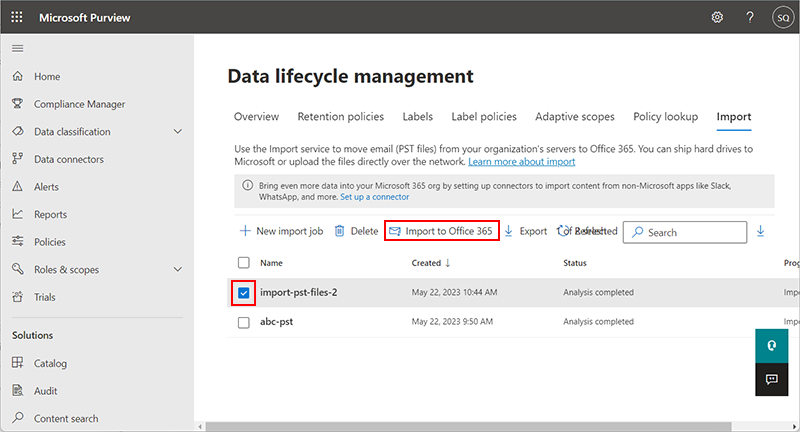
Step 3. After that, wait some time to complete the PST analysis process. Choose PST file and select Import to Office 365.
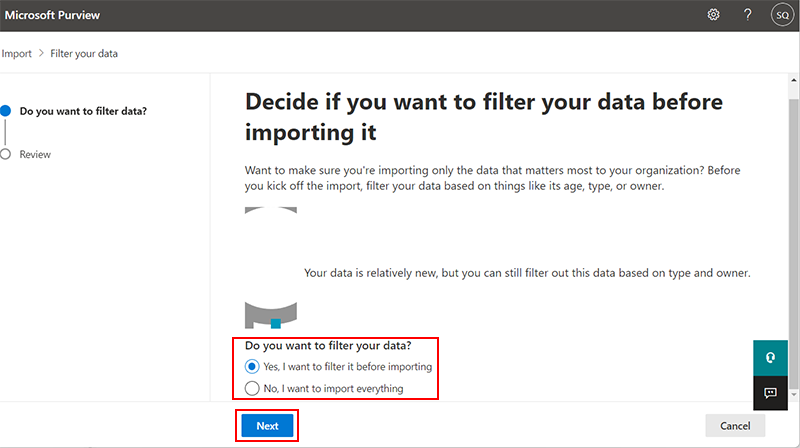
Step 4. If you want to filter data or import everything select according to your and hit on Next.
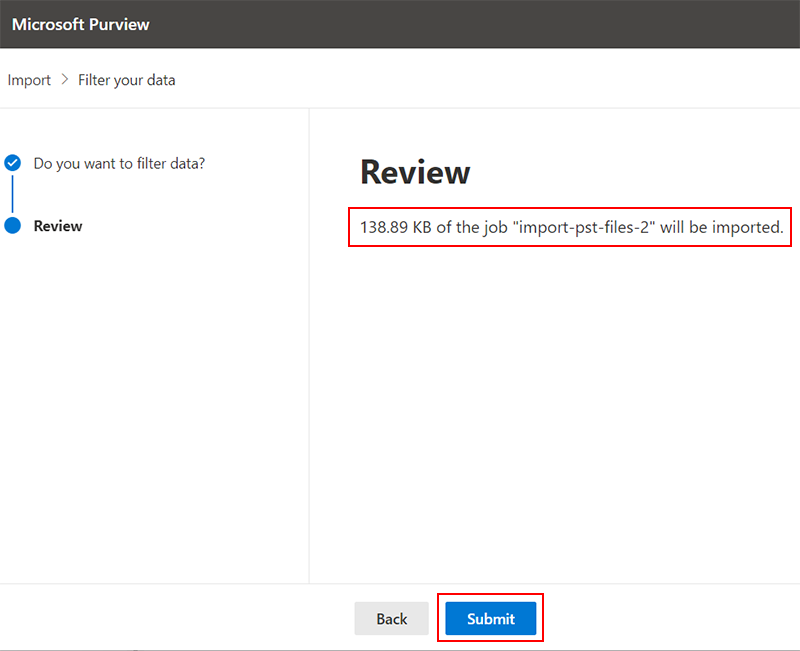
Step 5. Now, you can see a message that specific size PST file is imported and click on Submit button.
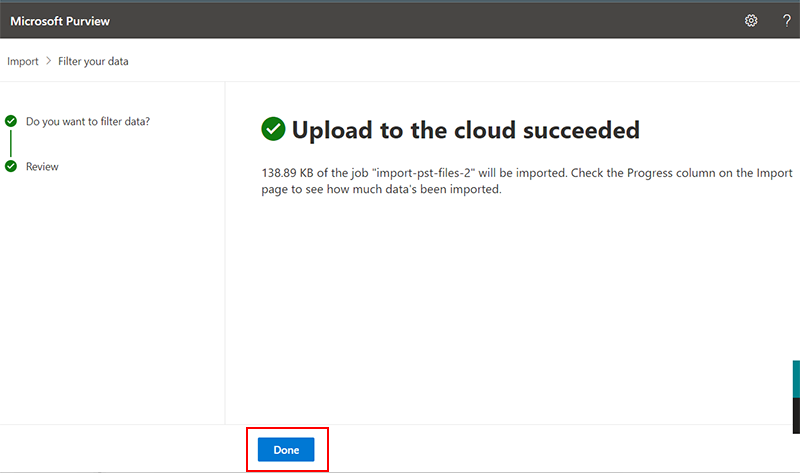
Step 6. Now, the process to import PST to shared mailbox Office 365 is started. It takes some hours to complete the process. So, wait. At last, it will show a success popup message.
Phase 6. Open Imported PST File to Shared Mailbox
Step 1. Login Office 365 and select Outlook application.
Step 2. Go to the Shared mailbox Office 365 account and access imported PST file data.
Drawbacks of Network Upload Method
- It is so lengthy and time consuming process.
- Users must have in-depth technical knowledge to import PST to Office 365 shared mailbox.
- After assign the admin role, you need to wait at least 24 hours to continue the process.
- You can not import larger than 20GB PST file to shared mailbox.
How to Import PST to Shared Mailbox Office 365 Instantly?
Try Xtraxtor on your Windows PC to complete the transfer process. The tool will import PST to Office 365 shared mailbox in a few simple clicks. In this application, you do not worry about the file size. It can import a large PST file with complete accuracy. It preserves folder hierarchy and email structure during the process.
Apart from this, the software is designed with a simplified user interface that helps beginners import PST files to shared mailbox Office 365 without any assistance.
Try its free demo version and save PST emails to shared mailbox Office 365 easily.
Steps to Upload PST to Shared Mailbox Office 365
Step 1. Firstly, Launch Xtraxtor Email Converter on your system.
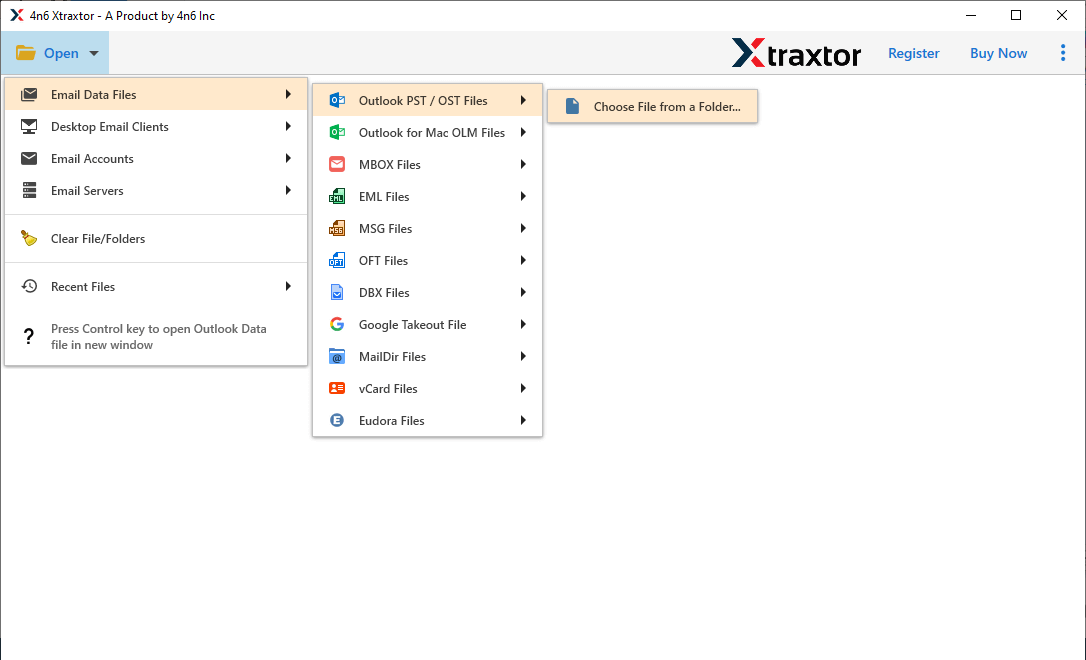
Step 2. Now, Click on Open >> Email Data Files >> Outlook OST/PST Files >> Choose PST File.
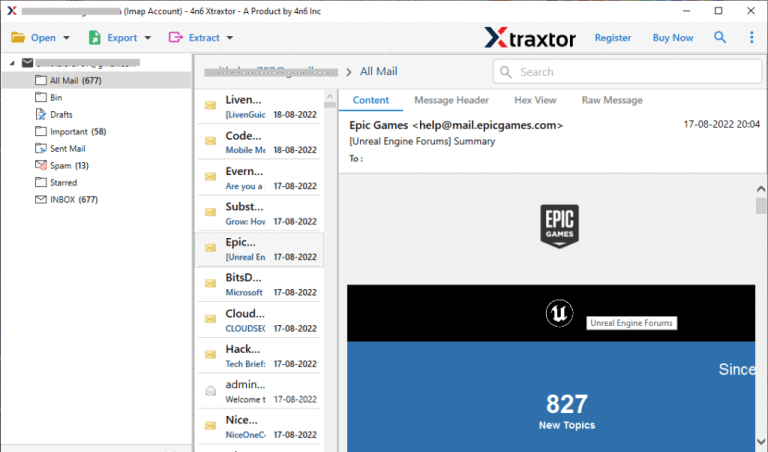
Step 3. Here, you can view emails from PST file before importing them to Office 365 shared mailbox.
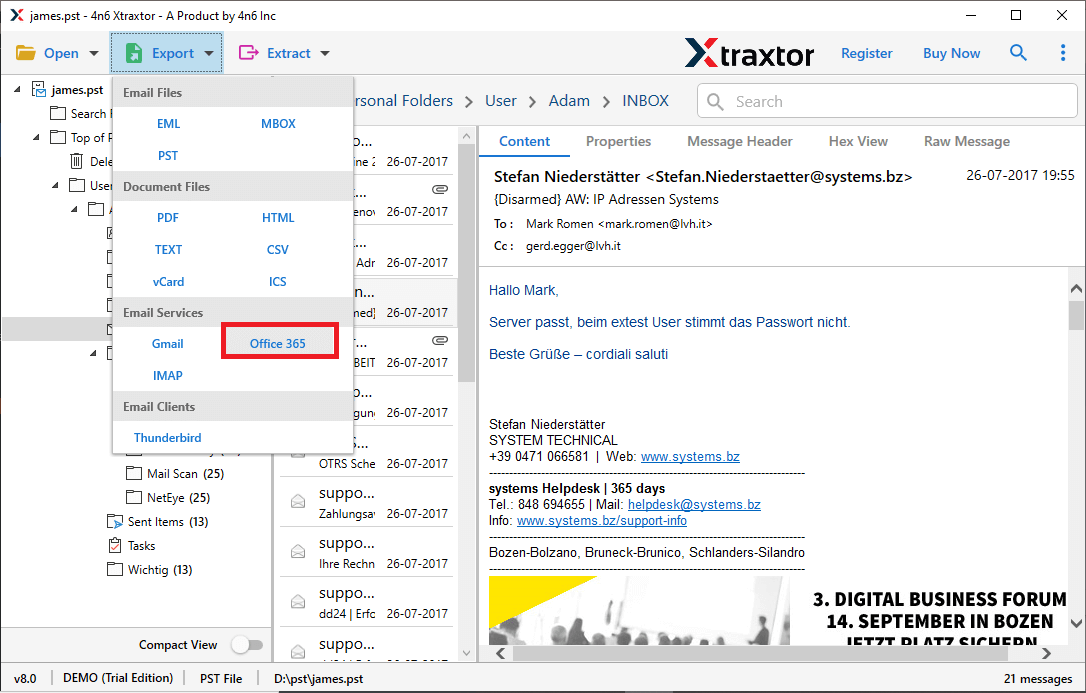
Step 4. Click on Export and select Office 365 from the given list.
Step 5. Choose the email folders and subfolders that you save in shared mailbox Office 365.
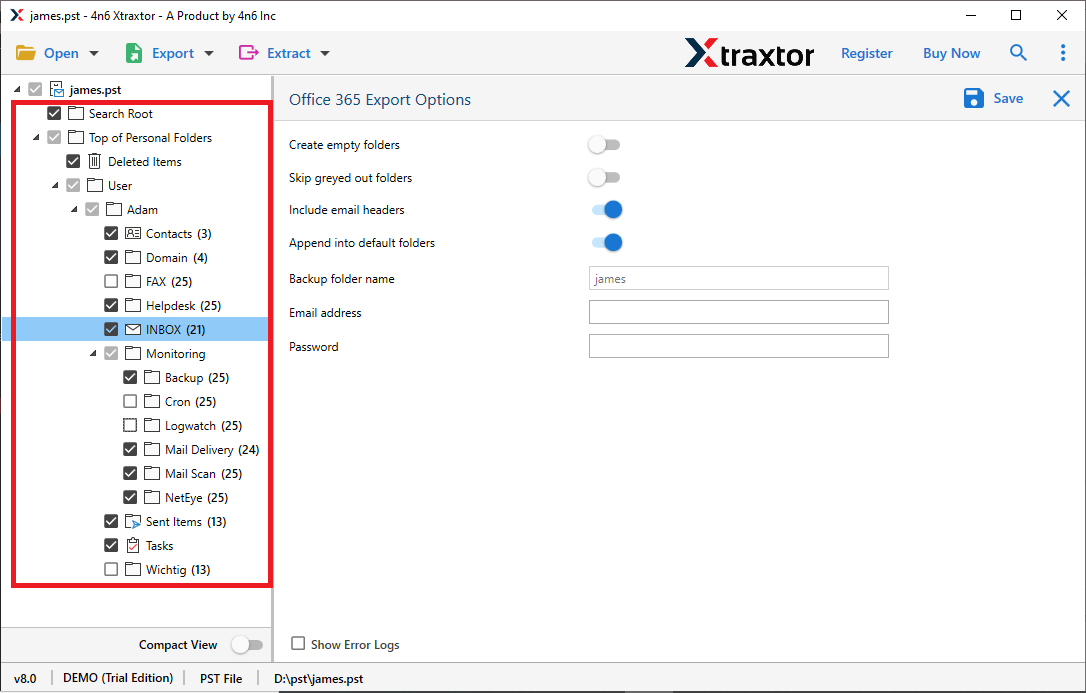
Step 6. Enter the Office 365 login details and then press the Save button.
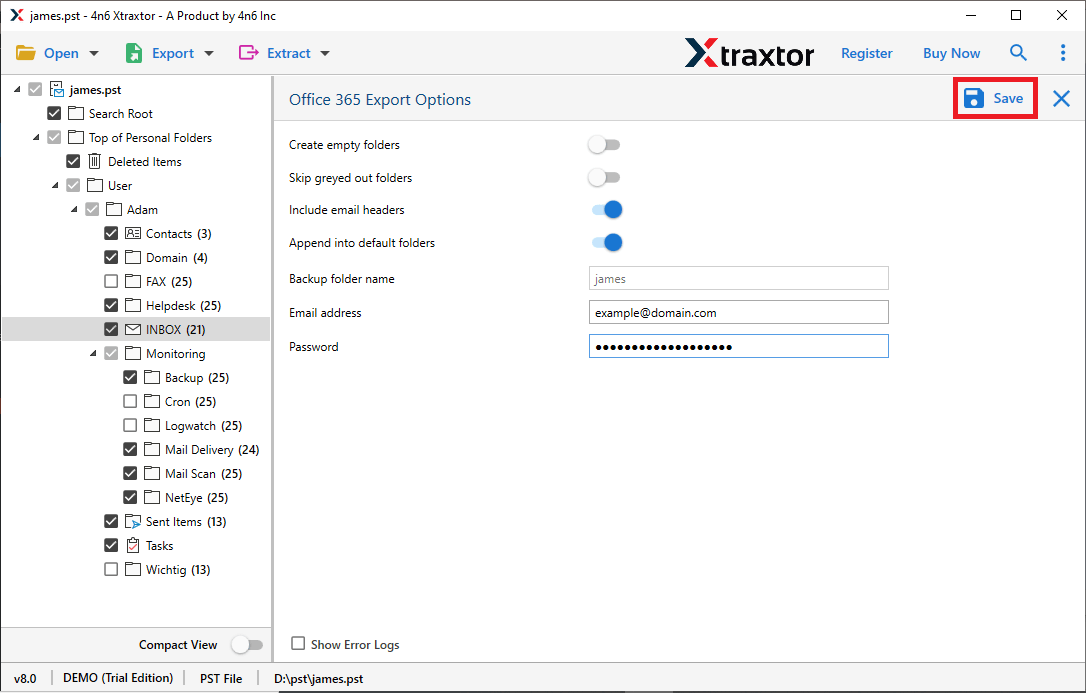
The process is Done! Hence, you can easily open PST file in shared mailbox Office 365 in a few simple clicks.
Prominent Features of Xtraxtor PST to Office 365 Migration Tool
- Tool can import PST file to Office 365 shared mailbox in bulk.
- Preserves 100% data integrity and save emails and other data with all key attributes.
- Selective email importing facility to save only particular data from file.
- Maintains folders and subfolders hierarchy during the importing process.
- Directly import PST to Shared mailbox Office 365 without installing any external applications.
- tool is able to import PST to Yahoo, Gmail, Hotmail, Thunderbird, and more email accounts.
- Able to transfer large or unlimited PST files without losing any single bit of data.
- Do not require in depth technical knowledge to export PST files to Microsoft 365.
- Supports Win 11, 10, 8.1, Vista, XP, and all below editions.
Final Words
In this post, we have discussed how to import PST to Shared mailbox Office 365. Here, we have explained 3 techniques to save PST emails to O365. You can manually export PST to Office 365 but these methods come with some limitations. However, experts recommend using the automated solution to transfer PST file to Shared mailbox in Microsoft Office 365. The above-suggested tool is capable of importing PST files to Office 365 shared mailbox without any hassle.
FAQs – People Also Ask (PAA)
Q1. Can I import PST directly to a shared mailbox?
Ans. Yes. You can import PST to a shared mailbox using Outlook, network upload, or a third-party migration tool.
Q2. Is Outlook mandatory to import PST?
Ans. No. Automated tools allow PST import without Outlook installation.
Q3. Can I import large PST files to shared mailbox?
Ans. Manual methods have size limits. Automated tools support large and unlimited PST files.
Q4. How long does PST import take?
Ans. It depends on PST size and the method used. Automated tools are significantly faster.
