How to Convert Office 365 Mailbox to CSV File?

This is the technical guide to convert Office mailbox to CSV file with attachments. Read till the end and convert all or selected emails from Office 365 into CSV file with ease.
Exporting your Office 365 emails to a CSV file is a smart way to organize and review your mailbox data. CSV (Comma-Separated Values) files are widely supported and can be opened easily in programs like Microsoft Excel or Google Sheets. This makes it much easier to sort, filter, or analyse your email data without needing advanced tools.
Without any further delay, let’s move ahead and complete the conversion process.
How to Export Office 365 Emails to CSV File Effortlessly?
Try Xtraxtor Email Backup Tool to export Office 365 mailbox to Excel CSV file in a secure way. The software can convert all emails from Office 365 to CSV format without any data loss. It preserves all metadata properties and other key attributes during Office 365 to CSV conversion. Using this utility, you can export any specific data from Office 365 to CSV with the help of filters.
In addition, it contains dozens of amazing features that help to instantly convert Office 365 mailbox to CSV file format. The tool comes with a simple user interface that helps beginners to complete the process without any assistance. You can download its free demo version to check its work efficiency and accuracy.


Steps to Convert Office 365 Mailbox to CSV File
- Download and run Xtraxtor software on your Windows PC.
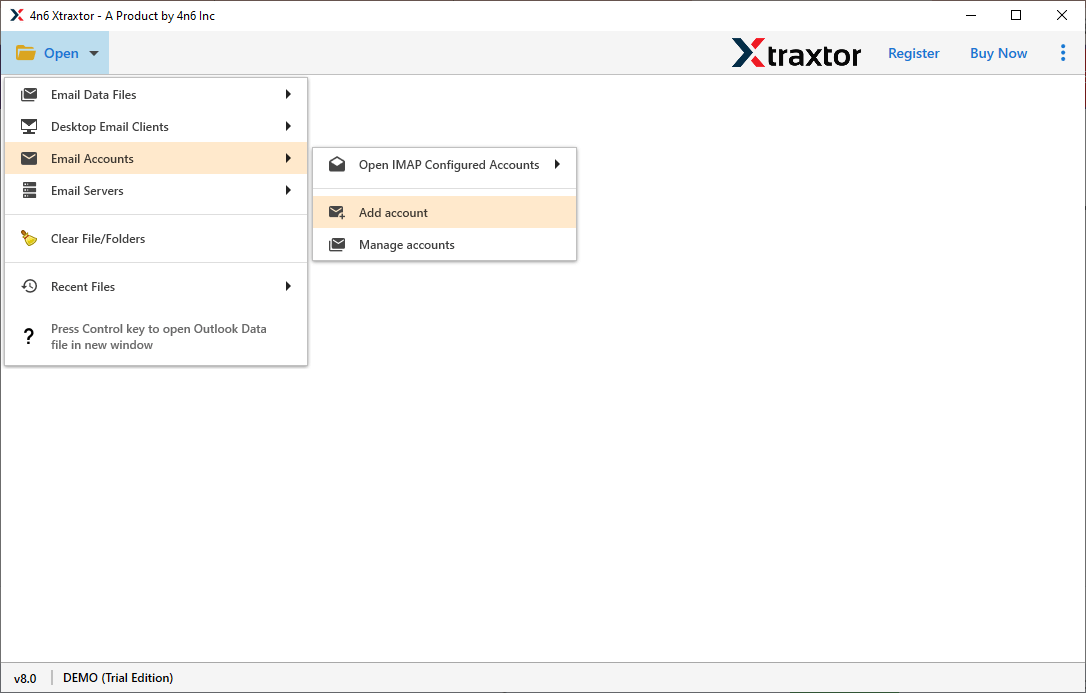
- Now, Click on Open >> Email Accounts >> Add Account.
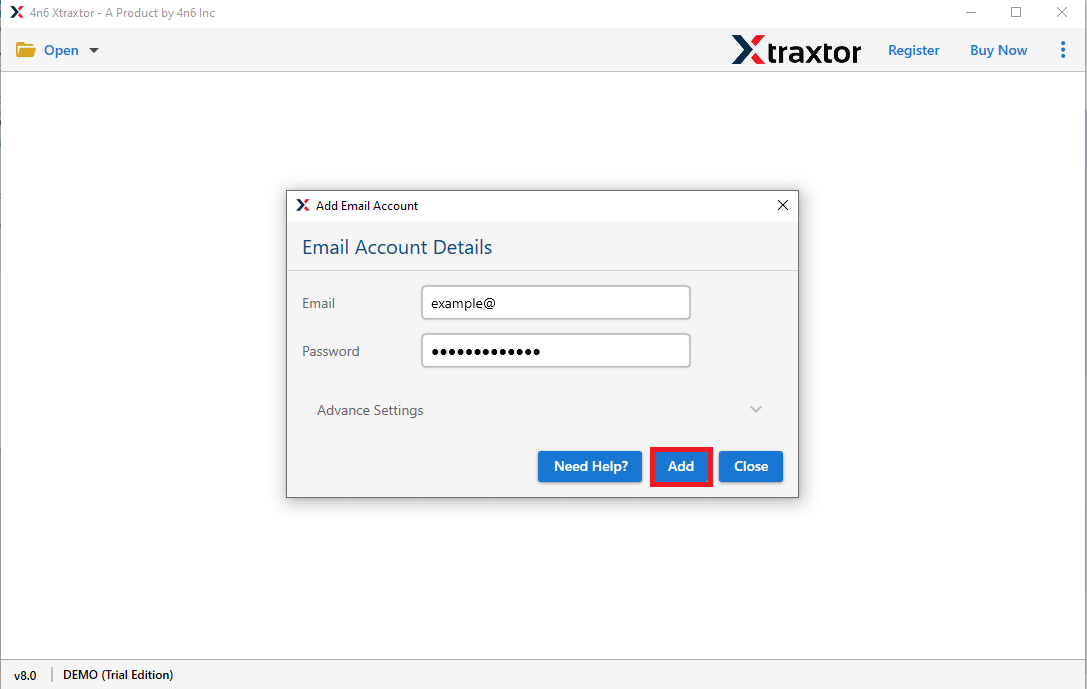
- Enter Office 365 credentials and click on Add button.
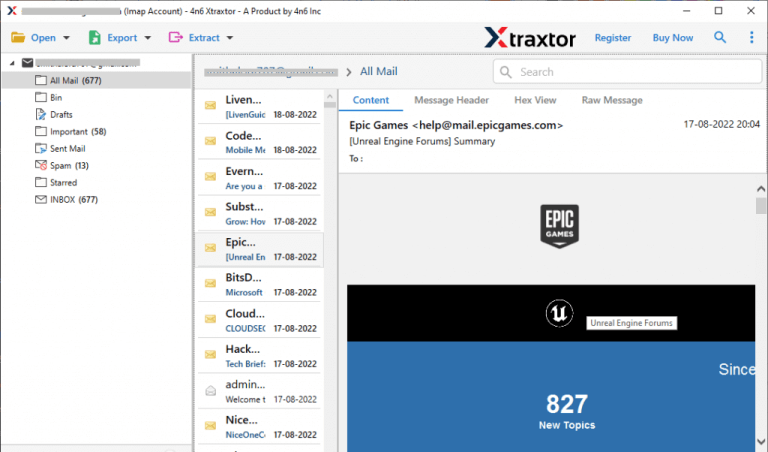
- Here, you can view Office 365 mailbox data before converting them.
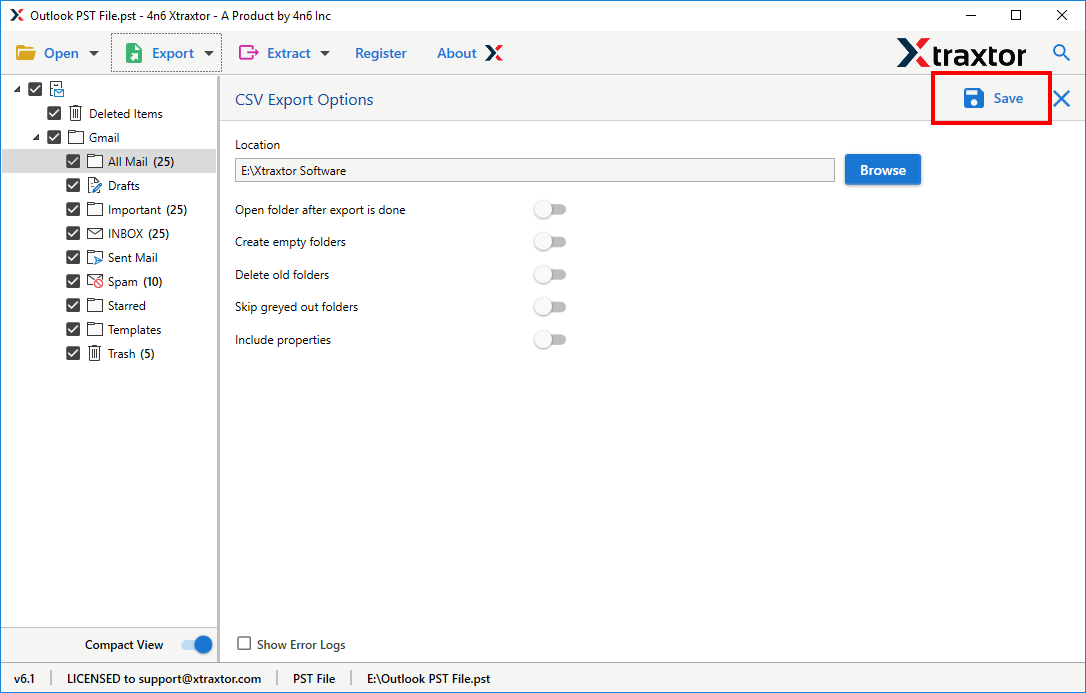
- After that, click on Export and select CSV format from the given options.
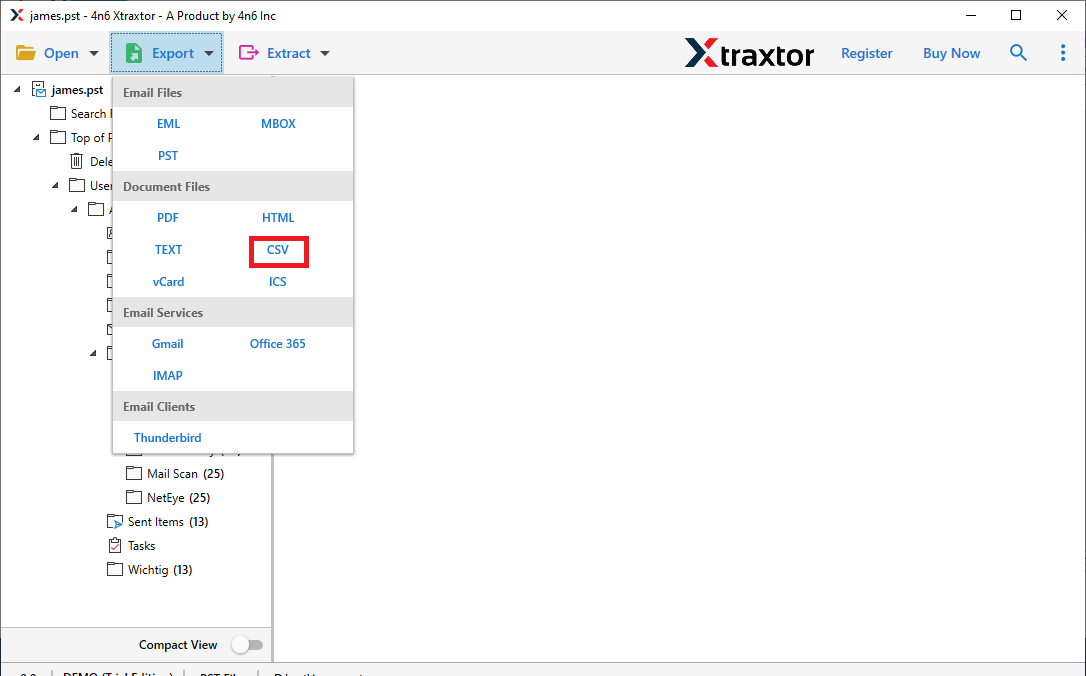
- Choose the Office 365 Mailbox folders and subfolders to save them in CSV file format.
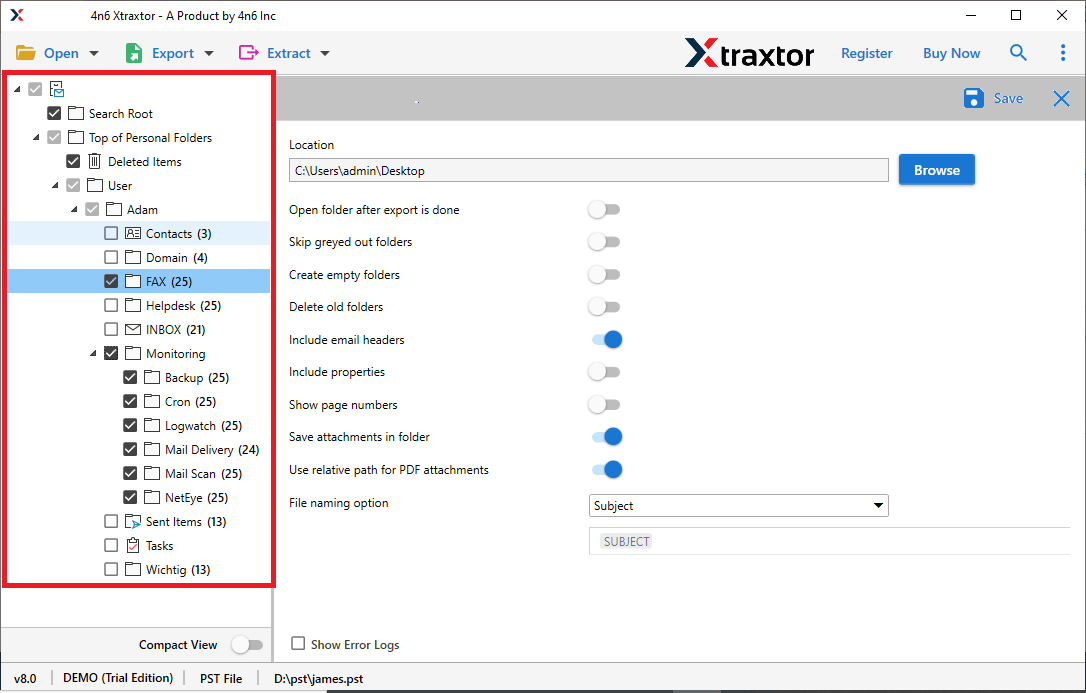
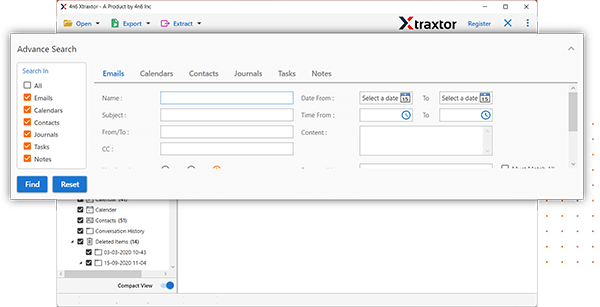
- Apply the filter options to convert only selected data from Office 365 to CSV.
- Browse the Destination location to save exported file and then click on the Save button to start the conversion process.
The process is complete. Hence, you can easily perform the Office 365 to CSV conversion process in a few simple clicks.
Prominent Features of Xtraxtor Software
The software has many advantages that help to convert Office 365 mailbox to CSV file. Some of them are-
- Bulk Conversion- With this application, you can export all mailbox data from Office 365 to CSV at the same time. It saves your time and effort to save large mailboxes.
- Direct Exporting- The tool can directly save Office 365 emails in CSV format without installing any external applications. Using this utility, you can also backup Office 365 email in PST, PDF, MBOX, HTML, EML, and 10+ file formats.
- Advanced Filter Options- There are multiple advanced filters such as to, from, date, time, cc, bcc, subject, etc. Using these, you can convert any specific emails from Office 365 to CSV file.
- Preserves Data Integrity- The software does not lose any single bit of data during the conversion process. It saves all data from Office 365 to CSV with complete accuracy.
- Cloud-to-Cloud Migration: Using this tool, you can directly migrate email from office 365 to Gmail, yahoo Mail, Hotmail, Zoho Mail, and many other email accounts.
- Maintains Folder Hierarchy- Users are always concerned about the structure of data during the process. Xtraxtor preserves all folders and subfolder hierarchies and exports them without changing the original format.
- Easy to Use- The interface of this utility is very simple and easy to use. Anyone can easily convert Office 365 to CSV file without having any technical training and guidance.
- Freedom to Choose Destination Location- The software allows you to save the exported file at your desired location. So, you can easily access them after the process for further use.
- Vast Compatibility- In this application, there are no compatibility issues. You can easily run this tool on any latest and old versions of Windows OS.

Method 2. How to Convert Office 365 Mailbox to Excel CSV File Manually?
You can manually export Office 365 mailbox to CSV file using the PowerShell cmdlet command. But, you can use this method if you have the necessary permissions to run the PowerShell cmdlet and access Office 365 mailboxes.
Follow the below-given steps to convert Office 365 mailbox to CSV file-
- Firstly, launch PowerShell and sign in with administrative details.
- Now, connect with Office 365 account using the following command:
connect-ExchangeOnline -UserPrincipalName your-email@domain.com
Type your Office 365 email address at the place of your-email@domain.com - Once you successfully connected then run the following command to convert Office 365 mailbox to CSV file format:
Search-Mailbox -Identity your-email@domain.com -Targetmailbox your-email@domain.com -TargetFolder “Export” -L - Again, type your Office 365 mailbox email address at the place of your-email@domain.com
- Select the Mailbox folders to convert into CSV and choose the path to save the CSV file.
- It takes some time that depends on the size of your Office 365 mailboxes.
- After completing the process, go to the path that you have provided to save the CSV file.
Limitations of Manual Solution
- You must have permission to use PowerShell to convert Office 365 mailbox to CSV file.
- Users must have the in-depth technical knowledge to use the PowerShell cmdlet command.
- It takes lots of time if your Office 365 mailbox size is large.
- There are higher chances of data loss during the process.
FAQs- Office 365 Backup Tool
Q1. Is it possible to export Office 365 mailbox to CSV in bulk in this application?
A- Yes, The software allows you to convert all mailbox data at once with complete accuracy.
Q2. Can I convert emails from Office 365 to CSV between April 2019 to March 2023?
A- Yes, You can easily save emails from April 2019 to March 2023 using date filters.
Q3. Can I run this utility on a Windows 11-based system?
A- Yes, You can run this tool on any latest and old versions of Win OS including Win 11.
Conclusion
In this post, we have discussed how to convert Office 365 mailbox to CSV file. Here, both manual and professional methods have been explained in detail. You can manually export Office mailbox to Excel CSV but there are some limitations of this approach. However, using the above-suggested tool you can save Office 365 mailbox data in CSV in a few simple clicks without losing any single bit of data.
