If you’re looking to learn how to back up your CenturyLink emails to your computer, this blog will guide you step by step. Whether you’re looking to save your entire mailbox or specific emails, we will provide the methods to help you securely store all your CenturyLink emails on your hard drive. By the end of this post, you will be able to protect your important data and ensure you have a local copy of all your communications for future reference.
Lumen Technologies, Inc., previously known as CenturyLink, is an American telecommunications company that provides a wide range of services, including communications, network services, security, cloud solutions, voice services, and management services. In addition to these services, CenturyLink offers a webmail platform that includes features such as address books, calendars, to-do lists, and more for seamless communication.
How to Download Emails from Centurylink?
1. Open the Outlook and navigate to File >> Info >> Add Account.

2. Then Enter your CenturyLink email address and hit on the Connect button.
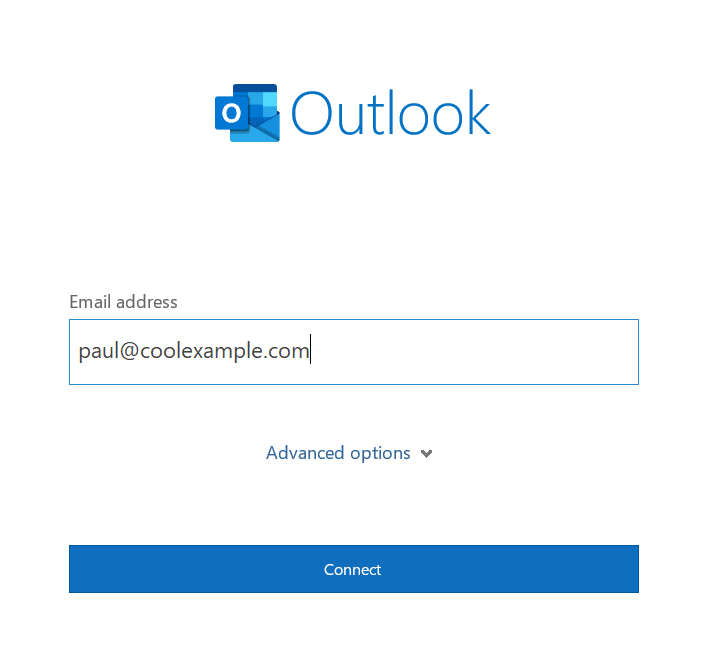
3. Now enter your password and finish the configuration.
4. Again go to File >> Open & Export >> Import/Export.
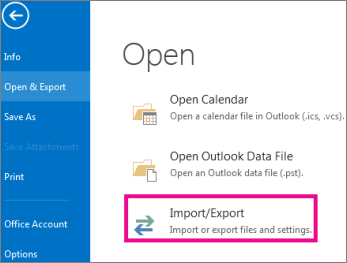
5. Choose Export to a File >> Outlook Data File (.pst).
6. Select your webmail address and select email folders to export.
7. Browse the location to save exported data file and hit on the Finish button.
Here you backup CenturyLink email to hard drive using a manual approach. However, with this native approach, you face many restrictions, such as data loss, lengthy process, no filter options, etc. Most importantly if Outlook import/export greyed out then this manual approach will be not the ideal one for backup.
How to Backup CenturyLink Emails to Hard Drive?
The Xtraxtor Email Backup Wizard is the most efficient way to export all your emails from your CenturyLink Mail account to your hard drive. Thanks to its user-friendly interface, even beginners can easily back up their CenturyLink emails locally. You can also use various filter options, such as To, From, CC, BCC, Name, Date, and Time, to selectively back up specific emails.
In addition, this tool allows you to migrate your CenturyLink emails to other webmail accounts, including attachments, all from a single interface. The software also supports multiple file formats, giving you flexibility in how you back up your CenturyLink email data to your hard drive.
Steps to Backup CenturyLink Emails
Step 1. Launch Xtraxtor software on your system.
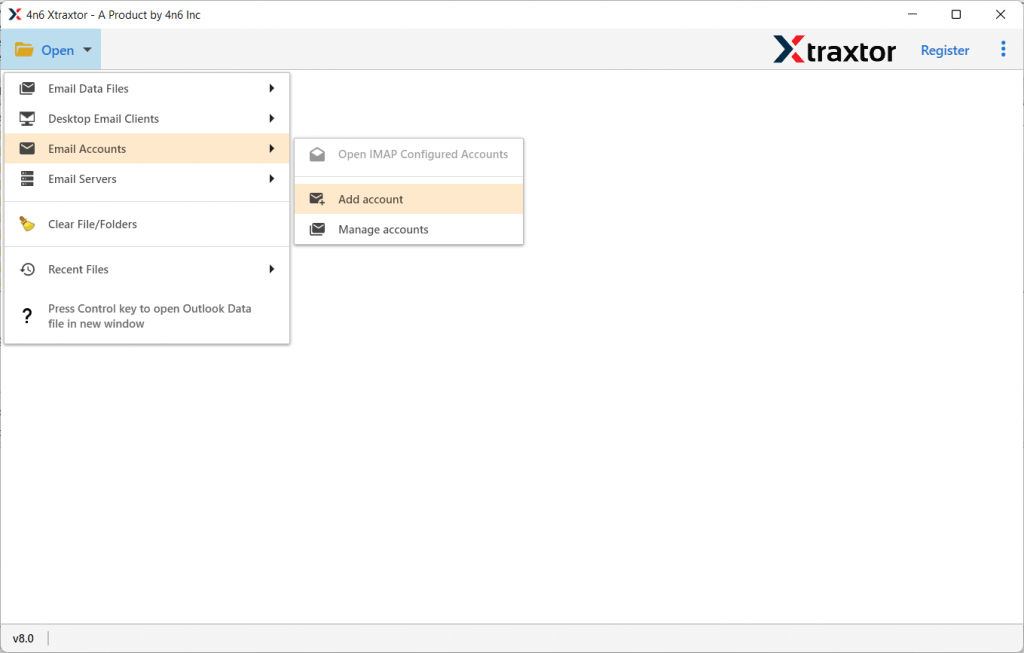
Step 2. Now select Open >> Email Account >> Add Account.
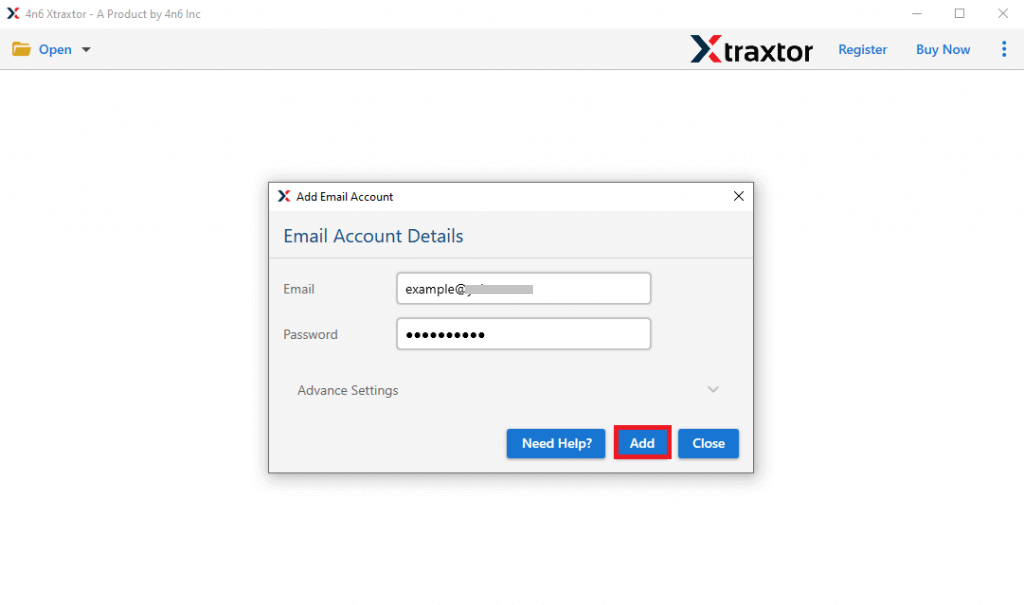
Step 3. Enter your login details and hit on the Add button.
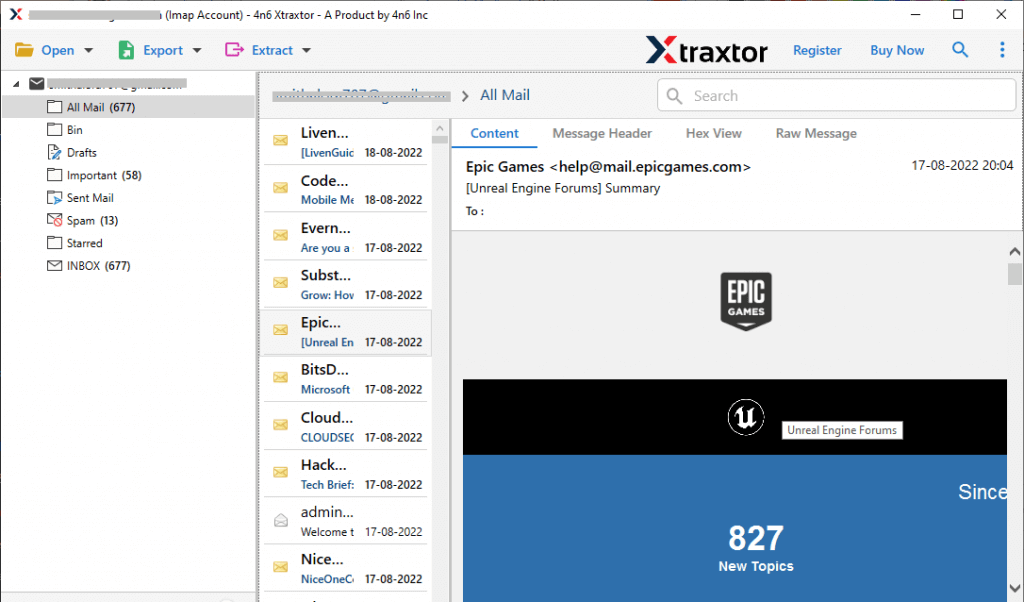
Step 4. Here you can view your emails before exporting them.
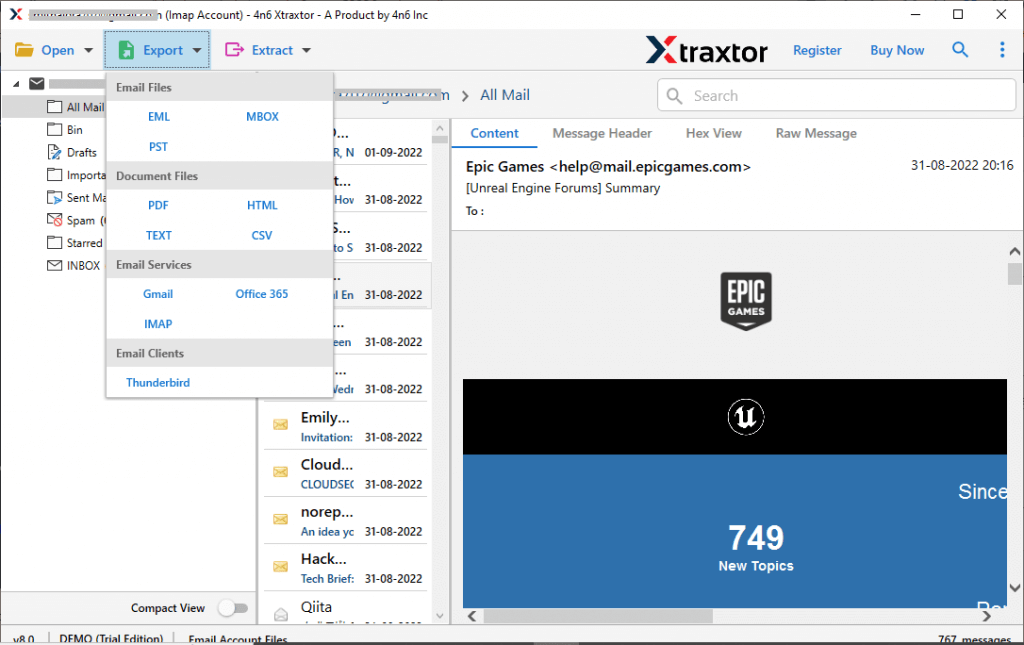
Step 5. Click on Export and choose PDF or any file format.
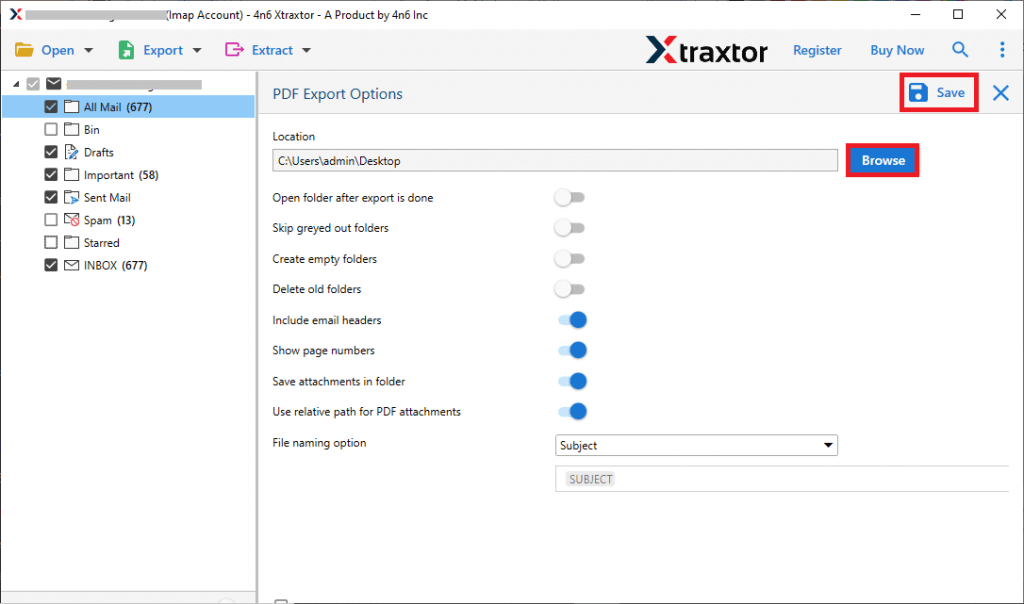
Step 6. Browse the location to save exported data file and hit on the Save button.
Done! Here you backup CenturtLink email to hard drive with attachments in a few simple clicks. You can use the demo version of the software for creating CenturyLink Mail backup on your hard drive.
Conclusion
In this above sections, we mention the manual as well as the automated way to download CenturyLink emails to hard drive. Now you choose any of the given solutions and backup CenturyLink Mail email to hard drive with attachments. By selecting the solution that best fits your needs, you can easily back up your CenturyLink emails and attachments to your hard drive, ensuring your important data is safely stored. This article aims to make the backup process straightforward and stress-free for you.
