Importing MBOX files into Microsoft Outlook is a common requirement for users migrating from MBOX-supported platforms like Thunderbird, Apple Mail, etc. Although Outlook doesn’t support MBOX format natively, this makes the process a bit tricky. In this guide, we’ll walk you through a step-by-step guide to import MBOX to Outlook client smoothly and accurately. Here, we’ll show you both manual and automated solutions to open MBOX file in Outlook.
Before we get started, let’s understand the reasons to add MBOx to Outlook.
Why Need to Import MBOX to Outlook?
Here are some reasons to choosing Outlook application for importing MBOX files.
- Switching from Thunderbird to Outlook for professional use
- Better integration with Office 365
- Outlook offers advanced features, such as calendars, contacts, and task management
- Centralised email management and stronger security features
How to Import MBOX File to Outlook Manually?
In this approach, you need to configure an email account like Gmail with Thunderbird, import MBOX files via ImportExportTools, and then move them to the Gmail mailbox folder. After that, add the same Gmail account in Outlook. This method works in many phases.
Follow the steps to import MBOX in Outlook:
Steps 1. Configure Email Account in Thunderbird
1. Open Thunderbird on your system.
2. Install ImportExportTools NG in Thunderbird.
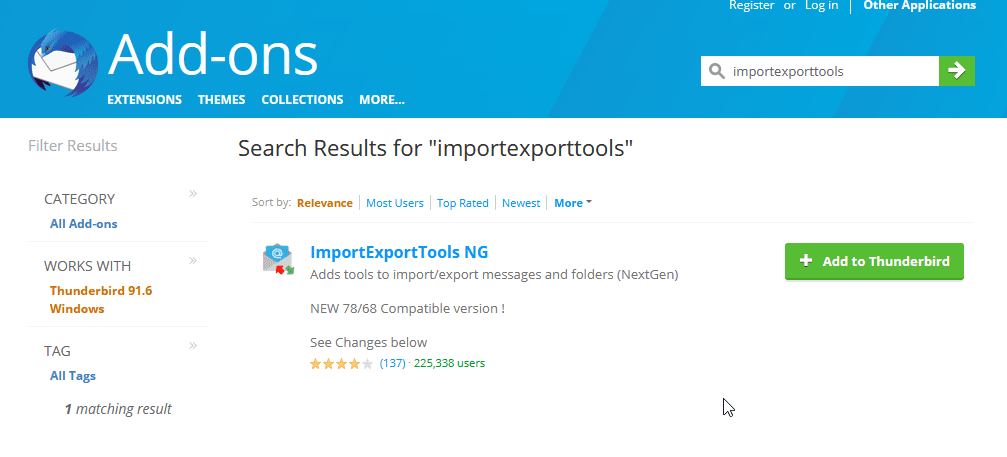
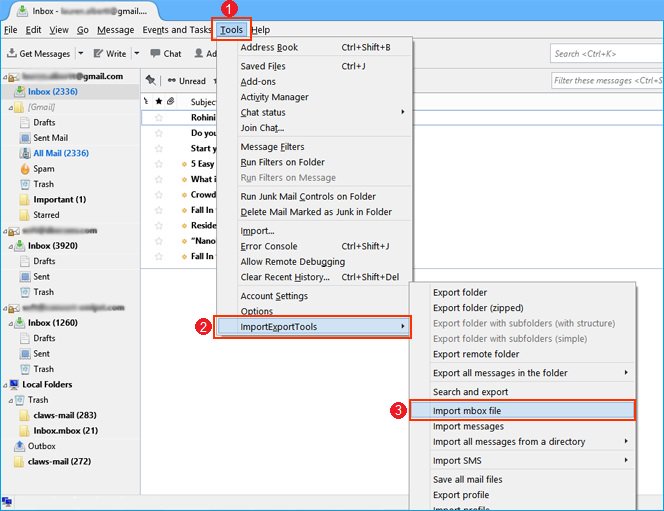
3. Now, click on Tools >> ImportExportTools NG >> Import MBOX File.
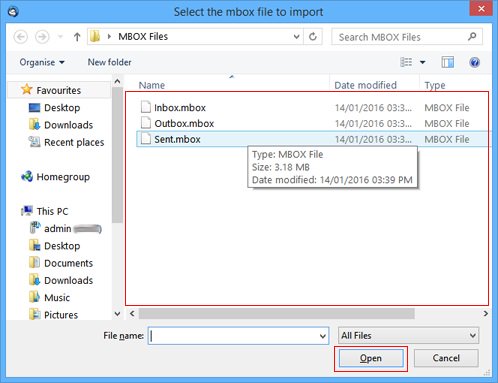
4. Select and import MBOX to Thunderbird that you want to upload into Outlook.
5. Click on three horizental line and select Account Settings.

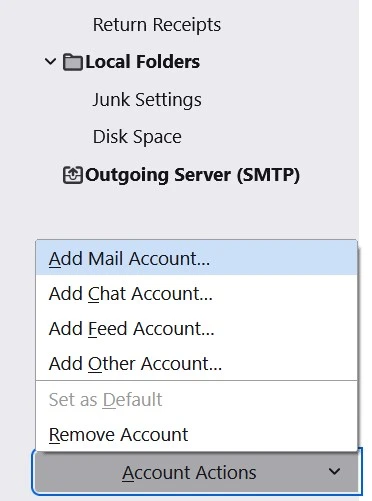
6. Click on Account Action and select Add Mail Account.
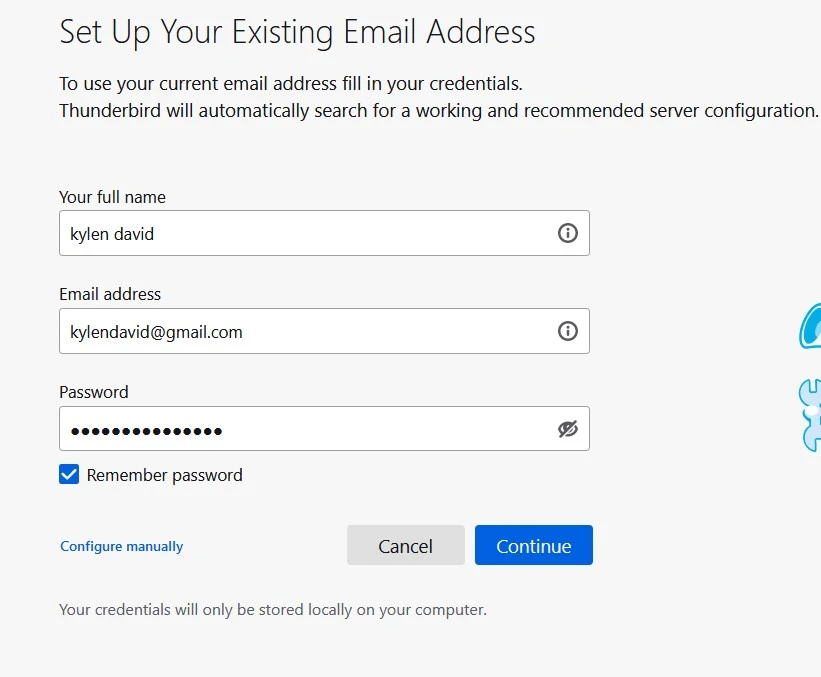
7. Enter your Gmail account email address and password and then hit on the Continue button.
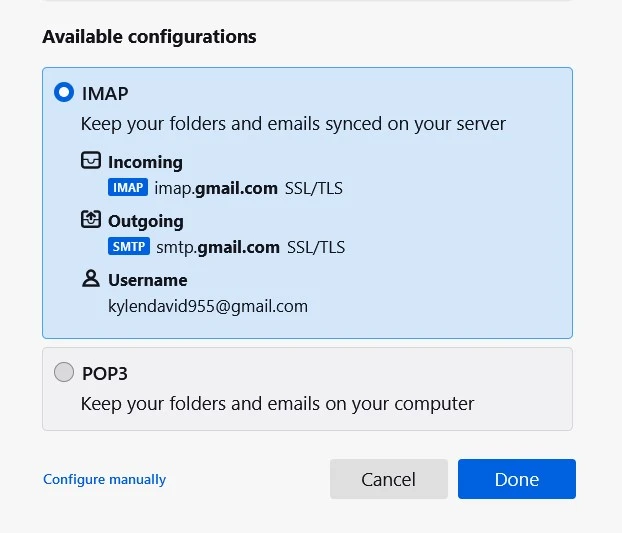
8. Enter the Gmail IMAP settings details and click on Done to complete the setup process.
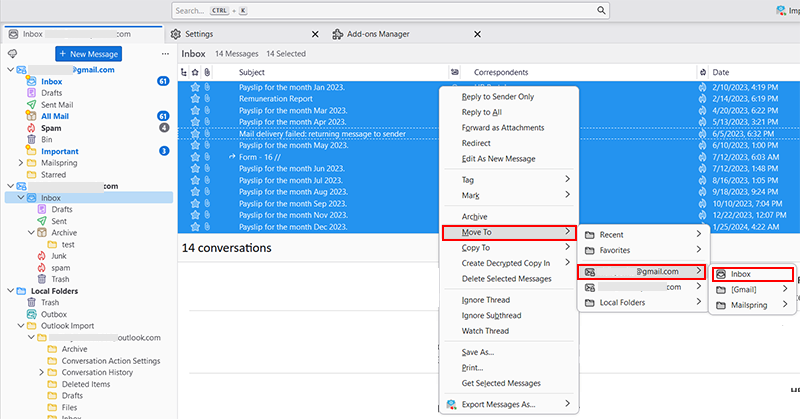
9. Go to the imported MBOX file and right-click on it.
10. Choose Move To >> Your Gmail account >> Gmail mailbox folder.
Step 2. Configure Same Email Account With Outlook
- Open the Outlook application on your system.
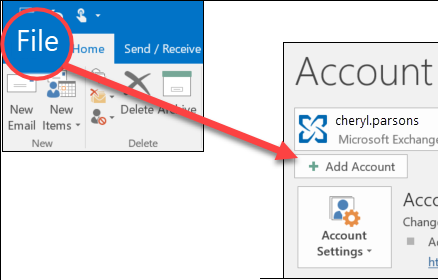
2. Click on the File tab and select Add Account.
3. Enter your Gmail account login details and click the Connect button.
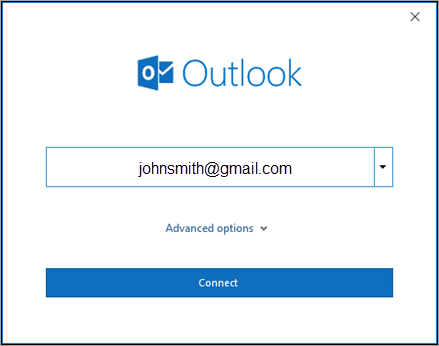
4. Outlook will verify your Gmail account details. Once checked, click the Done button.
Now, you can access MBOX emails in your Outlook mailbox. However, the process is time-consuming users must have technical expertise to complete this task without any data loss.
How to Open MBOX File in Outlook Automatically?
Download and install Xtraxtor MBOX Converter on your system. This software will help you to import MBOX to Outlook in a few simple clicks. With this utility, you can export MBOX files to PST format that can be easily imported into Outlook via the Import/Export option. It will maintain the folder and subfolder hierarchy during the MBOX to Outlook transfer process. It is 100% safe and authentic program that can transfer multiple MBOX files at once.
Click on the link below to download it for free.
Steps to Import MBOX to Outlook Client
Step 1. Launch the mentioned program on your Windows PC.
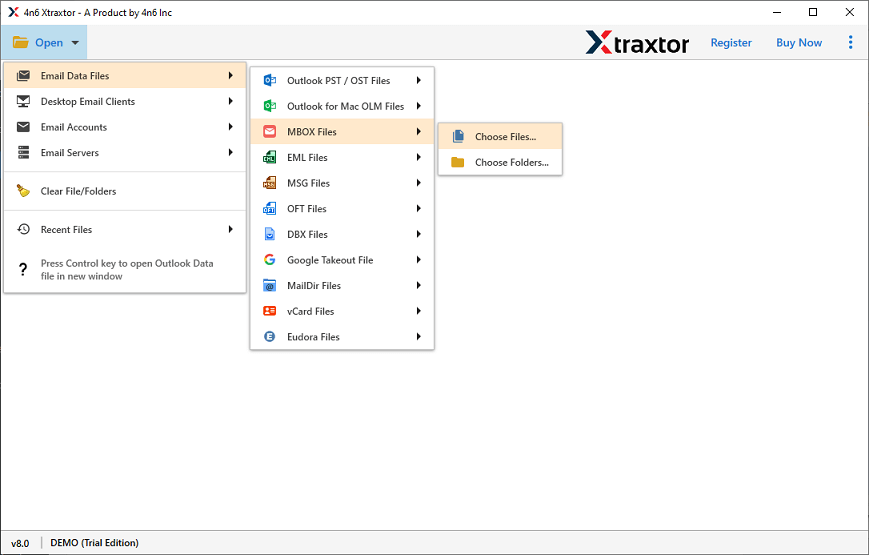
Step 2. After that select Open >> Email Data File >> MBOX Files >> Select File or Folder.
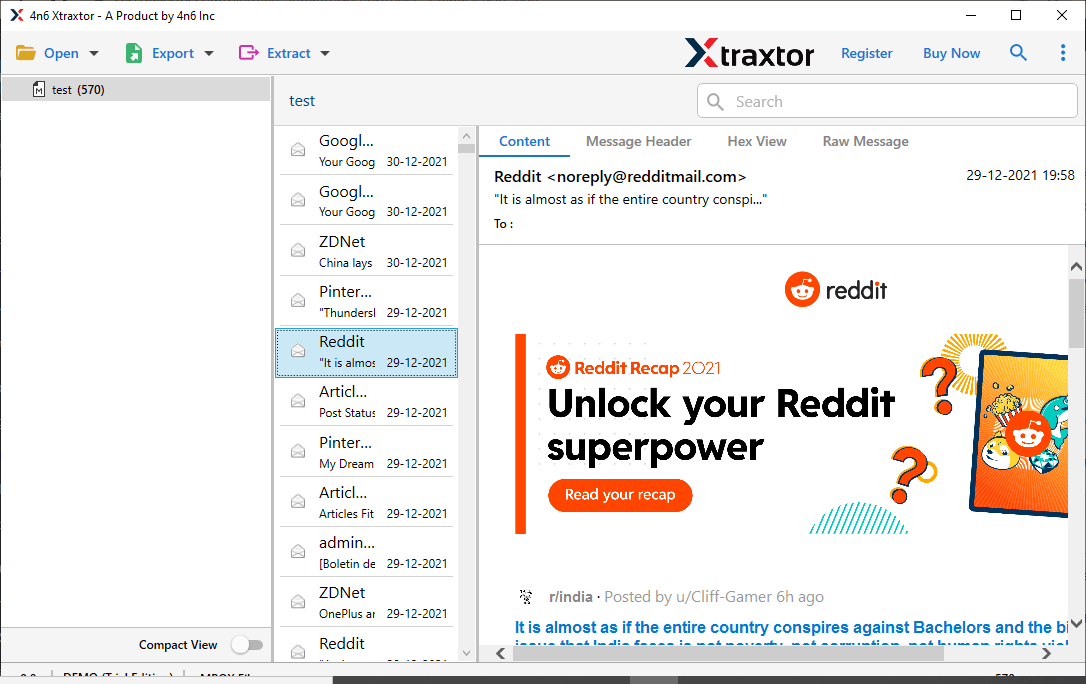
Step 3. Here you can view your emails from the uploaded data file.
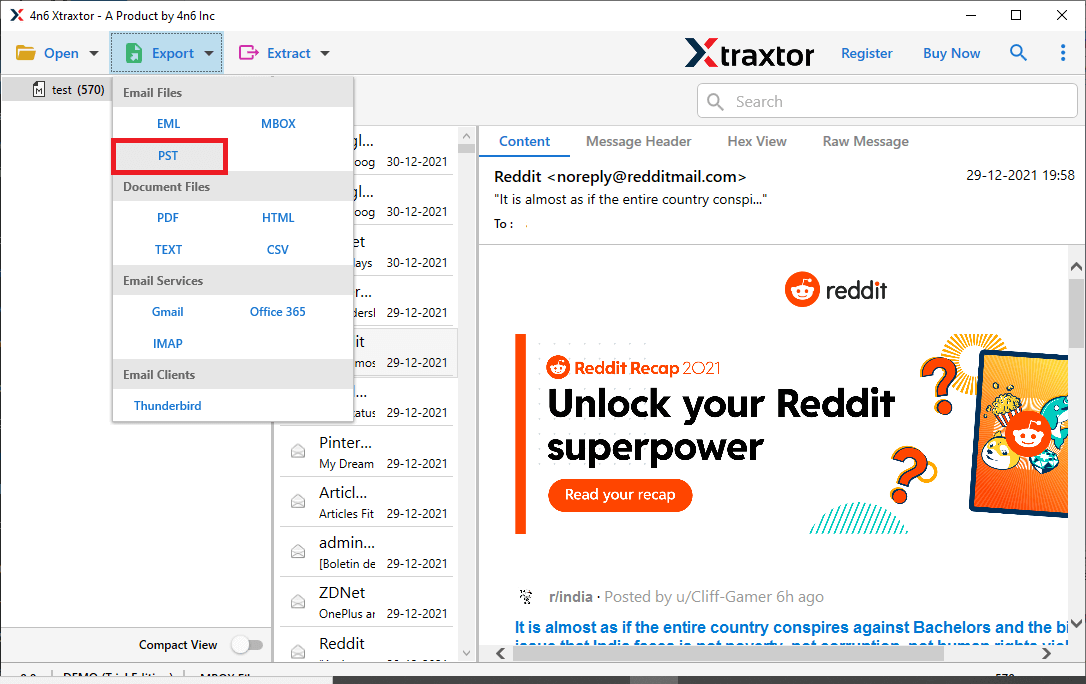
Step 4. Click on Export and choose PST as a saving option.
Step 5. Specify the location to save the data file and hit on the Save button.
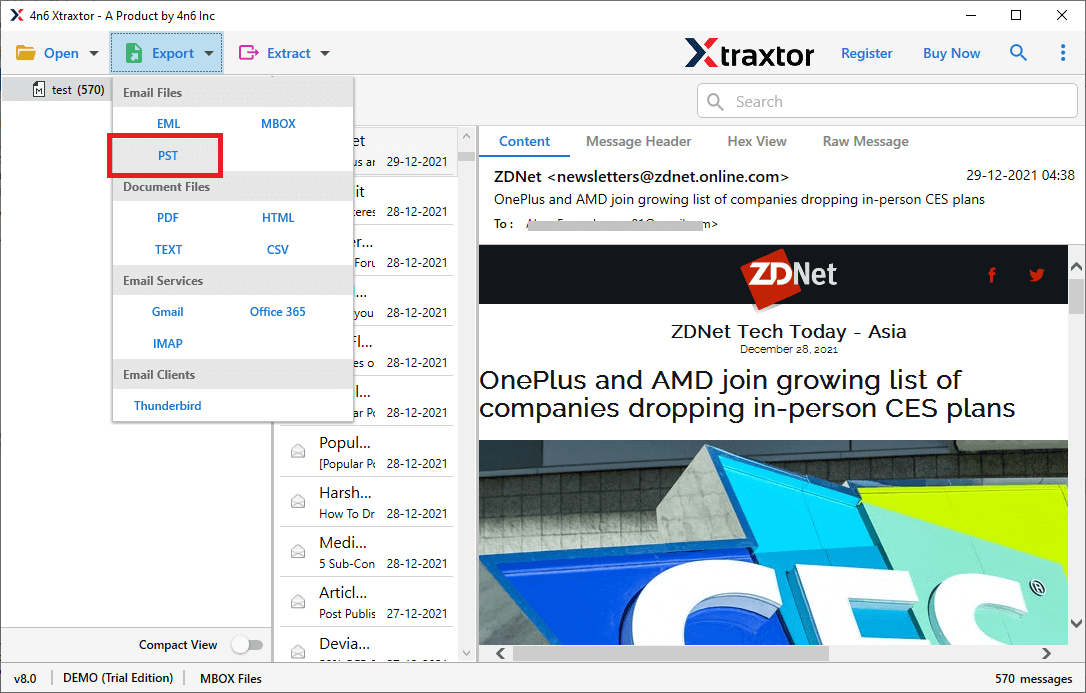
Step 6. Now open Outlook and import PST to Outlook using the Import/Export tool.
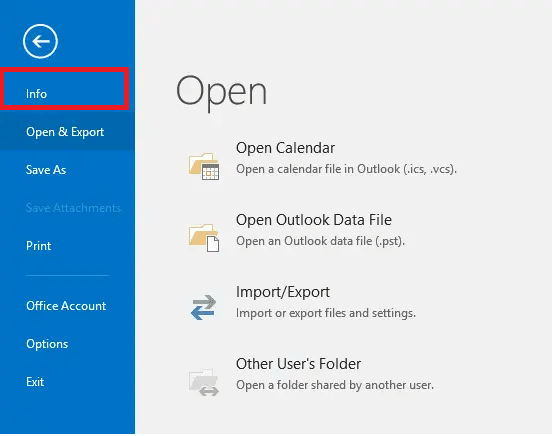
Done! That’s how you can import MBOX into Outlook in a swift way without any data loss.
Why Choose Xtraxtor to Transfer MBOX to Outlook Client?
The software offers various advanced features that make the importing process simple. Some of them are;
- The software enables you to export MBOX file in bulk with full accuracy.
- The tool keeps the original structure of mailbox folders while importing.
- It preserves all key elements and attributes throughout the process.
- It can also import emails from MBOX to Exchange, Yandex and many other email accounts.
- With this tool, you can preview emails from MBOX files.
- This software is designed with a simple and easy graphical user interface.
- It is compatible with all the latest and older versions of Windows OS.
- Gives the option to import selective MBOX file folders to Outlook.
- A free demo version of the software is also available.
Conclusion
This blog explained how to import MBOX to Outlook using both manual and automated methods. The manual method works but is lengthy and time-consuming. To save time and effort, we suggest using an automated tool to upload MBOX to Outlook. You can use the demo version of the tool and experience the MBOX to Outlook transfer process.
Frequently Asked Questions
Q1. How to import MBOX files into Outlook?
Ans. There are two different ways to convert MBOX to Outlook, which are explained in this article.
Q2. Can I import multiple MBOX files into Outlook at once?
Ans. Yes, you can select multiple MBOX files or folders and import them at once without affecting your data.
Q3. Will the folder structure of my MBOX file be preserved in Outlook?
Ans. Yes, the email folder and sub-folder structure will be preserved while importing MBOX email to Outlook account.
