Moving emails from Outlook to Office 365 can sometimes be difficult, especially when your email data is stored in a PST file. PST files cannot be directly imported into Office 365 without using Outlook or another suitable method. Because of this limitation, many users find it confusing to import PST to Office 365 account.
If you are also looking for a way to migrate PST files to Office 365 account, then this guide will help you. In this article, we will explain different methods that you can use to import PST to Office 365 mailbox step by step. These methods will help you transfer your emails along with attachments and other mailbox data safely.
Microsoft Outlook is one of the most popular desktop email clients used by individuals and organizations to manage emails. It stores mailbox data in PST files, which are used for backup and data portability. On the other hand, Office 365 is a cloud-based email service that allows users to access their emails from anywhere and on any device.
Because of the flexibility and cloud access provided by Office 365, many users want to move their Outlook PST data to their Office 365 account. In the following sections, we will discuss the reasons for this migration and the best methods to complete the PST to Office 365 import process.
So, let’s begin the process.
Why Do Users Import PST to Office 365 Mailbox?
Users commonly migrate PST files to Office 365 for these reasons:
- To store everything in a secure cloud mailbox
- To access old emails on any device
- To remove dependency on local Outlook installations
- To centralize all company email data
- To prevent PST corruption or accidental loss
Manual Ways to Migrate PST Files to Office 365 Mailbox
Microsoft provides three native methods. Each works for a different type of user.
Method 1. How to Import PST Files Office 365 With Outlook?
You can manually import PST to Office 365 using Outlook. Follow the steps below for PST to Office 365 migration-
Step 1. Add Office 365 Account in Outlook
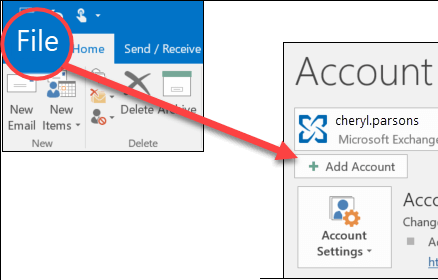
- Open the MS Outlook email client on your system. Now, Click on File >> Add Account.
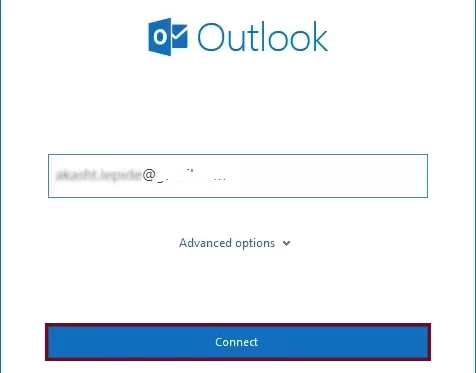
- Enter the Office 365 email address and click Connect.
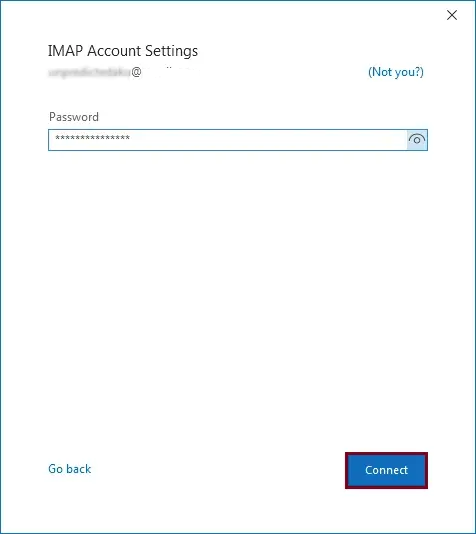
- After that, Type your Office 365 account password and Click on Connect.
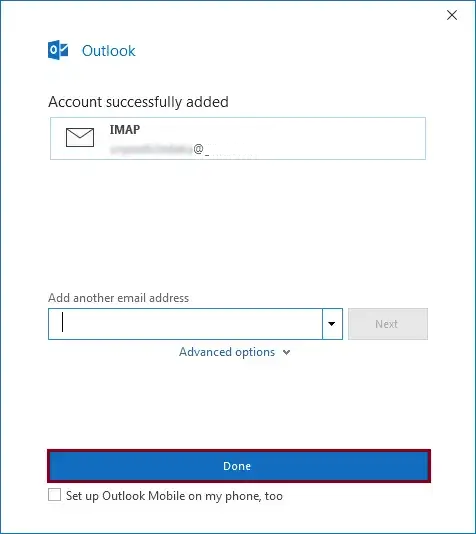
- Now, your Office 365 account is successfully added to Outlook, Press the Done button.
Step 2. Import PST File into Office 365 Mailbox
- Again Click on File >> Open & Export >> Import/Export.
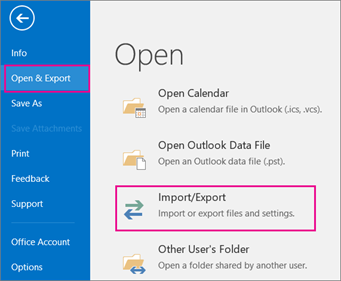
- Select Import from another program or file and press the Next button.
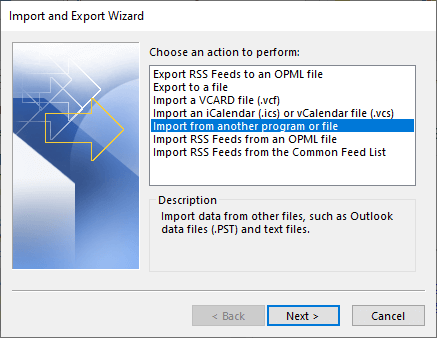
- Choose Outlook Data File (.pst) and hit on Next button.
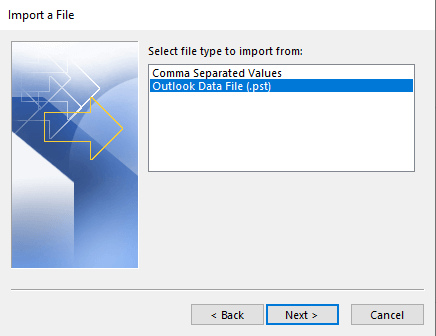
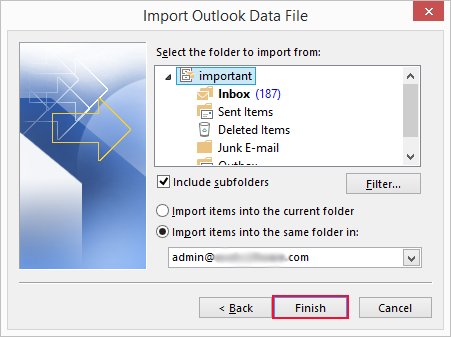
- Click on the Browse button and select the PST file that you want to import.
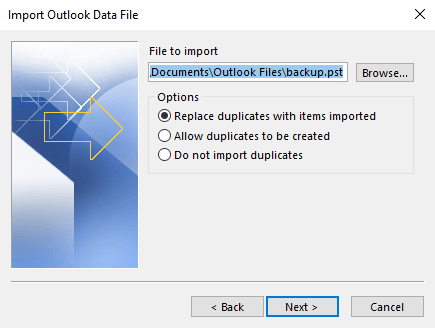
- Choose Office 365 Mailbox and click on the Finish button to start the import process.
Done! Here is the manual way for the migration. Alternatively for hassle-free import, you can use the automated tool.
Method 2: How to Migrate PST into Office 365 Using Network Upload?
This native approach completes the PST to Office 365 migration in different steps. Follow the given instructions for that –
Step 1. Assign Import Permissions
- Log in to your Microsoft 365 Admin Center.
- Navigate to Security & Compliance > Permissions.
- Assign the Mailbox Import Export role.
Step 2. Download & Install Azure AzCopy Tool
- Go to the Microsoft Download Center and install Azure AzCopy.
- Use the SAS URL provided by Microsoft to upload PST files to Azure Storage.
Step 3. Upload PST Files to Microsoft Cloud
Open Command Prompt and run the following command:
[box type=”shadow” align=”” class=”” width=””]
AzCopy.exe /Source:<PST Folder Path> /Dest:<SAS URL> /V:<Log File Path>[/box]
Step 4. Create a Mapping File
- Download the PST Import Mapping Template from the Compliance Center.
- Fill in details such as email addresses, file names, and destinations.
Step 5. Import PST to Office 365
- Navigate to Security & Compliance > Data Governance > Import.
- Select Import PST Files and upload your mapping file.
- Click Validate and start the import process.
The Network Upload Method is a long and complicated process that requires technical knowledge. It has a 20 GB file size limit, so larger files cannot be imported at once. Using PowerShell for the import can be tricky and might cause data corruption if not done correctly. Also, the process is not instant, so you may have to wait, especially when importing PST files into a shared Office 365 mailbox.
Method 3: How to Import PST File to Microsoft 365 Using Drive Shipping
If you have large PST files, the Drive Shipping method is a better alternative. Follow the steps for Drive Shipping:
- Copy PST files to a BitLocker-encrypted hard drive.
- Request a shipping label from the Office 365 Security & Compliance Center.
- Ship the drive to Microsoft’s data center.
- Microsoft uploads PST files to Azure Storage.
- Complete the import via the Office 365 Compliance Center.
Although these manual solutions will transfer PST emails to Office 365 with these, there are various limitations. All are time-consuming and need advancing of technical knowledge
When Manual Methods Are Not Enough
Manual methods may not work when:
- PST is too large (50GB or more)
- PST file is corrupted or orphaned
- Outlook is not installed
- You want selective import
- You need bulk migration without errors
- Import/Export option is greyed out
- You don’t have Azure/Compliance permissions
Only in these cases, users prefer a professional tool to avoid data loss and make the process simple.
How to Upload PST File to Office 365 Online Securely?
To avoid any hassle while importing PST files to Office 365, try Xtraxtor software. This will effortlessly move all the PST file data into Office 365 mailbox without affecting your data integrity. One of its standout features is that it maintains the original folder structure and hierarchy, keeping everything well-organized. To complete the importing, simply upload the PST file, choose Office 365, and enter your login credentials. The software will start transferring your emails with precision and accuracy.
Download the free version of PST to Office 365 migration tool. For that, click the link below.


Steps to Import PST to Office 365 Without Outlook
- Install and run the software on your system.
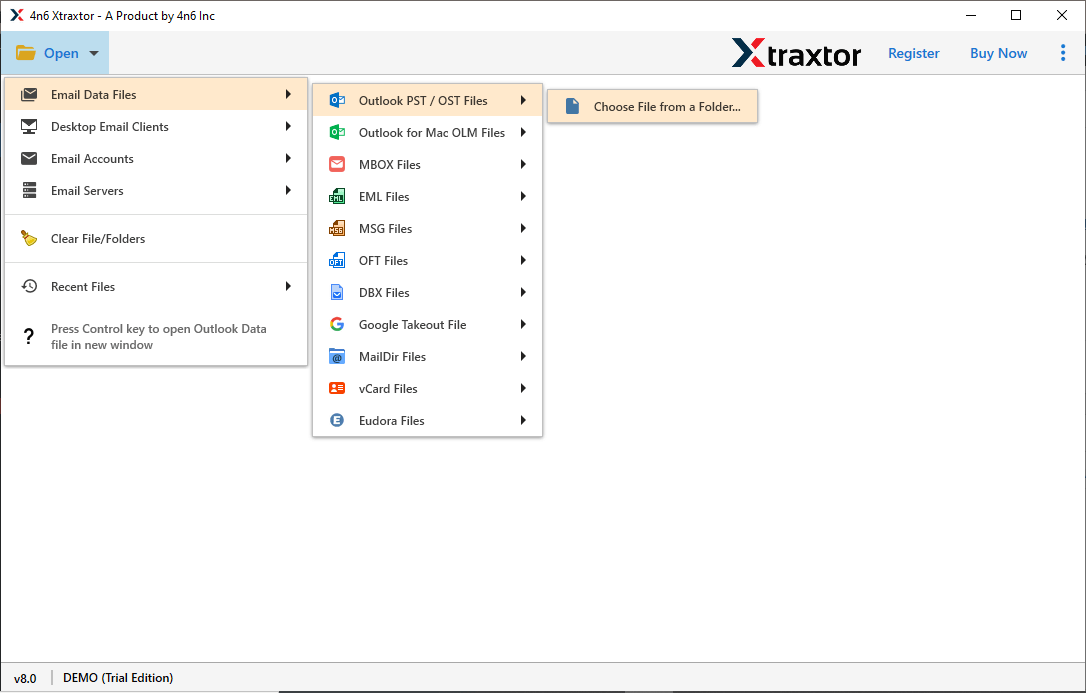
- Select Open >> Email Data File >> Outlook PST/OST File >> Select File from Folder.
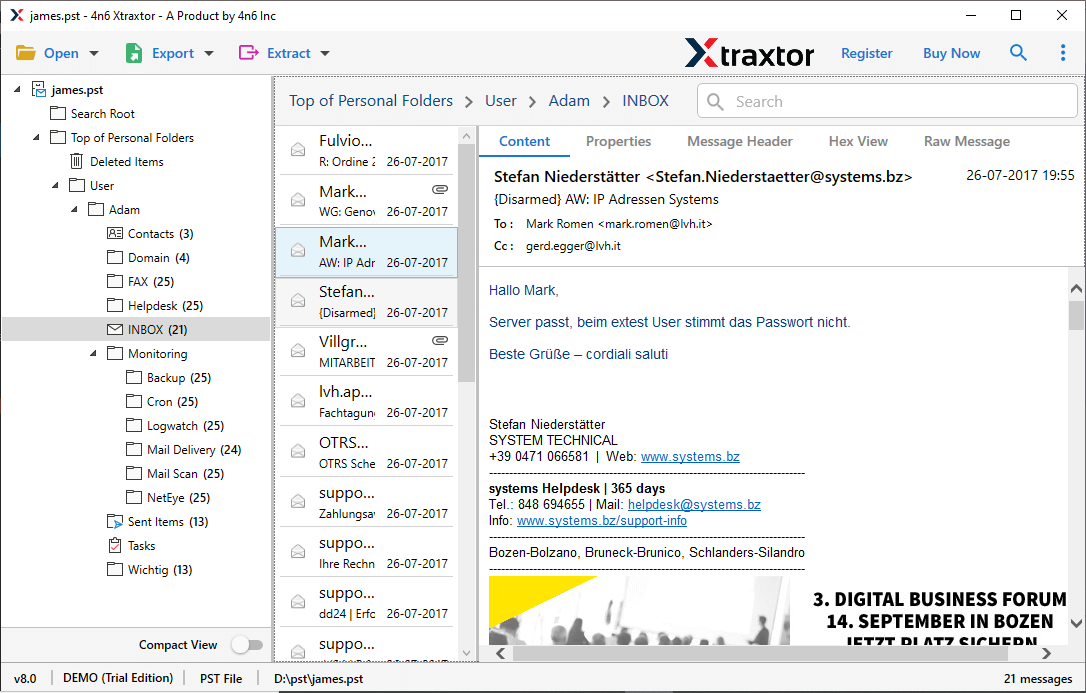
- Here you can view PST file data, and analyze it.
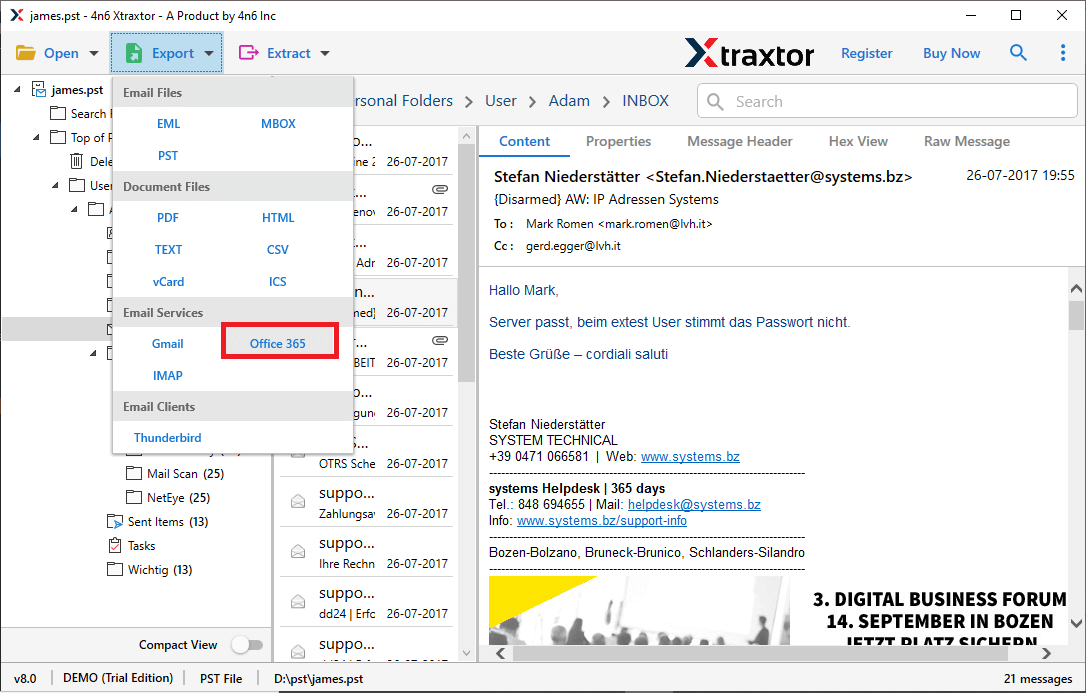
- Click on Export and choose the Office 365 option.
- Select the email folders you want to import into the Microsoft 365 mailbox.
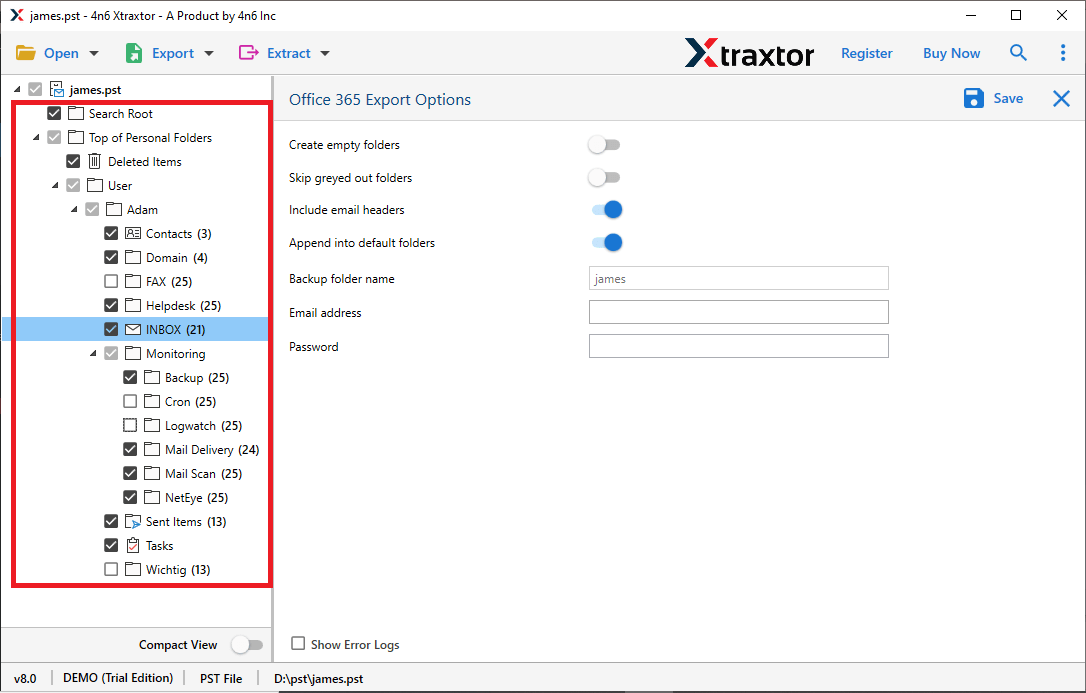
- At last, enter your Office 365 login details and hit the Save button.
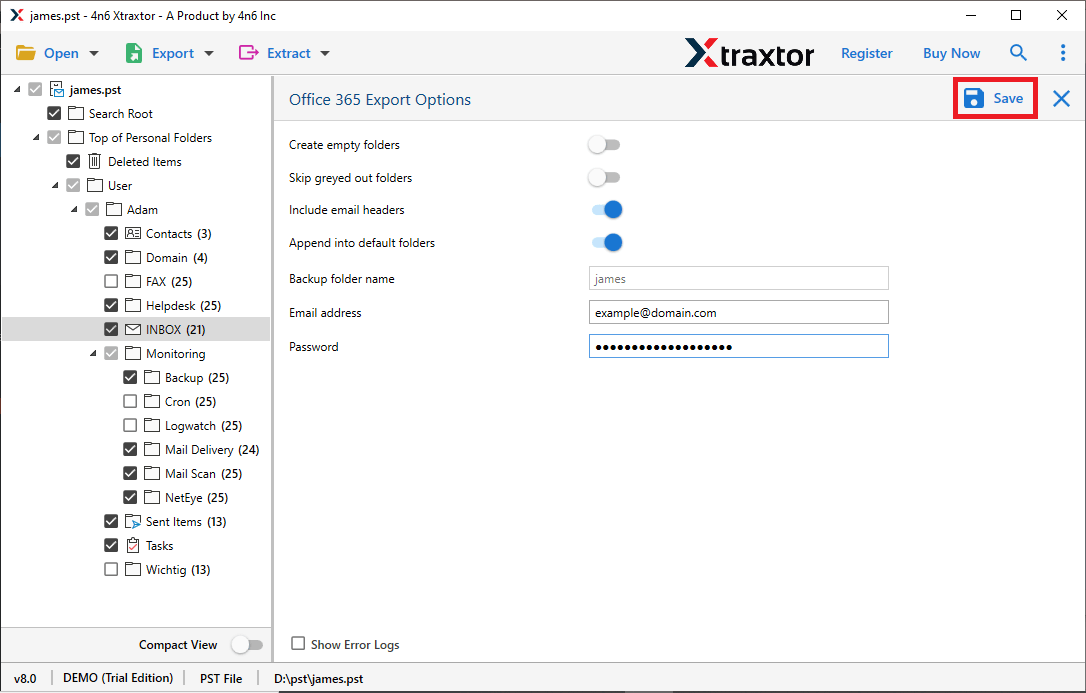
Done! Here you import PST to Office 365 mailbox in a few simple steps. If you want to try the importing process, then use the demo version of this tool.
Conclusion
So, we have seen that importing PST files to Office 365 is possible through multiple methods. Outlook import is best for individual users, Network Upload and Drive Shipping are suitable for IT admins handling larger migrations. However, these manual methods can be time-consuming, require technical knowledge, and may not work in situations like corrupted files, missing Outlook, or large PST sizes.
If you face such limitations, a specialized tool can help you solve this issue as soon as possible. Whichever method you choose, go through the limitations and benefits of each technique first.
Frequently Asked Questions
Q1. My PST file is very large (10GB–50GB). Will it upload to Office 365?
Ans. Large PST files often fail or freeze during manual import. Tools can split or handle large PST files smoothly and upload them without interruption.
Q2. Can I migrate only selected folders from a PST file?
Ans. Manual import imports everything. Tools allow selective migration; only Inbox, Sent Items, Custom folders, or specific labels.
Q3. What if my PST file is corrupt or partially damaged?
Ans. Manual import may stop working. PST migration tools can read and repair corrupted PST files before transferring them.
