Summary: Without a proper emails backup, you risk losing important emails, contacts, and other critical information that could have a significant impact on both your business and personal affairs. This article will cover three different methods for backup GoDaddy emails, each with its unique benefits and drawbacks. Choosing the right method for your situation is key.
In this write up we will discuss different solutions to export GoDaddy emails to Computer. If you are also searching for a way to backup GoDaddy emails to hard drive along with attachments then this post is for you.
Table of Content
- Why need to Transfer Emails from GoDaddy to Hard Drive
- Manual Way to Backup emails from GoDaddy to Hard Drive
- Limitations of the Manual Approach
- Expert Solution to Backup GoDaddy Emails to Hard Drive
- Why Use the Xtarxtor Email Backup tool
- Conclusion
GoDaddy – Overview
GoDaddy is a globally recognized web hosting and domain registration company from America. It is widely known for offering a range of services aimed at helping individuals and businesses establish and manage their online presence. Founded in 1997 by Bob Parsons, GoDaddy has since grown into one of the largest domain registrars and web hosting providers in the world. Apart from these services, GoDaddy also provides business webmail services to over 17 million customers. However, in this digital era, cyber-attacks become more frequent and not everything on the internet is safe now. Thus one needs to backup GoDaddy emails to hard drive so that you have a copy of your important data.
Why need to Backup GoDaddy Emails to Hard Drive
The reasons to backup GoDaddy emails to hard drive vary from one user to another user. However, the main reason for the backup is to secure their mailbox data. Though sometimes users were unable to access their webmail account due to inactive internet connection, in that case, a copy of the mailbox data comes handy. Therefore in this article, we will discuss different ways to archive GoDaddy emails to hard drive. Read the complete blog and know the complete backup process.
Manual Way to Backup Emails from GoDaddy to Hard Drive
To export GoDaddy emails to hard drive, you can add your webmail account to Outlook email client. After that, it is easy to save emails in your external hard drive. For that follow the given instructions-
1. Open your Outlook email client on your Windows OS system.
2. Then click on File >> Add Account.

3. Now enter your GoDaddy email address and click on Connect button.
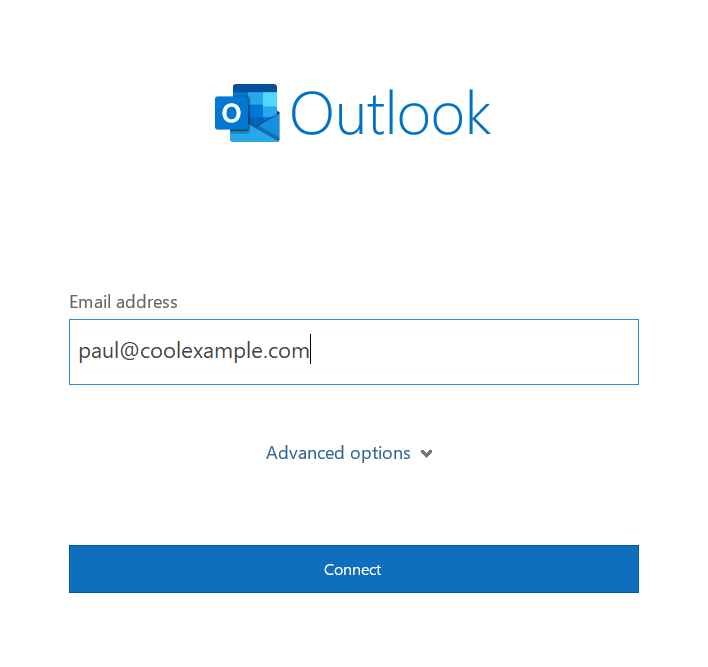
Note: If Outlook automatically discovers a GoDaddy email account, then enter your password and finish the process. IF not net follow the next steps.
4. In Advance setup options choose IMAP.
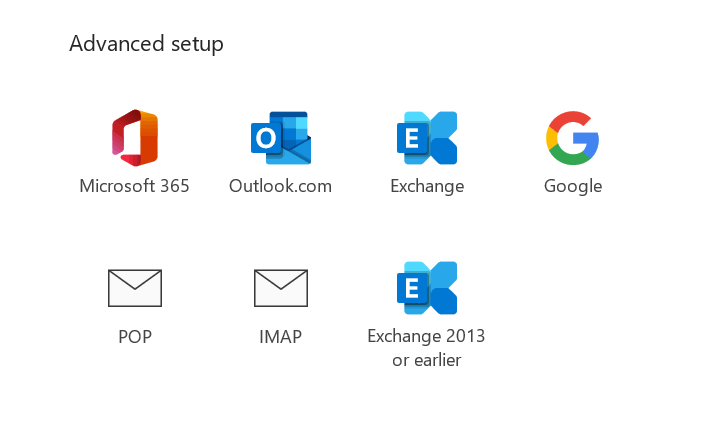
5. After that enter Incoming Server and Port number.
IMAP Server – imap.secureserver.net Port Number – 993
6. Now enter your webmail password and hit on the connect button.
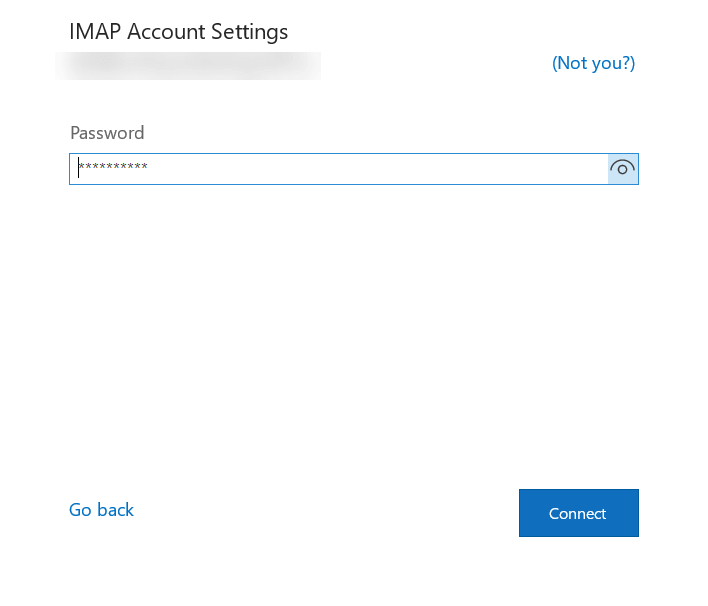
A successful mailbox adding message will appear, after that restart your Outlook and you will find your webmail account data under its email address.
Step 2: Export GoDaddy Emails to Hard Drive
Now using Outlook import/export tool archive mailbox data to hard drive. For that, follow the given instructions –
1. In Outlook select, File > Open & Export >> Import/Export.
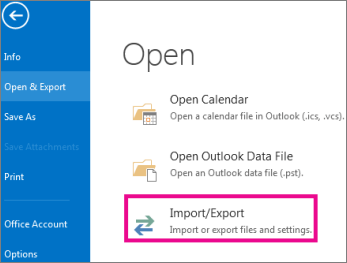
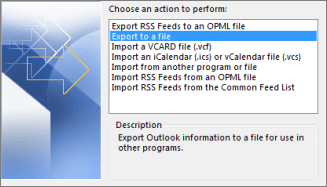
2. After that, choose the Export to a File option.
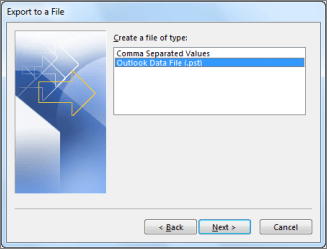
3. Then select the Outlook data file or CSV option.
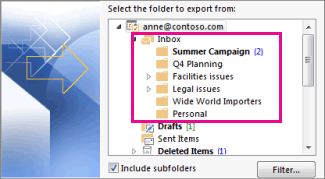
4. Choose the email folders you want to export.
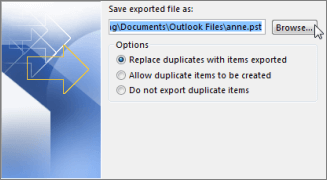
5. Browse the location (hard drive) to save extracted data file and hit on the Finish button.
Here complete the backup process. Now you can access your GoDaddy emails on your system without opening your webmail account. However, with this native approach, there are certain limitations.
Loopholes With Manual Solution
- In order to save GoDaddy emails to hard drive manually you need to follow the lengthy processes that require a lot of time.
- You need to purchase an Outlook subscription to export webmail emails if you don’t have one.
- There are no filters to export selective emails from GoDaddy account.
- If Outlook Import/Export Greyed Out, then you were not able to backup emails from GoDaddy to hard drive.
- A single mistake can affect your mailbox data and corrupt it.
Expert Solution to Backup GoDaddy Emails to Hard Drive
Since there are various restrictions with manual approach, there requires a professional tool GoDaddy emails backup tool offers one such solution that will instantly backup emails from GoDaddy to hard drive directly from the mailbox. With its advanced filter options – to, from, name, date, time, cc, bcc, etc you can backup selective emails.
Additionally, using this tool you can also migrate emails from GoDaddy mailbox to different webmail accounts. With its simple user interface, one can transfer GoDaddy emails to hard drive in a few simple clicks.
Process to Migrate GoDaddy Mailbox to Hard Drive
Follow the given instructions and move GoDaddy emails to hard drive along with attachments.
Step 1. Download and Run Xtraxtor on your Windows OS system.
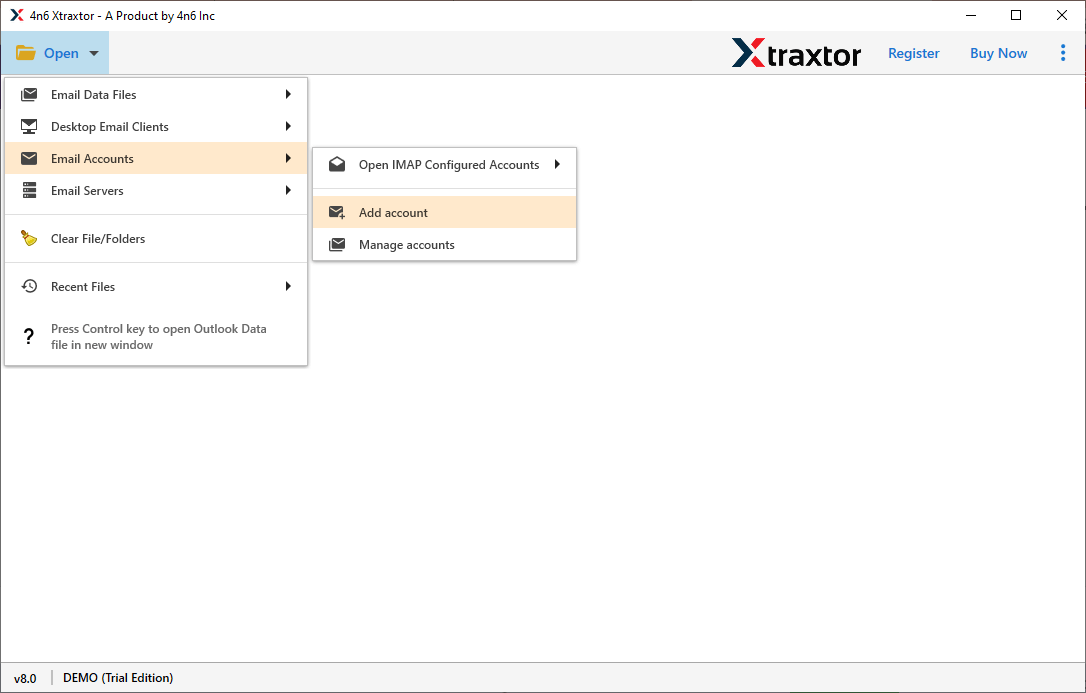
Step 2. After that, click on Open >> Email Accounts >> Add Account.
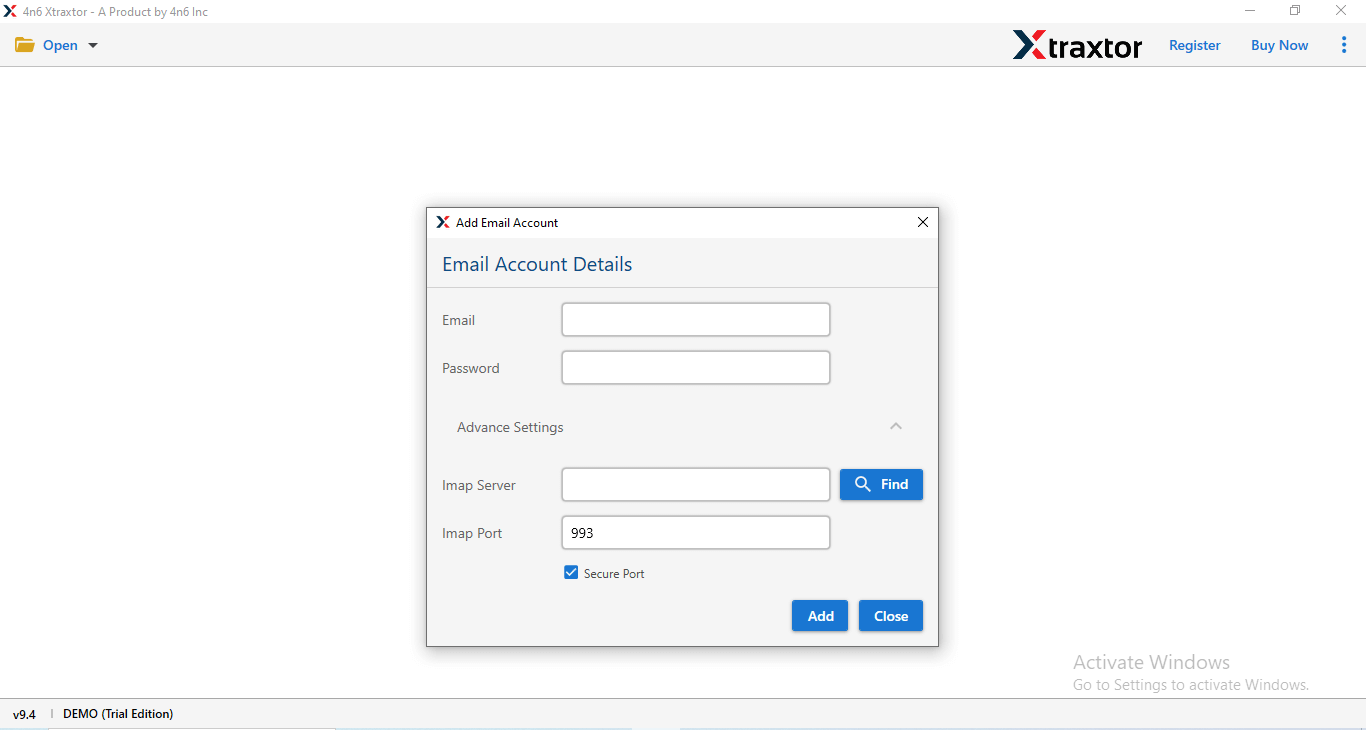
Step 3. Enter your GoDaddy email id and password and hit on the Add button.
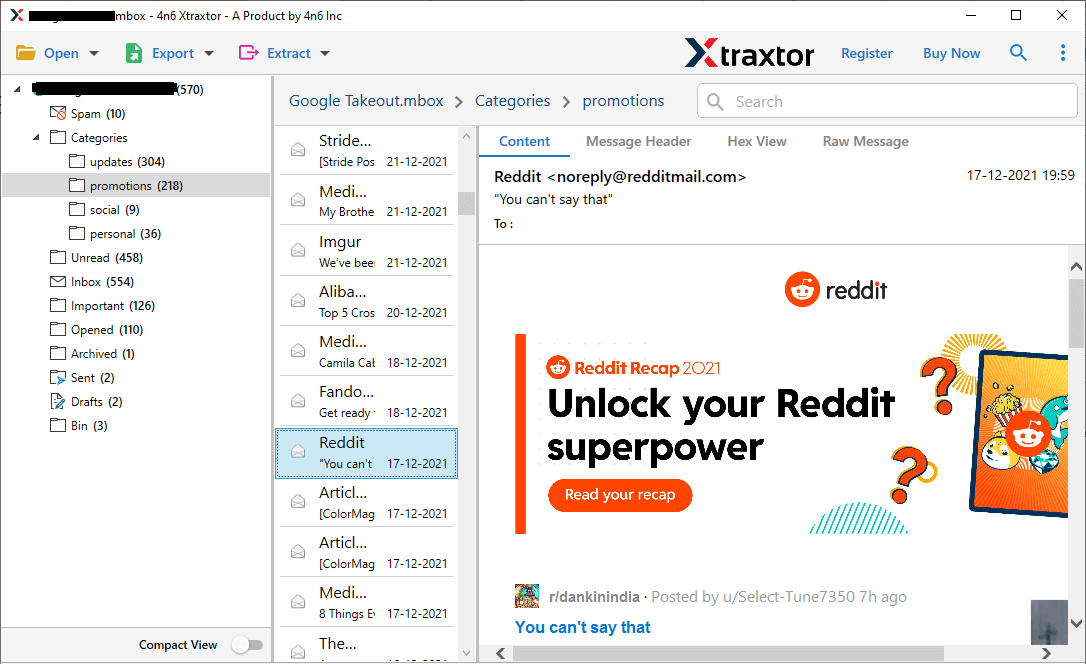
Step 4. Here you can view your emails before exporting them.
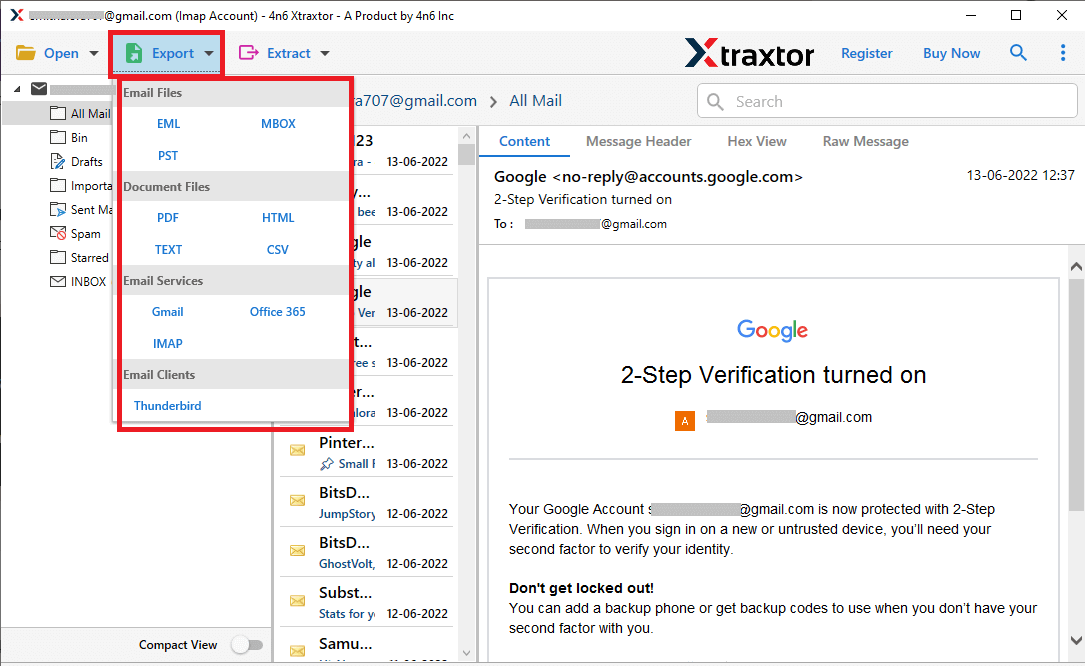
Step 5. Click on Export and choose any file format from the given list.
Step 6. Select the email folders that you want to export.
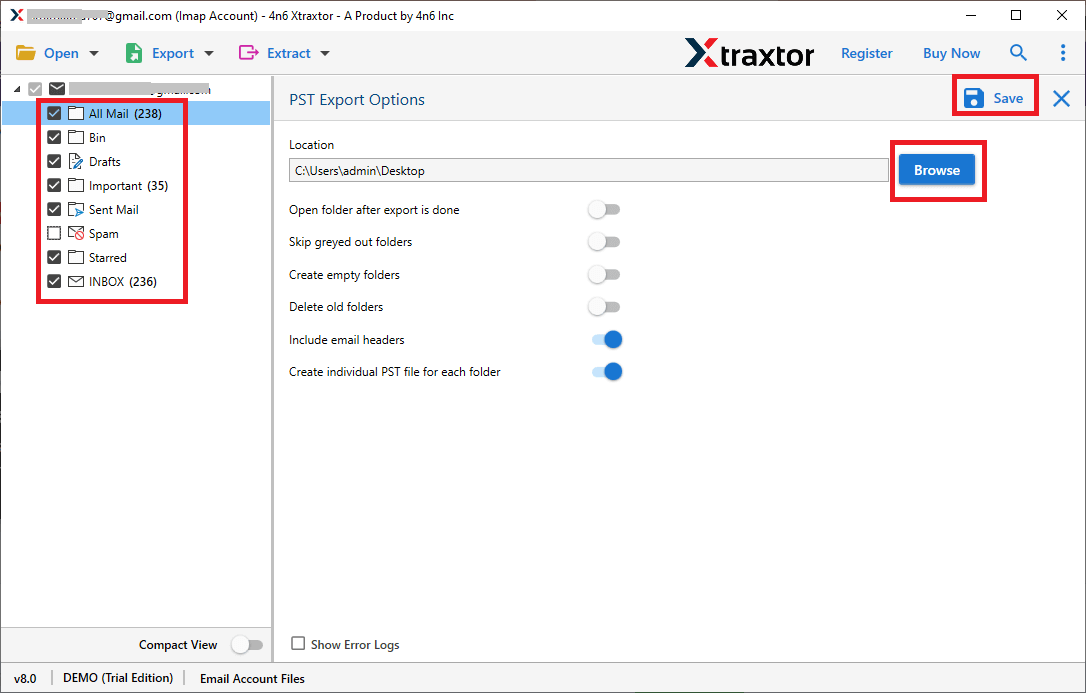
Step 7. In the end, browse the location to save exported data and hit on the Save button.
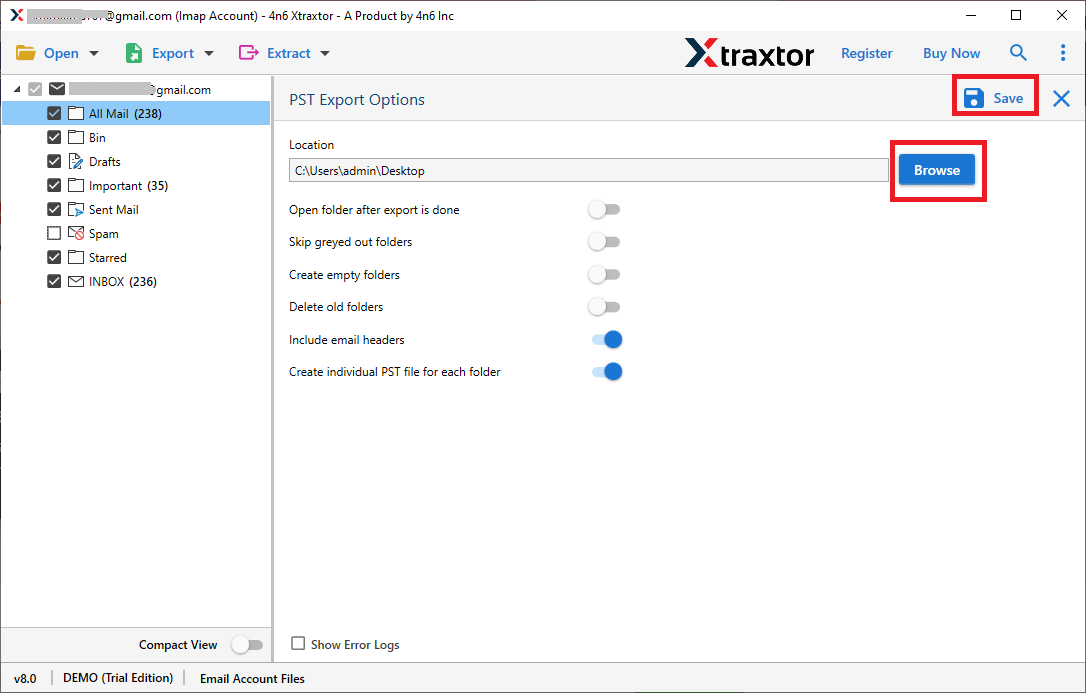
Here you backup GoDaddy emails to hard drive using expert solution. There are various advantages of using this tool that make the backup process effective and efficient.
Why Use the Xtraxtor Email Backup tool
- Direct Export: The tool enables the direct export of emails from GoDaddy’s webmail to your hard drive or any other storage device.
- Selective Export: You can filter and export specific emails based on various criteria such as sender, recipient, subject, date, time, and more.
- Data Integrity: The software preserves the integrity of your data, ensuring that no information is lost or corrupted during the export process.
- Folder Hierarchy Preservation: It maintains the structure of your email folders and sub-folders, so everything is organized as it was in the original account.
- Cross-Webmail Migration: This tool also allows you to migrate GoDaddy emails to other webmail accounts (e.g., Gmail, Yahoo, etc.) with ease.
This software is an excellent choice for users looking to backup GoDaddy emails data without complications, while ensuring complete security and data preservation.
Conclusion
This article gives you an efficient and secure way to backup GoDaddy emails to hard drive along with attachments. You can either manually migrate GoDaddy emails to hard drive or directly transfer them using a professional tool. Now you can choose which method is suitable for you and transfer GoDaddy emails to hard drive without any hassle.
