Switching from Webmail to Gmail is a common decision today. Many users want one secure inbox that works everywhere, on mobile, desktop, and web, without worrying about storage limits or server issues. Gmail fits that need perfectly. If your emails are still stored in a Webmail account (cPanel, hosting email, or ISP email), this guide will help you to transfer Webmail to Gmail without confusion.
We’ll first explain the easiest built-in option, then cover a more reliable solution when the manual way doesn’t work.
What Users Actually Want When Moving Webmail to Gmail
Before choosing a method, it’s important to understand the real goal behind this migration. Most users want to:
- Keep all old emails and attachments
- Avoid missing or duplicate messages
- Use one main inbox instead of multiple logins
- Access emails anytime, anywhere
- Stop depending on hosting providers for email access
Gmail solves these problems by offering cloud storage, strong spam protection, and seamless access across devices.
How to Transfer Webmail to Gmail Manually?
Gmail has a built-in feature called Import Mail & Contacts that lets you pull emails from another email account.
Follow these steps:
Follow the steps to transfer Webmail to Gmail, which are given below-
Step 1. Sign in to your Gmail account.
Step 2. Click the Gear icon >> See all settings.
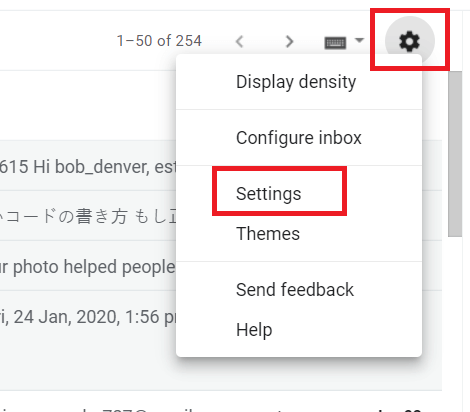
Step 3. Go to Accounts and Import.
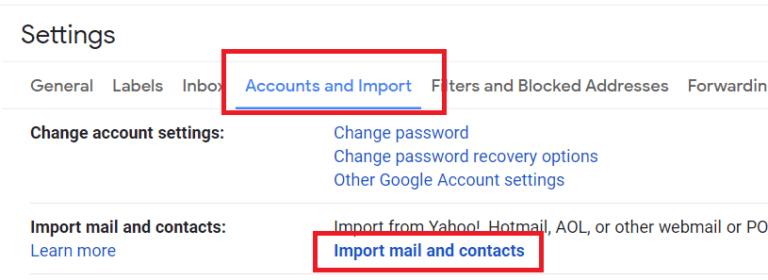
Step 4. Click Import mail and contacts.
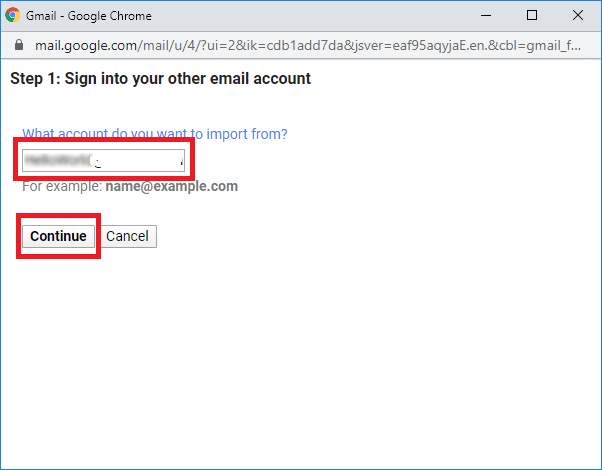
Step 5. Enter your Webmail email address >> click Continue.
Step 6. A pop-up will appear >> click OK.
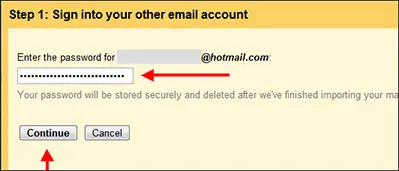
Step 7. Enter your Webmail password >> click Continue.
Step 8. Select what you want to import >> click Start import.
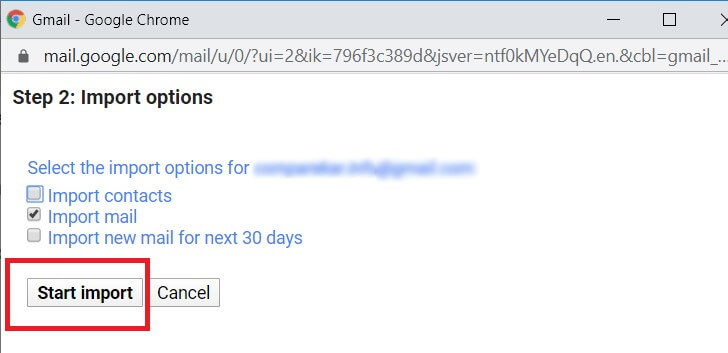
Gmail will start copying your Webmail emails.
The process may take several hours >> or even days, depending on your mailbox size.
Limitations of the Manual Method
Before choosing this option, keep these points in mind:
- You cannot choose specific folders; Gmail imports everything.
- You cannot apply filters (date, sender, etc.).
- It may take a long time to complete.
- Sometimes Gmail fails to connect with certain hosting providers.
- Importing stops if the connection fails.
If you only have a few emails, the manual method may be enough.
But for large inboxes or full migrations, this method often becomes unreliable.
How to Migrate Webmail to Gmail with Complete Emails?
If Gmail’s manual import option doesn’t work for you, or if you need to move a large number of emails with attachments and folder structure, using a dedicated migration tool becomes necessary.
A tool can help when:
- Gmail keeps showing connection errors
- Your Webmail mailbox is very large
- You want to choose only specific folders
- You need filters (date, from, subject)
- Manual import is too slow
- Your Webmail provider blocks POP access
One such tool is Xtraxtor Email Backup Tool, which can directly transfer Webmail to Gmail in a simpler way. The tool logs into your Webmail account, loads the folders, and moves them to Gmail with attachments and structure intact. Filters help you transfer only what you need, making the process faster and smoother.

Steps to Transfer Webmail to Gmail Account
Step 1. Launch Xtraxtor software on your Windows PC.
Step 2. Now, navigate to Open >> Email Accounts >> Add Account.
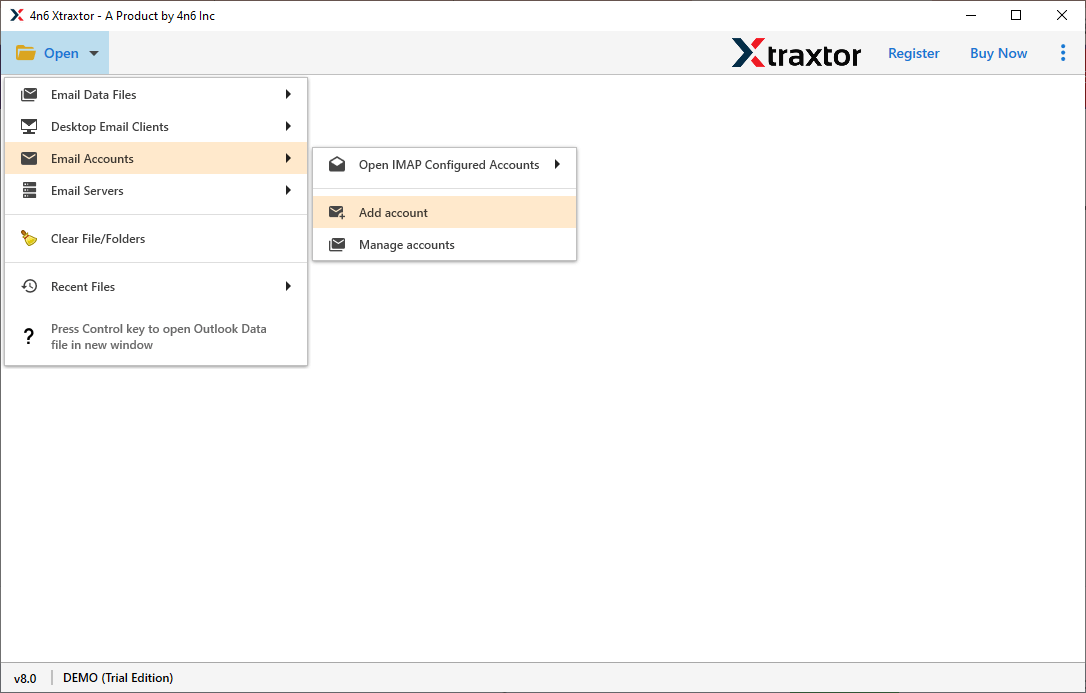
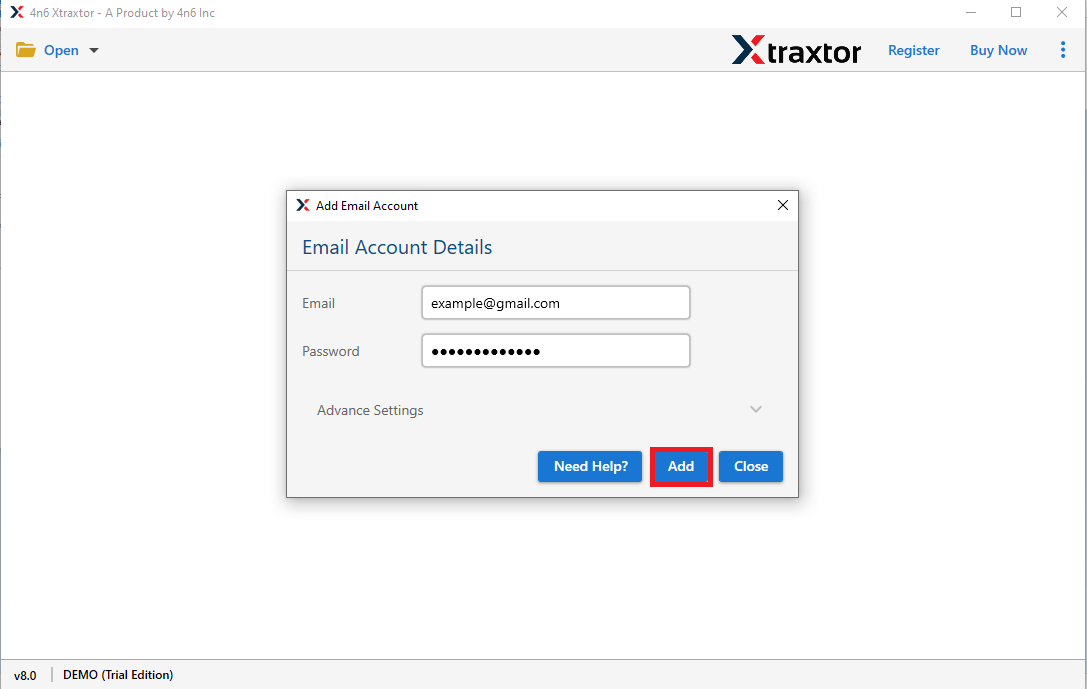
Step 3. Enter your Webmail Account credentials and press Add Button.
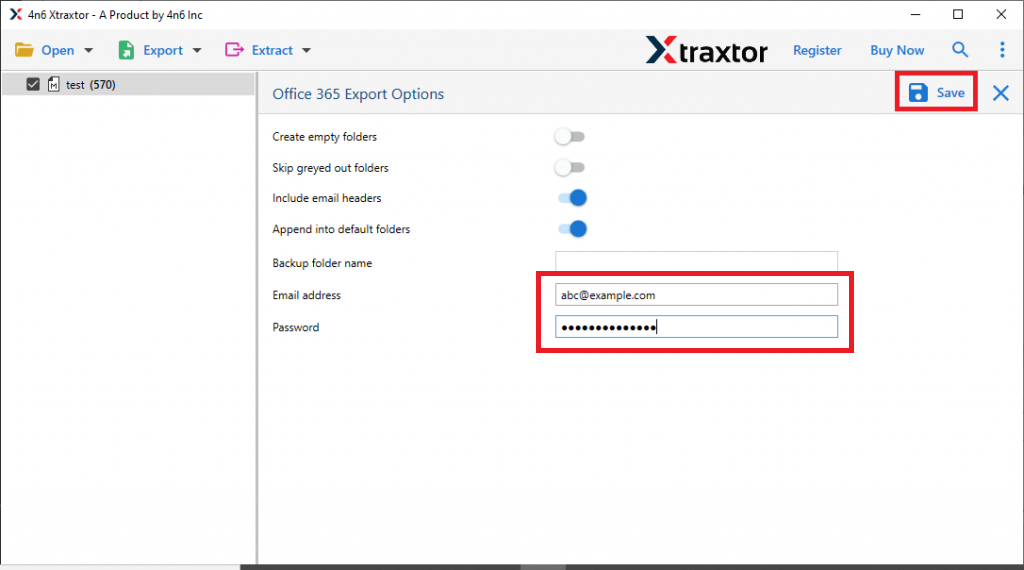
Step 4. After that, click on Export and select Gmail from the given options.
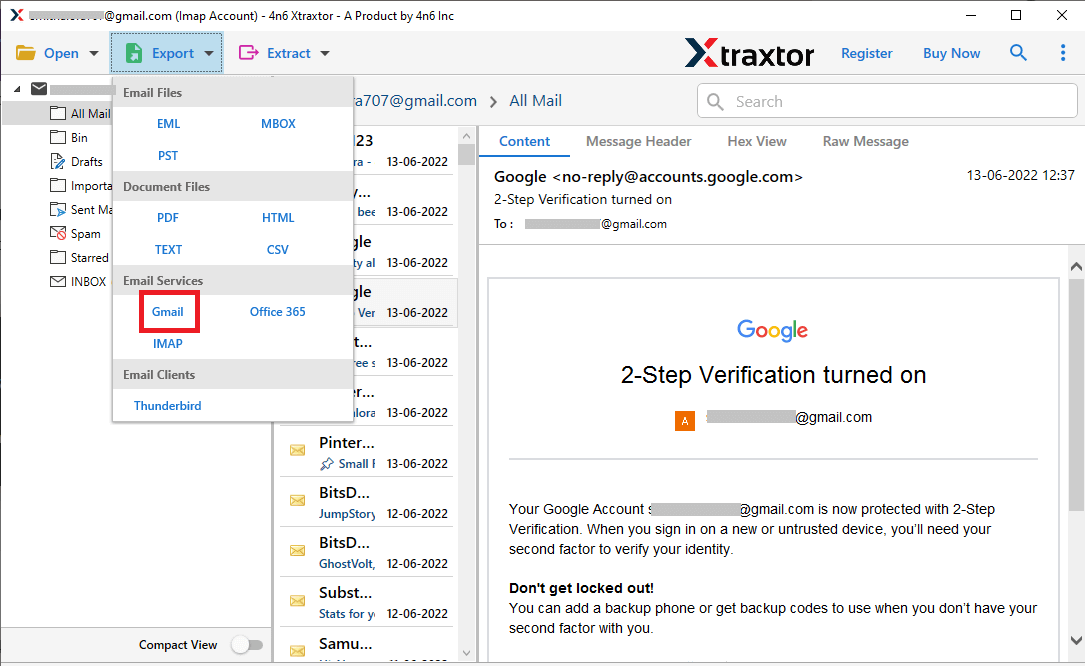
Step 5. Enter your Gmail email ID and app password.
This completes the transfer without the long delays or issues seen in the manual method.
Final Words
In conclusion, this guide explained how to transfer Webmail to Gmail using both manual and automated methods. First, we discussed why many users prefer moving from Webmail to Gmail, then, we explained the manual method along with its step-by-step process.
However, we have encountered some limitations of the manual approach that may create some issues while using these methods. To solve these problems, we also discussed an automated solution that allows you to transfer Webmail emails to Gmail safely with attachments.
Finally, by comparing both methods, it becomes clear that the manual option works for small inboxes, while the automated method is a better choice for large or important mailboxes. You can choose the method that best fits your needs, time, and comfort level.