Your Outlook folders are more than just emails – they contain important work data, personal memories, work progress, and much more. In situations where you are creating a new account, shifting to a new job, or deleting your current Outlook profile, moving your Outlook folders to another account is essential. If you move Outlook folders from one account to another, you can access your data without any hassle, and this blog will guide you on how to do that.
Microsoft Outlook is a popular email client with robust features for managing emails, contacts, calendars, and tasks. Its friendly interface has become a popular choice for professional and personal users.
However, there are times when users need to transfer folders from one email account to another. Before proceeding, it’s important to remember that moving Outlook email folders to another account involves transferring emails, attachments, inline images, and all other associated data. To ensure a successful transfer, you must know the correct method to do it without any data loss.
In this post, we will explore the most effective methods to transfer folders from one Outlook account to another.
How to Transfer Outlook Folders to Another Outlook Account?
In this manual approach, you can only move the customized folders to another account. Most important note that it will not transfer your inbox, sent and outbox folders. If you want to move the folders that you created and have important data, then you can follow the given instructions –
Step 1: Open Microsoft Outlook on your computer.
Step 2: Navigate to File > Add Account and add both the source and target accounts.
Step 3: Right-click the folder you wish to transfer and select Move Folder from the options.
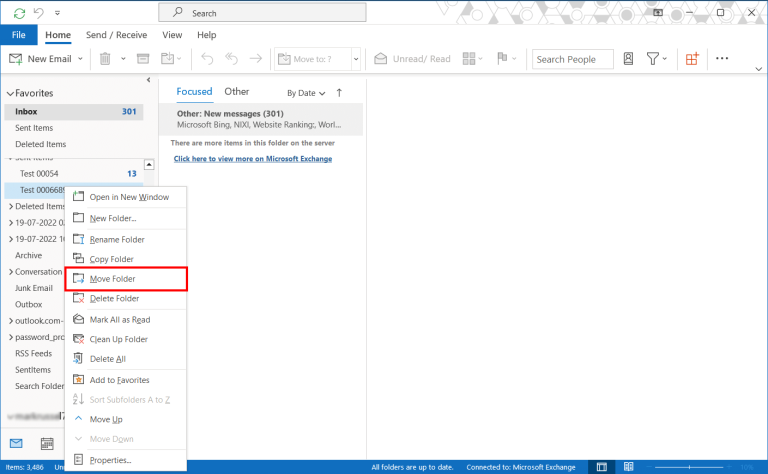
Step 4: A pop-up window will appear. Choose the target location for the folder.
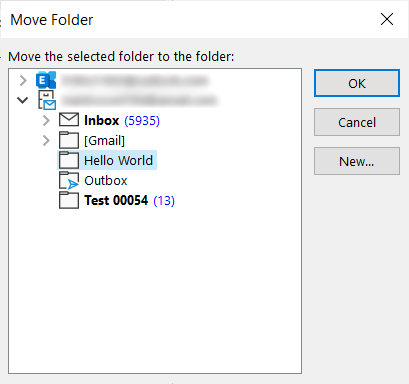
Step 5: Select the secondary account as the destination and click OK to complete the process.
Done! Here with this approach, you move only the customized folders that you created to another account.
How to Move Outlook Folders From One Account to Another?
Alternatively, you can export PST file from Outlook and then move it to your other account. While it may be a lengthy process, it is one of the ways of moving Outlook folders from one account to another.
Step 1: First, add both of your email accounts to Microsoft Outlook.
Step 2: Go to File > Open & Export, and choose Import/Export.
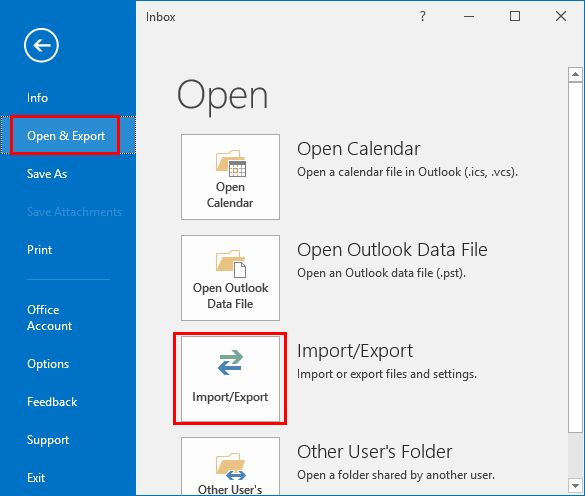
Step 3: In the wizard, select Export to a file, then click Next.
Step 4: Select Outlook Data File (.pst) and click Next.
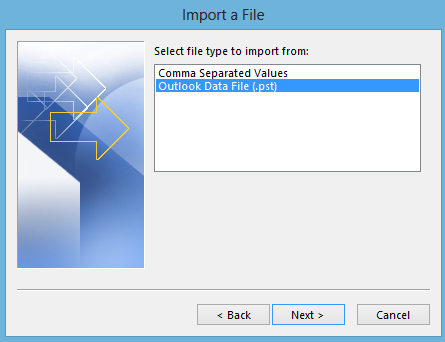
Step 5: Choose the folder you want to move, then click Next.
Step 6: Browse a location on your computer to save the folder as a PST file and click Finish.
Step 7: Go back to File > Open & Export, and choose Import/Export again.

Step 8: Select Import from another program or file, then click Next.
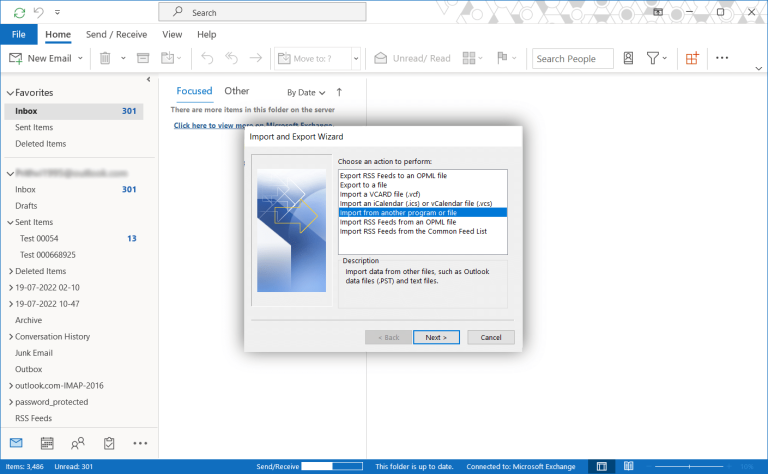
Step 9: Choose Outlook Data File (.pst) and click Next.
Step 10: Select the PST file you saved earlier and click Next.
Step 11: Choose your second account and click Finish to import the folder.
Done! Here you transfer Outlook folders to another Outlook account manually.
How to Automatically Transfer Emails from One Account to Another in Outlook?
With the help of the Xtraxtor tool, you can easily transfer folders in Outlook to another user with a few simple clicks. The software will effortlessly transfer your email folders without affecting its integrity. The tool will move email folders from the email account that is configured with your Outlook client to another email account with ease. This is a simple and hassle-free solution for moving Outlook email folders to another account with no data loss.
Additionally, you can select the email folders- inbox, send, outbox or customized folders as well. Moreover, the filter options offered by this tool help you to send emails from the specific sender, date, time, name, etc. Download the demo version of the software to know its working process.
Steps to Move Outlook Folders From One Account to Another
1. Run the software on your system.
2. Then, click on Open >> Email Accounts >> Add Account.
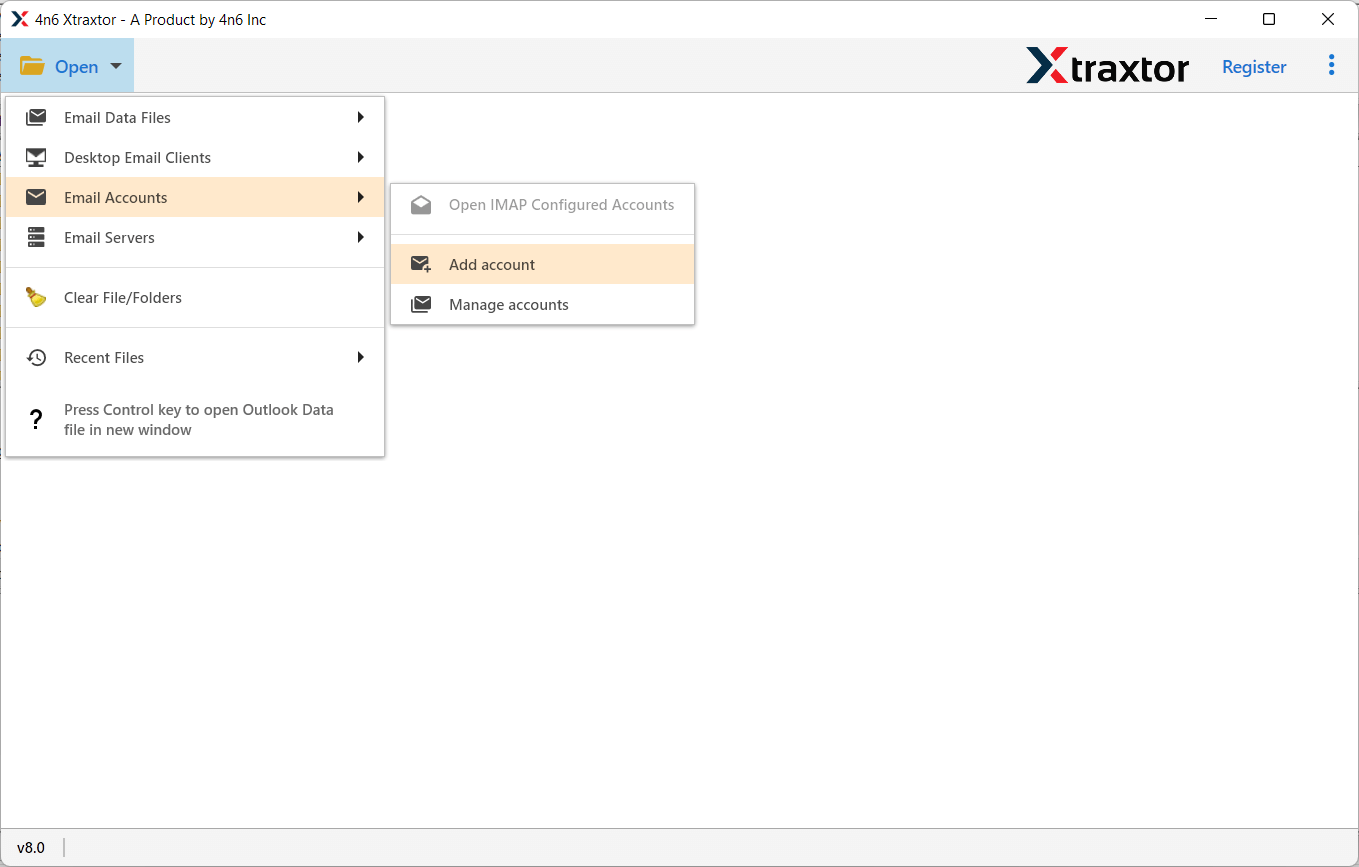
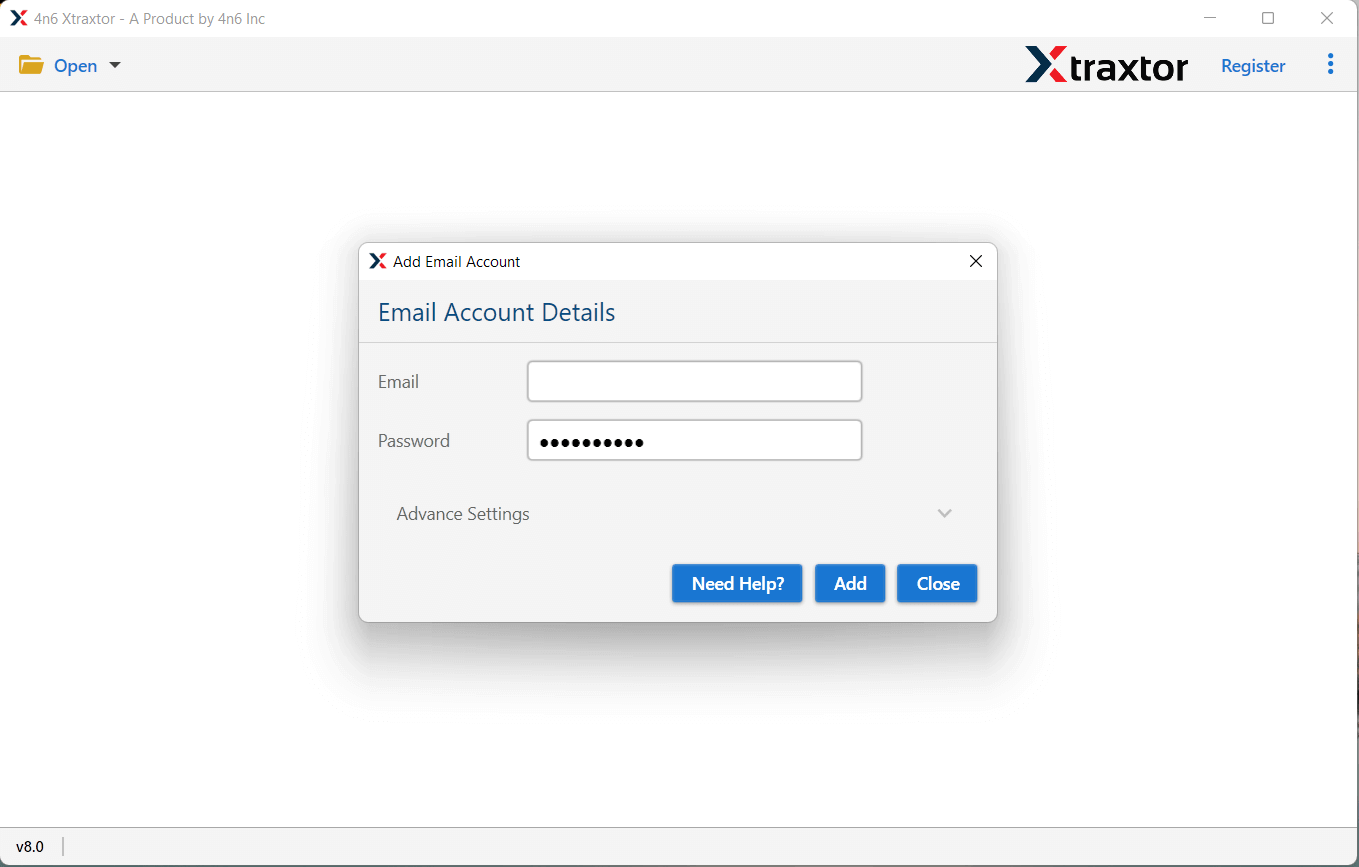
3. Enter your account login details from which you want to move folders. Then hit the Add button.
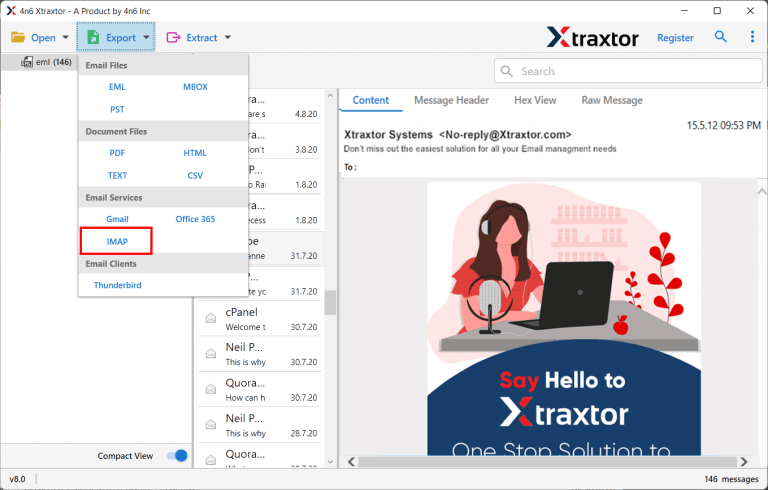
4. Click on Export >> IMAP option.
5. Select the email folder you want to transfer.
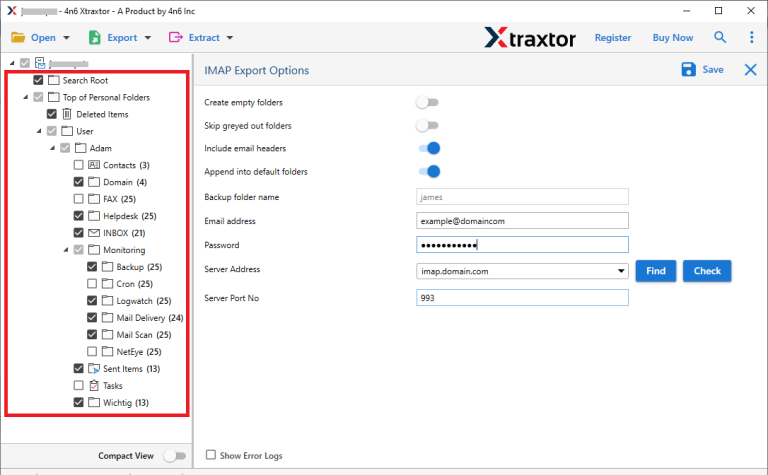
6. Enter the secondary email account details and hit the Save button.
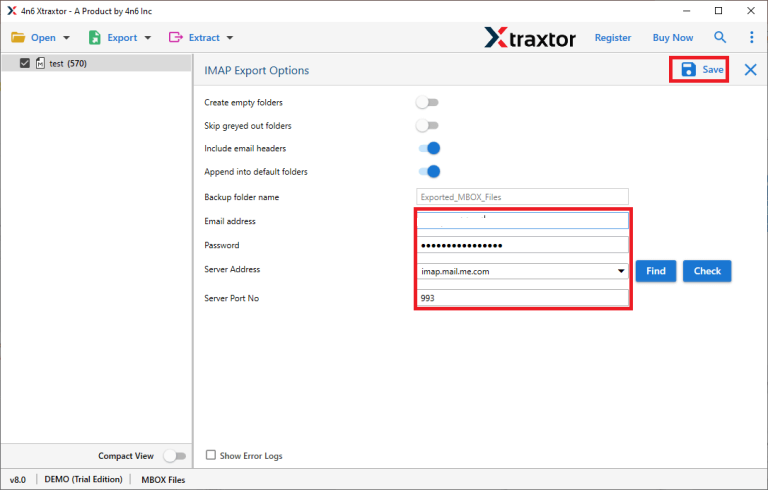
Done! Here you transfer Outlook folders to another Outlook account in a few simple clicks. With this tool, there are various outstanding features, including –
- Effortlessly transfer Outlook folders to another Outlook account with complete data.
- Maintain email folder and sub-folder structure and hierarchy.
- Advance filter options to move selective emails from Outlook to another account.
- Simple and user-friendly interface for both technical and non-technical users.
- Works on all Windows OS version including Windows 11, 10 and all older one.
- Effortlessly export Outlook emails to Google Workspace or other email accounts.
- Export outlook emails to different file formats including PDF, CSV, EML and many more.
- A free demo version of the software is also available to know its working process.
Conclusion
Moving Outlook folders from one account to another is important to keep your data safe and accessible. Whether you’re changing jobs, combining accounts, or setting up a new profile, the steps above will help you transfer your folders smoothly. By following the right steps, you can ensure a hassle-free transferring of email folders without losing any important information.

