Import emails to webmail account is an essential task for anyone who wants to keep their emails organized, switch to a new email provider, or backup important messages. Webmail offers the convenience of accessing your emails from any device with an internet connection, making it ideal for users who need flexibility and mobility. Import emails from other platforms allows users to consolidate their communication in one place, simplifying email management. Additionally, Webmail services often provide built-in security features, such as encryption and spam filtering, enhancing the protection of your sensitive data. For businesses, import emails to Webmail ensures that important communications are stored and accessible on a central platform, which can improve collaboration and streamline workflows. Lastly, many Webmail services allow for easy backup and recovery of emails, offering peace of mind in case of data loss or accidental deletion.
Whether you’re switching to a new webmail service, merging accounts, or just organizing your emails, knowing how to import emails to a webmail account is an important skill. This process makes sure all your emails, contacts, and attachments are safely transferred in one place without any changes.
Without any further delay, let’s move ahead and start import emails to Webmail mailbox with complete data.
How to Transfer Emails to Webmail Account With Attachments?
The Xtraxtor software is the full-fledged solution to move all your emails directly from your account to Webmail mailbox in a few clicks. With its advanced features and filters, you can import selective emails from your account without affecting their integrity. All you need to do is add your source email account and choose IMAP to move emails to your Webmail account.
Additionally, using this tool you can also import emails to Roundcube and many other email accounts. To experience the importing process, you can use the demo version of the software.


Steps to Import Emails to Webmail Account
1. Download Xtraxtor on your system.
2. Select Open >> Email Accounts >> Add Account.
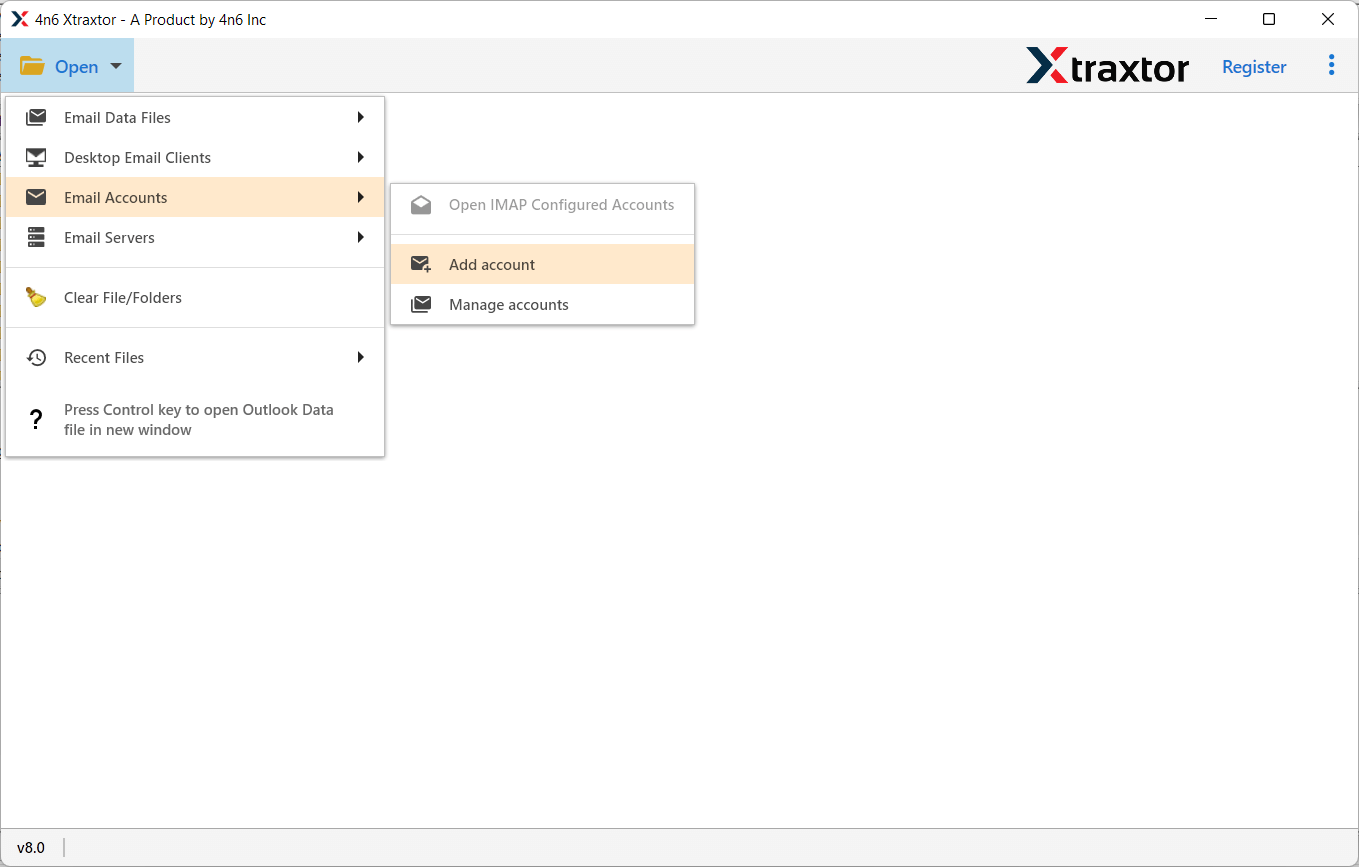
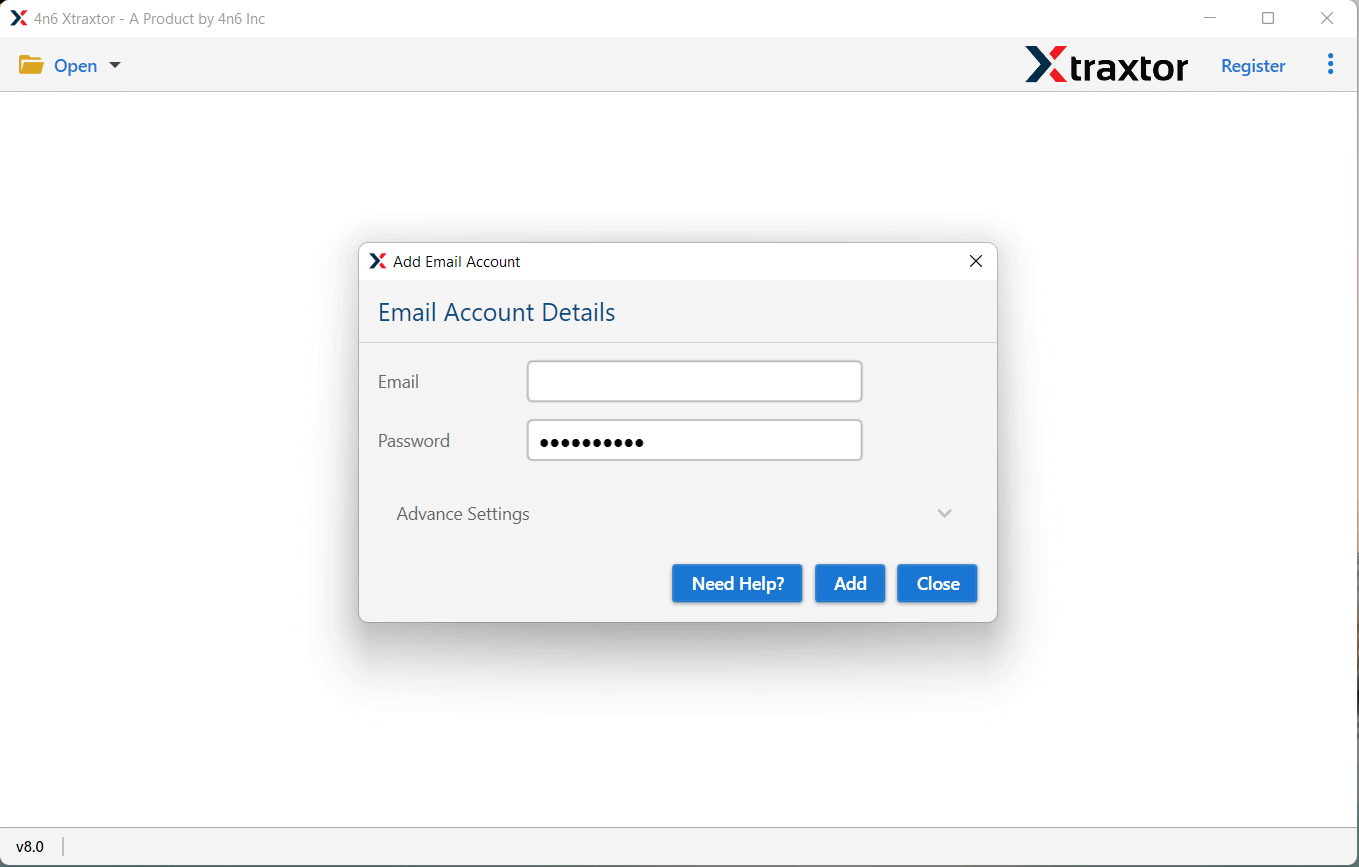
3. Enter login details of the source email account and hit the Add button.
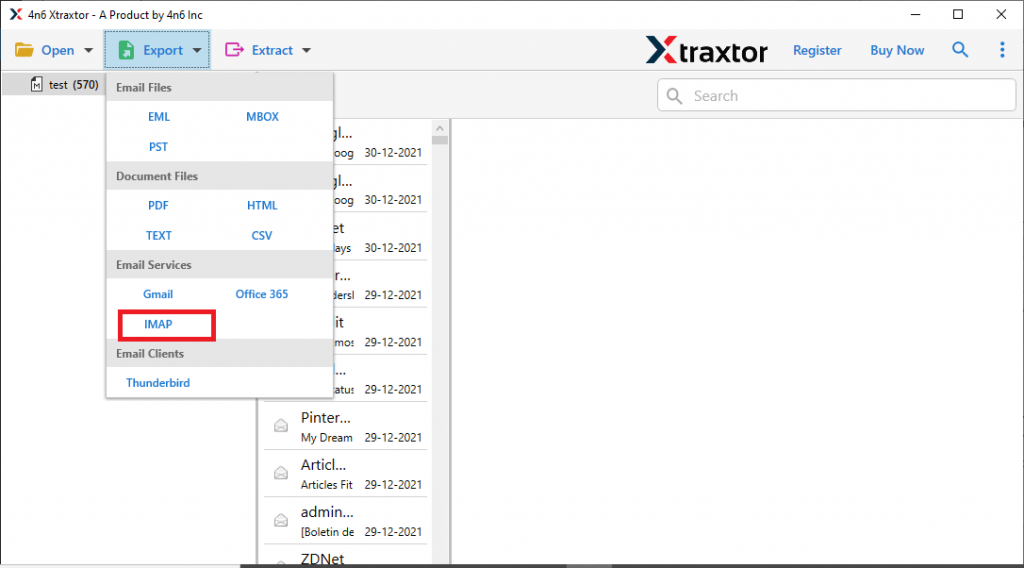
4. Click on Export and choose IMAP from the given option.
5. Select the email folders you want to import.
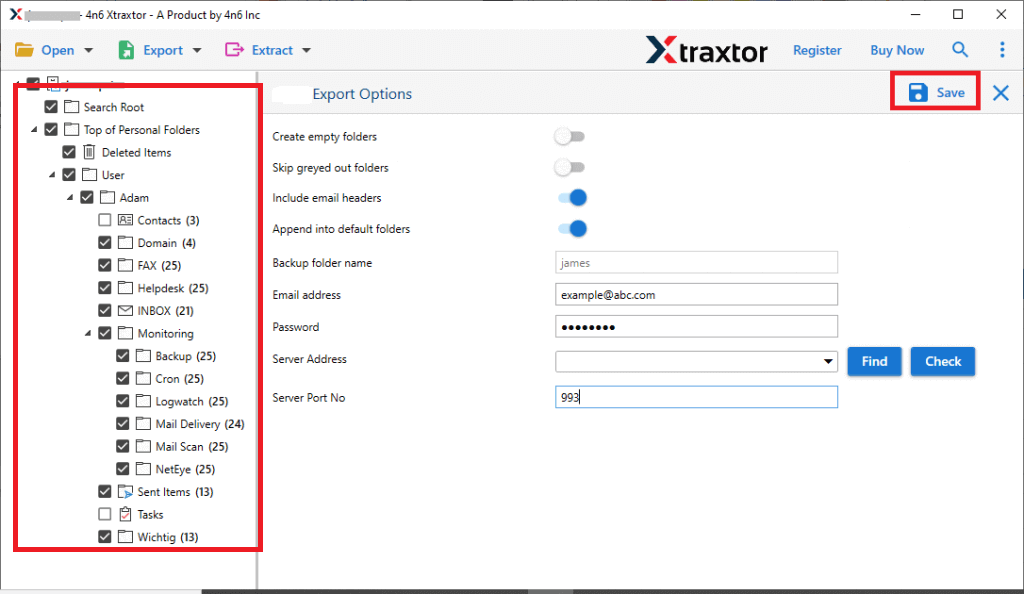
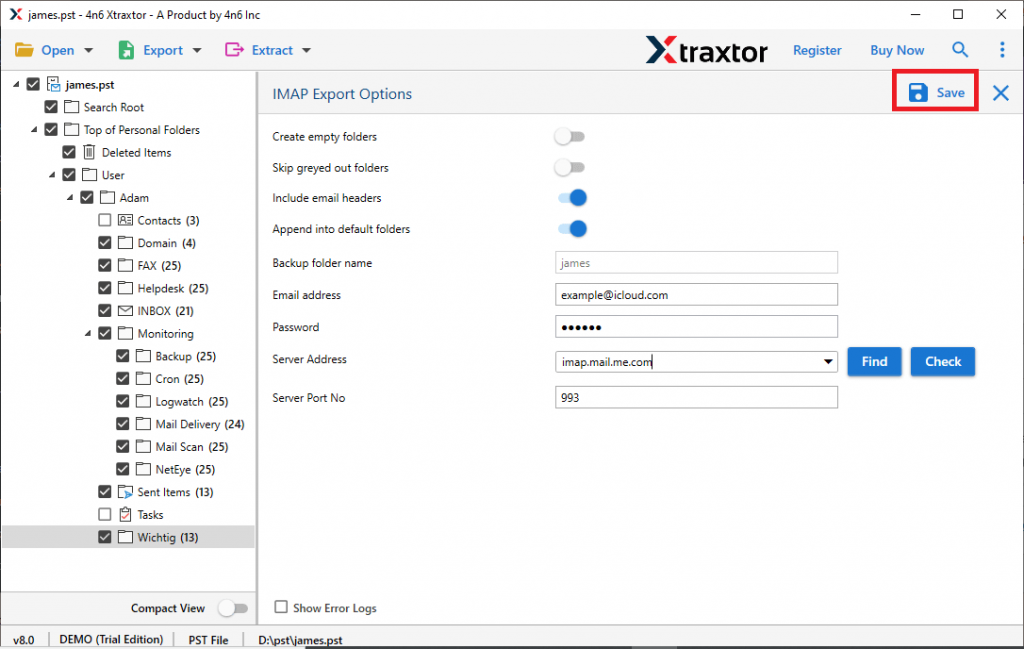
6. Enter your Webmail login details and hit the Save button.
Done! Here you migrate emails to Webmail account in a few simple clicks. With this tool there are various outstanding features, including –
- Quickly transfer emails, contacts, calendars, and more to your webmail account.
- Import emails from a variety of cloud-based services with ease.
- Preview your emails before importing to make sure everything is correct.
- Maintains the original format and structure of your emails during import.
- Easily transfer emails to iCloud, Exchange, Office 365, Zoho Mail, and more.
- Keeps your folder and sub-folder structure intact during transfer.
- Use filters to select specific emails by sender, date, or attachments.
- Convert emails to formats like PST, CSV, or MBOX for use elsewhere.
- Import only the folders you need, leaving out unnecessary data.
- Compatible with all versions of Windows, including Windows 11, 10, 8, Vista, XP, and older versions.
Conclusion
To sum up, import emails to a webmail account is an easy process that helps you keep your emails organized and accessible. By following the steps, you can quickly move your emails, contacts, and other data while maintaining your email format. To know the process to import emails to Webmail account, you can use the demo version of the software and analyze it.